Kushal Das

FOSS and life. Kushal Das talks here.

kushal76uaid62oup5774umh654scnu5dwzh4u2534qxhcbi4wbab3ad.onion

Fedora 23 on Tegra K1 Chromebook

Last year during Flock I got myself an Acer CB5 311 Chromebook with Nvidia Tegra K1 ARM board, and 2 GB ram. It is a very nice machine to run ChromeOS, but my goal behind getting the hardware was all about running Fedora on it. With the great help from Jon Disnard (IRC: masta) on #fedora-arm channel, I finally managed to do that this morning.

We started doing this yesterday, following the excellent guide at Fedora wiki. Though I had few changes, the major one was about having only two kernel partitions in the partition table. So the command to create the partition table using the sgdisk command becomes something like:

$ sgdisk -a 8192 -n 1:0:+30M -t 1:7F00 -c 1:"KERN-A" -A 1:=:0x011F000000000000 \
             -n 2:0:+30M   -t 2:7F00 -c 2:"KERN-B" -A 2:=:0x011A000000000000 \
             -n 3:0:+600M  -t 3:8300 -c 3:"BOOT"                             \
             -n 4:0:+600M  -t 4:8200 -c 4:"SWAP"                             \
             -n 5:0:0      -t 5:8300 -c 5:"ROOTFS" chromebook-xfce.raw

This change makes the partition number change in all the following commands given in the wiki. Remember to double check that you have right /etc/fstab file in the image so that it can mount /boot. You can get the UUID by using blkid command. Btw, the SD card came in as a different device on my laptop. So a few corresponding changes are given below.

$ sudo sgdisk -a8192 -e -d5 -n5:0:0 -t5:8300 -c5:'ROOTFS' -p /dev/mmcblk0
$ sudo e2fsck -f /dev/mmcblk0p5
$ sudo resize2fs /dev/mmcblk0p5

During my first boot on the Chromebook with the Fedora SD card, it got into the emergency shell, I had to manually mount /boot, and then pressed Ctrl+d to continue the default flow. I made the change to the /etc/fstab file to make sure that I don't have to mount /boot every time manually. I got XFCE working out of the box. glxgears showing a frame rate of 230+. But I could not get the wireless work. I decided to take a break, slept for 4 hours, and was in front of the computer at 6AM again.

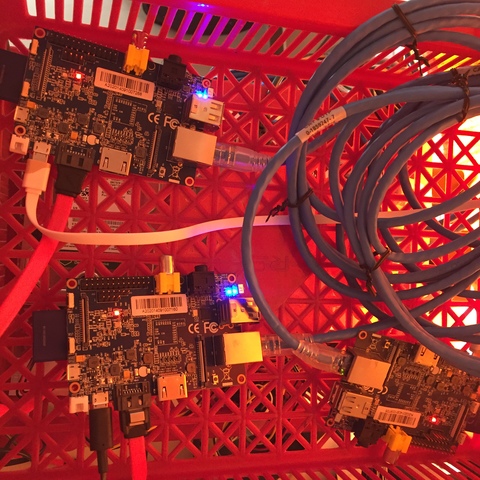
So to fix the wireless issue I had to build the mainline kernel on that system. I had to mount the card on a banana pi running F23, and then chrooted into it. I installed the following packages.

# mkdir /tmp/t2
# mount /dev/sdb5 /tmp/t2
# mount -o bind /dev dev
# mount -o bind /proc proc
# mount -o bind /sys sys
# mount -t tmpfs tmpfs tmp
# chroot /tmp/t2
# dnf install @development-tools vboot-utils htop pss vim
# exit
# umount --recursive /tmp/t2

After I copied the mainline kernel to the SD card, I first added the .config file (I got this from masta), and then execute the following command to build

# make -j8

It takes a lot of time, so you can take a break, drink coffee, or even finish parts of a big book :). After the build was finished, I used the following script to install the newly built kernel, remember to change the PARTUUID as required. After a reboot, I have the system ready with wireless. Tested with a few of my Python applications, it seems to be a perfect box for development while travelling, or at conferences, as it has long battery life :). There are still a few glitches, like the touchpad does not work, but we will get those fixed in the coming days. This whole experiment made me the second person to run Fedora on a Tegra K1 Chromebook :D. In case you want to join in this exclusive club, come down to #fedora-arm channel on freenode, we will help you to setup Fedora on your Chromebook.

I am also looking forward to work with ARM64 boards in future, may be a Mustang board. If someone has a spare one, feel free to send one my way :)

Home storage cluster with Fedora and Gluster

In a previous post I wrote about the encrypted storage I am using at home. Using Banana Pi, and Fedora. But, for my photos I had to look for something else. I need redundancy. The of the self NAS boxes which can do network and RAID are super costly in my standard.

So, I decided to build that at home. The setup is simple that can be done in few hours. I have 2 Banana Pi(s) running Gluster, replicated 2TB hard drives over a local Gigabit network. My old Banana Pi is where I mounted the Gluster volume.

First set up the Fedora for Banana Pi(s).

I am using the minimal Fedora 23 images.

$ sudo fedora-arm-image-installer --image=/home/kdas/Fedora-Minimal-armhfp-23-10-sda.raw.xz --target=Bananapi --media=/dev/mmcblk0 --selinux=ON

Due to a bug in the F23 images, I had to remove initial-setup service from the installations.

$ rm /run/media/kdas/__/etc/systemd/system/multi-user.target.wants/initial-setup-text.service

Then I setup my ssh key on the cards.

$ USER=YOURUSERNAME
$ sudo mkdir /run/media/$USER/__/root/.ssh/
$ su -c 'cat /home/$USER/.ssh/id_rsa.pub >> /run/media/$USER/__/root/.ssh/authorized_keys'
$ sudo chmod -R u=rwX,o=,g= /run/media/$USER/__/root/.ssh/

Installing and enabling ntp

# dnf clean all
# dnf install ntp
# systemctl enable ntpd

Setting up the hostname

I just set the hostname on the all the 3 systems as gluster01, gluster02, and storage.

# hostnamectl set-hostname --static "gluster01"

Setting up static IP using networkd

I prefer to use Networkd on head less systems. So, I used the same to setup static network on all the systems.

# systemctl disable NetworkManager
# systemctl disable network
# systemctl enable systemd-networkd
# systemctl enable systemd-resolved
# systemctl start systemd-resolved
# systemctl start systemd-networkd
# rm -f /etc/resolv.conf
# ln -s /run/systemd/resolve/resolv.conf /etc/resolv.conf
# vi /etc/systemd/network/eth0.network

The configuration of the network file is given below. This is much easier for me to maintain than ifcfg files.

[Match]
Name=eth0
[Network]
Address=192.168.1.20/24
Gateway=192.168.1.1
# These are optional but worth mentioning
DNS=8.8.8.8
DNS=8.8.4.4
NTP=pool.ntp.org

Remember to setup all 3 systems in the similar way. Replace the IP/Gateway address as required. I also updated the /etc/hosts file in all the 3 systems so that they can talk to each other using hostname than IP addresses.

Setting up the new hard drives

First we create a new partition, and then format it as ext4. I also added the corresponding address in the fstab file so that it gets mounted automatically on /mnt.

# fdisk -c -u /dev/sda
# mkfs.ext4 /dev/sda1
# vim /etc/fstab

Setting up Gluster on the systems

Next big step is about setting up Gluster on both the gluster01 and on gluster02.

# dnf install glusterfs-server.armv7hl -y
# mkdir -p /mnt/brick/glusv0
# systemctl start glusterd

Next I had to enable the required ports in the firewalld. For now I have added eth0 on public zone.

# firewall-cmd --zone=public --add-interface=eth0
# firewall-cmd --zone=public --add-service=glusterfs

Remember to run the above commands on the both the Gluster systems. Now from gluster01 I enabled a peer. Finally we create the volume, and start it.

# gluster peer probe gluster02
# gluster peer status
# gluster volume create glusv0 replica 2 gluster01:/mnt/brick/glusv0 gluster02:/mnt/brick/glusv0
# gluster volume start glusv0
# gluster volume info

Mount the gluster volume on the third box.

# dnf install glusterfs-fuse -y
# mount -t glusterfs gluster01:/glusv0 /gluster -o backupvolfile-server=gluster02
# chown USERNAME -R /gluster/

Now you can use the mounted volume in any way you want. I also had a problem in keeping the systems properly. So, I used an old plastic rack to host the whole solution. Less than $5 in cost :)

hdparm output from banana pi server

The question

Why did I chose a Banana pi server instead of a simple home desktop working as a storage box? This question was not only in my mind, but many of my friends asked me too.

Normally a desktop will give better performance than this ARM SOC, but that also includes more space, and money. I wanted to see how good/bad is this one compared to a desktop box I use as server (located somewhere in USA). I chose to use hdparm command to do simple testing, where I can make sense of the output.

Test on Banana Pi

[root@localhost ~]# hdparm -t /dev/sda1

/dev/sda1:
 Timing buffered disk reads: 268 MB in  3.01 seconds =  89.05 MB/sec
[root@localhost ~]# hdparm -T /dev/sda1

/dev/sda1:
 Timing cached reads:   772 MB in  2.00 seconds = 385.52 MB/sec

Test on my desktop server

[root@fedora-build ~]# hdparm -t /dev/sda1

/dev/sda1:
 Timing buffered disk reads: 434 MB in  3.01 seconds = 144.37 MB/sec
[root@fedora-build ~]# hdparm -T /dev/sda1

/dev/sda1:
 Timing cached reads:   22548 MB in  2.00 seconds = 11284.87 MB/sec

Is it too slow?

Maybe in many use cases, but not for my own backup needs.

New home storage box with Fedora and ARM

Buying the hardware

I was looking forward to setup a new storage box at home. The biggest two points were about being able to run Fedora, and to be in the cheaper side. After looking at the available hardware prices for the desktops, I thought I should look into something else.

While asking about the similar setups, Dennis Gilmore, and Peter Robinson from Fedora release engineering team suggested me to look at the ARM boards which can run the standard Fedora ARM. After looking into the boards which I can buy online from an Indian shop, I decided to go for a Banana Pi. It has Allwinner A20, 1GB DDR DRAM, and most important a SATA connector. I ordered the device from crazypi, I have bought many other things from them before. The device was delivered within 24 hours :)

The next issue was to get the hard drive for the system. After a few failed attempts to find a power cable for a SATA drive, I just decided to buy a desktop SMPS to power the hard drive (and it will power the future ones too), I also bought a 8 port switch as I was out of available ports in my home network.

The setup

OS installation

I downloaded the minimal Fedora ARM image (find it here). On my laptop first I installed fedora-arm-installer package. Used the same to get the image on a SD card

# dnf install fedora-arm-installer
# fedora-arm-image-installer --image=Fedora-Minimal-armhfp-22-3-sda.raw.xz --target=Bananapi --media=/dev/sdb --selinux=OFF

After everything was done, I reinserted the card in my laptop, and then edited the file extlinux.conf under boot partition, added the words console=tty0 as a parameter.

Network configuration

Next step was to connect the Banana Pi to a TV (it has HDMI), and boot the system, setup root password, timezone, and another user. After logging into the system, my next job was to setup a static ip for the system. To do so, add a new file /etc/sysconfig/network-scripts/ifcfg-eth0 and put the following (after changing the ip details) into it.

DEVICE="eth0"
BOOTPROTO="static"
OBBOOT="yes"
TYPE="ETHERNET"
IPADDR="192.168.1.250"
NETMASK="255.255.255.0"
GATEWAY="192.168.1.1"
DNS="8.8.8.8"

Brought back the system to my office room, setup the network switch, and the cables. Connected the system along with the hard drive, and I managed to connect to system from my laptop using ssh.

Setting up the SATA drive

The drive came up as /dev/sda in the system. I wanted to encrypt it first, that will keep the data secured in case it gets stolen. Install the following package for the same.

# dnf install cryptsetup

Then wanted to fill up the drive with some random data (this will take some time).

# dd if=/dev/urandom of=/dev/sda1 bs=1M

Then encrypted the drive.

# cryptsetup luksFormat /dev/sda1

WARNING!
========
This will overwrite data on /dev/sda1 irrevocably.

Are you sure? (Type uppercase yes): YES
Enter passphrase: 
Verify passphrase:

Next step is to open it with a given name (the name will come up under /dev/mapper), and format the partition as ext4.

[root@localhost ~]# cryptsetup luksOpen /dev/sda1 store1
Enter passphrase for /dev/sda1: 
[root@localhost ~]# 
[root@localhost ~]# ls /dev/mapper/
control  store1
[root@localhost ~]# mkfs.ext4 /dev/mapper/store1 
mke2fs 1.42.12 (29-Aug-2014)
Creating filesystem with 244189878 4k blocks and 61054976 inodes
Filesystem UUID: 43a8b791-3fac-43cb-8244-8988ff3fb749
Superblock backups stored on blocks: 
32768, 98304, 163840, 229376, 294912, 819200, 884736, 1605632, 2654208, 
4096000, 7962624, 11239424, 20480000, 23887872, 71663616, 78675968, 
102400000, 214990848

Allocating group tables: done                            
Writing inode tables: done                            
Creating journal (32768 blocks): done
Writing superblocks and filesystem accounting information: done 

Now I do not want the drive to be automounted, that is why I added a script which will open it, and mount to /mnt in the future.

Software configuration

I tried to use Owncloud for some time on that box, it is an excellent application, but sadly mariadb was taking a lot of CPU. Later at night Dennis suggested me rdiff-backup. I am using that for now, I will update the post later with my experience.