Kushal Das

FOSS and life. Kushal Das talks here.

kushal76uaid62oup5774umh654scnu5dwzh4u2534qxhcbi4wbab3ad.onion

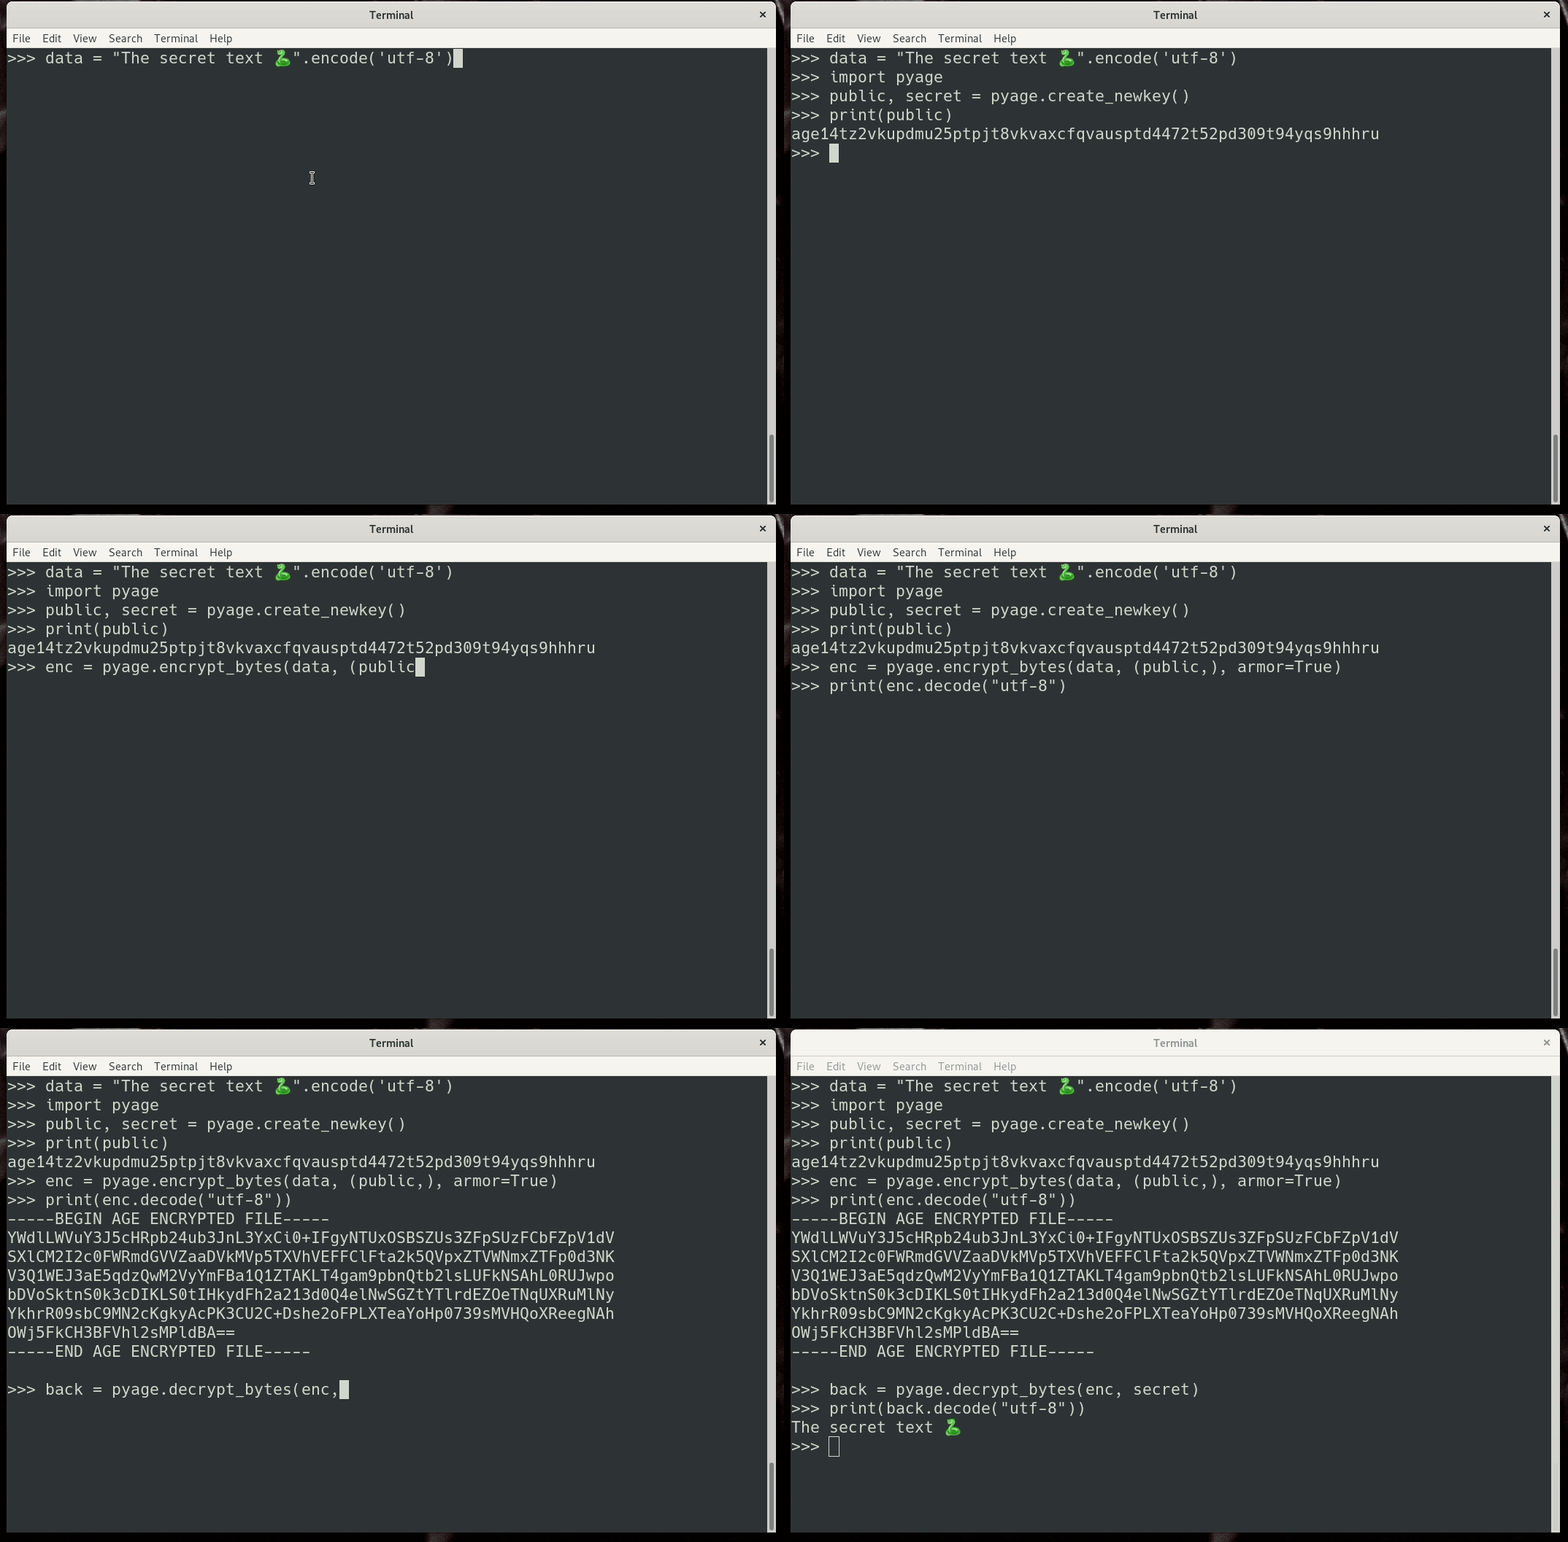
Introducing pyage-rust, a Python module for age encryption

age is a simple, modern and secure file encryption tool, it was designed by @Benjojo12 and @FiloSottile.

An alternative interoperable Rust implementation is available at github.com/str4d/rage

pyage-rust is a Python module for age, this is built on top of the Rust crate. I am not a cryptographer, and I prefer to keep this important thing to the specialists :)

pyage-rust demo

Installation

I have prebuilt wheels for both Linux and Mac, Python 3.7 and Python 3.8.

python3 -m pip install pyage-rust==0.1.0

Please have a look at the API documentation to learn how to use the API.

Building pyage-rust

You will need the nightly rust toolchain (via https://rustup.rs).

python3 -m venv .venv
source .venv/bin/activate
python3 -m pip install requirements-dev.txt
maturin develop && maturin build

Missing items in the current implementation

I am yet to add ways to use ssh keys or alias features, but those will come slowly in the future releases.

Another try at a new Python module for OpenPGP aka johnnycanencrypt

Using OpenPGP from Python is a pain. There are various documentation/notes on the Internet explaining why, including the famous one from isis agora lovecraft where they explained why they changed the module name to pretty_bad_protocol.

sequoia-pgp is a Rust project to do OpenPGP from scratch in Rust, and as library first approach. You can see the status page to see how much work is already done.

Using this and Pyo3 project I started writing an experimental Python module for OpenPGP called Johnny Can Encrypt.

I just did an release of 0.1.0. Here is some example code.

>>> import johnnycanencrypt as jce
>>> j = jce.Johnny("secret.asc")
>>> data = j.encrypt_bytes("kushal šŸ".encode("utf-8"))
>>> print(data)
-----BEGIN PGP MESSAGE-----

wcFMAwhsWpR1vDokAQ//UQGjrmmPLP0Td8pELf8XZEPh6fY9Xad6XHH6vQjGwvjG
36kK8ejRqyLbZpwVOO1FUfiZt6AyaeIEeEagoolMxmFl67mWBHsw5Z2NUPhydAwJ
EX+VdFn6CtRzQ0xG3T7rOCrsR50COO13gc4fIAn7Rxj1DyjqlFvur10FNnxRm0iJ
jnOwPnWVWKwoROzevfQd1Oef0n4nbkDUuyrS9oHSRFhFF/9I9bGtJhho0VIIcmFG
YVkhR0+QROTZ4edKotUg0R3UUfHmfwT0XcybGWMG/8Nh3W8pYuxwDdtbSMNDZzxu
o9TdpLrgoRIkhyGmuYWrURrRN1hmce5B6XOagWu7aKL7pFhP7Vd6LLoliDwY4G6x
1yKHbSo/1FEof7WBDujCksuVedUO8Gs9giitR/p/U9PBadeyiW0CKTYiTURkkNiF
g79lVfbmM54eZ9zmU+PraVNpekYXvH3o+lvXd5T39mo4Y/dv2fDCjo2aiZ/bE56Q
yn/0Hhmj2ikrsUk3NcuhO4zxt+VLctJt+lfk+R2hal+6NTaRkREdprPp4ltAt/bm
8xwBmqp+FDdxGgY+ItJkG69vsIf4WpPsvBI37fVbeYqrPsaz9NGlz2QKdfQvaH7j
R7rgxf24H2FjbbyNuHF3tJJa4Kfpnhq4nkxA/EdRP9JcVm/X568jLayTLyJGmrbS
PAHlVMLSBXQDApkY+5Veu3teRR5M2BLPr7X/gfeNnTlbZ4kF5S+E+0bjTjrz+6oo
dcsnTYxmcAm9hdPjng==
=1IYb
-----END PGP MESSAGE-----

>>> result = j.decrypt_bytes(data.encode("utf-8"), "mysecretpassword")
>>> print(result.decode("utf-8"))
kushal šŸ

The readme of the project page has build instruction, and more details about available API calls. We can create new keypair (RSA4096). We can encrypt/decrypt bytes and files. We can also sign/verify bytes/files. The code does not have much checks for error handling, this is super early stage.

You will need nettle (on Fedora) and libnettle on Debian (and related development packages) to build it successfully.

I published wheels for Debian Buster (Python3.7), and Fedora 32 (Python3.8).

Issues in providing better wheels for pip install

The wheels are linked against system provided nettle library. And every distribution has a different version. Means even if I am building a python3.7 wheel on Debian, it will not work on Fedora. I wish to find a better solution to this in the coming days.

As I said earlier in this post, this is just starting of this project. It will take time to mature for production use. And because of Sequoia, we will have better defaults of cipher/hash options.

dns-tor-proxy 0.2.0 aka DoH release

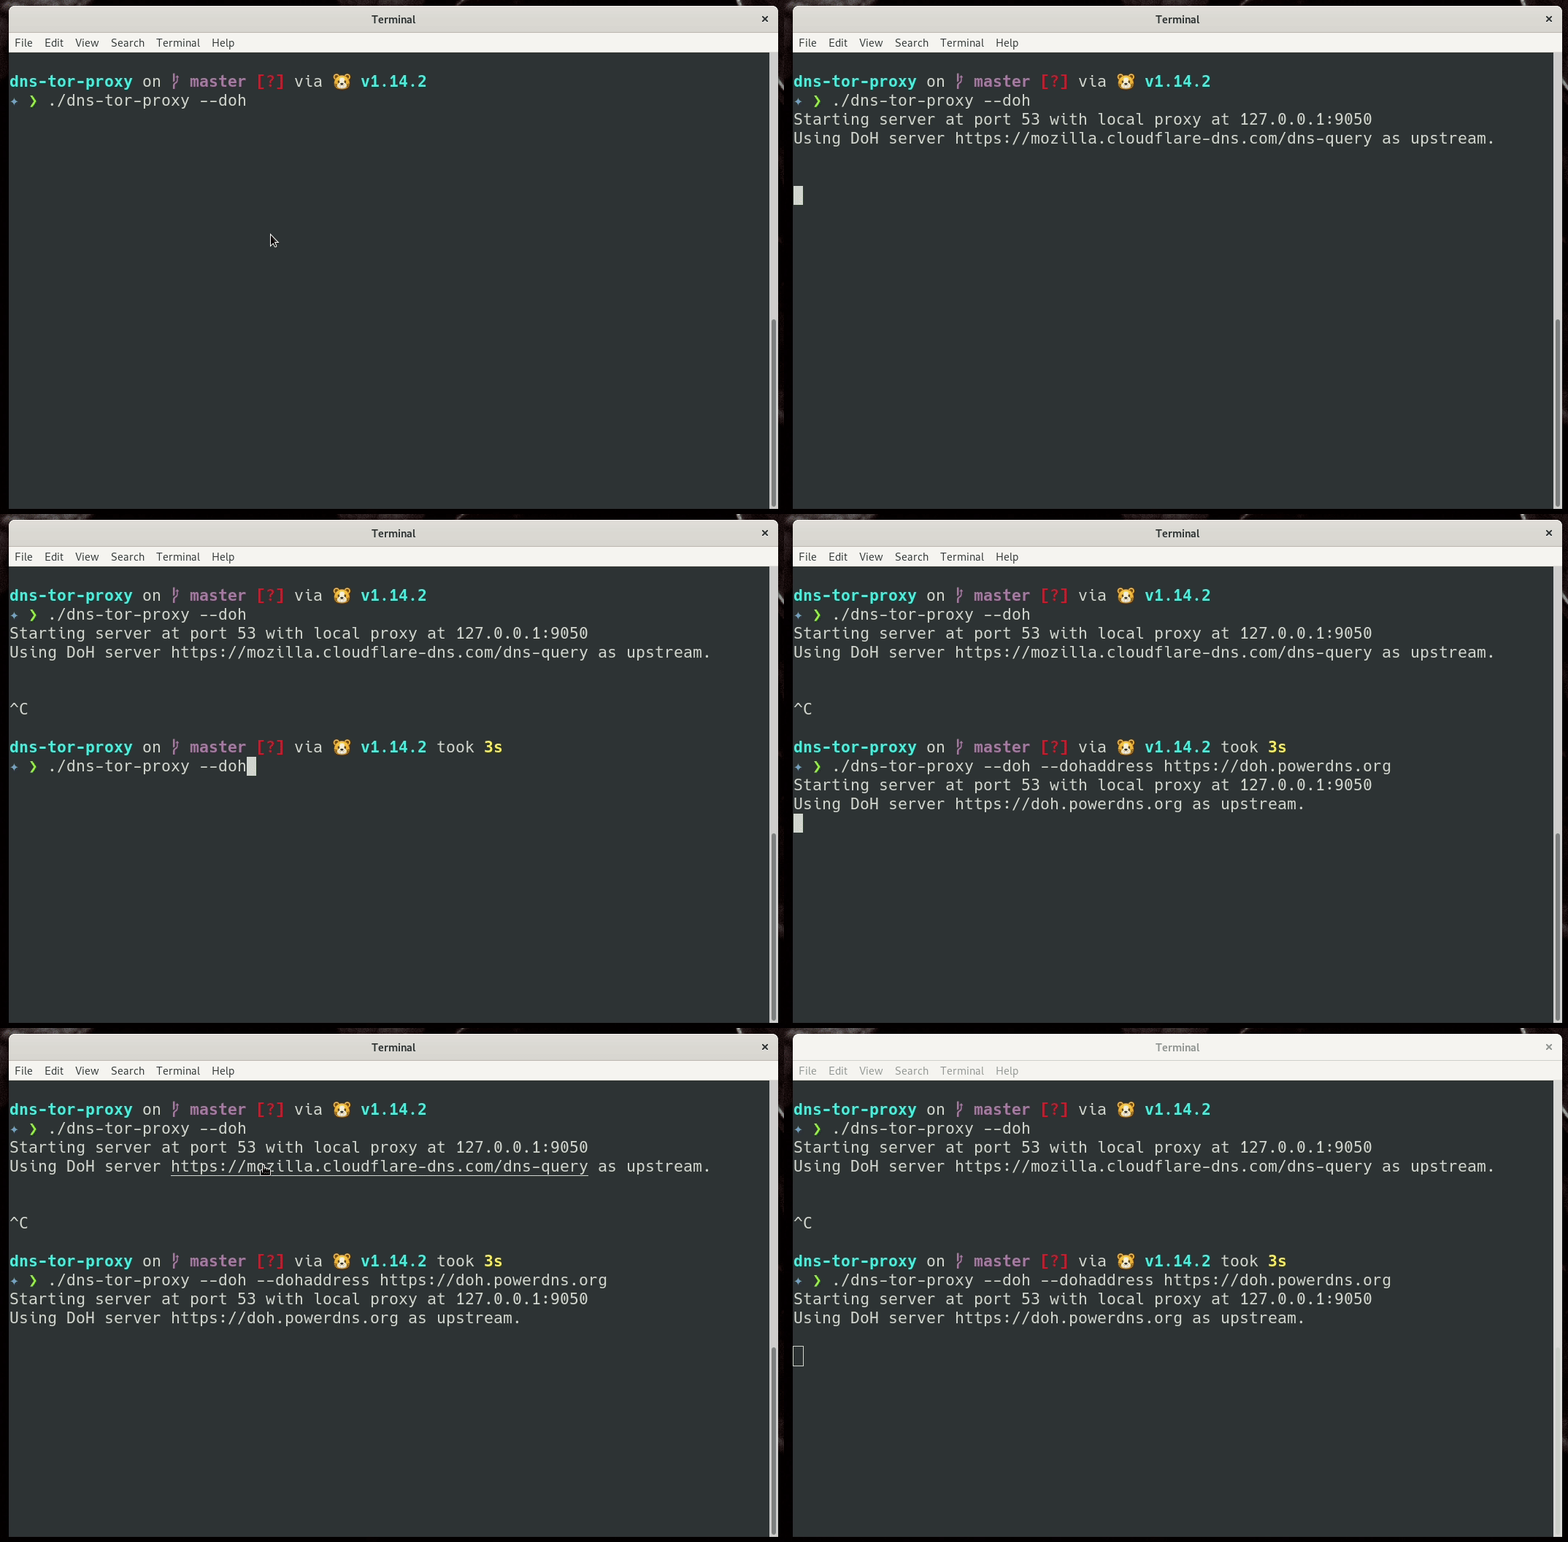
I just now released 0.2.0 of the dns-tor-proxy tool. The main feature of this release is DNS over HTTPS support. At first I started writing it from scratch, and then decided to use modified code from the amazing dns-over-https project instead.

Demo

demo of the DoH support in the tool

āœ¦ āÆ ./dns-tor-proxy -h
Usage of ./dns-tor-proxy:
      --doh                 Use DoH servers as upstream.
      --dohaddress string   The DoH server address. (default "https://mozilla.cloudflare-dns.com/dns-query")
  -h, --help                Prints the help message and exists.
      --port int            Port on which the tool will listen. (default 53)
      --proxy string        The Tor SOCKS5 proxy to connect locally, IP:PORT format. (default "127.0.0.1:9050")
      --server string       The DNS server to connect IP:PORT format. (default "1.1.1.1:53")
  -v, --version             Prints the version and exists.
Make sure that your Tor process is running and has a SOCKS proxy enabled.

Now you can pass --doh flag to enable DoH server usage, by default it will use https://mozilla.cloudflare-dns.com/dns-query. But you can pass any server using --dohaddress flag. I found the following servers are working well over Tor.

  • https://doh.libredns.gr/dns-query
  • https://doh.powerdns.org
  • https://dns4torpnlfs2ifuz2s2yf3fc7rdmsbhm6rw75euj35pac6ap25zgqad.onion/dns-query
  • https://dnsforge.de/dns-query

The release also has a binary executable for Linux x86_64. You can verify the executable using the signature file available in the release page.

Introducing dns-tor-proxy, a new way to do all of your DNS calls over Tor

dns-tor-proxy is a small DNS server which you can run in your local system along with the Tor process. It will use the SOCKS5 proxy provided from Tor, and route all of your DNS queries over encrypted connections via Tor.

By default the tool will use 1.1.1.1 (from Cloudflare) as the upstream server, but as the network calls will happen over Tor, this will provide you better privacy than using directly.

In this first release I am only providing source packages, maybe in future I will add binaries so that people can download and use them directly.

Demo

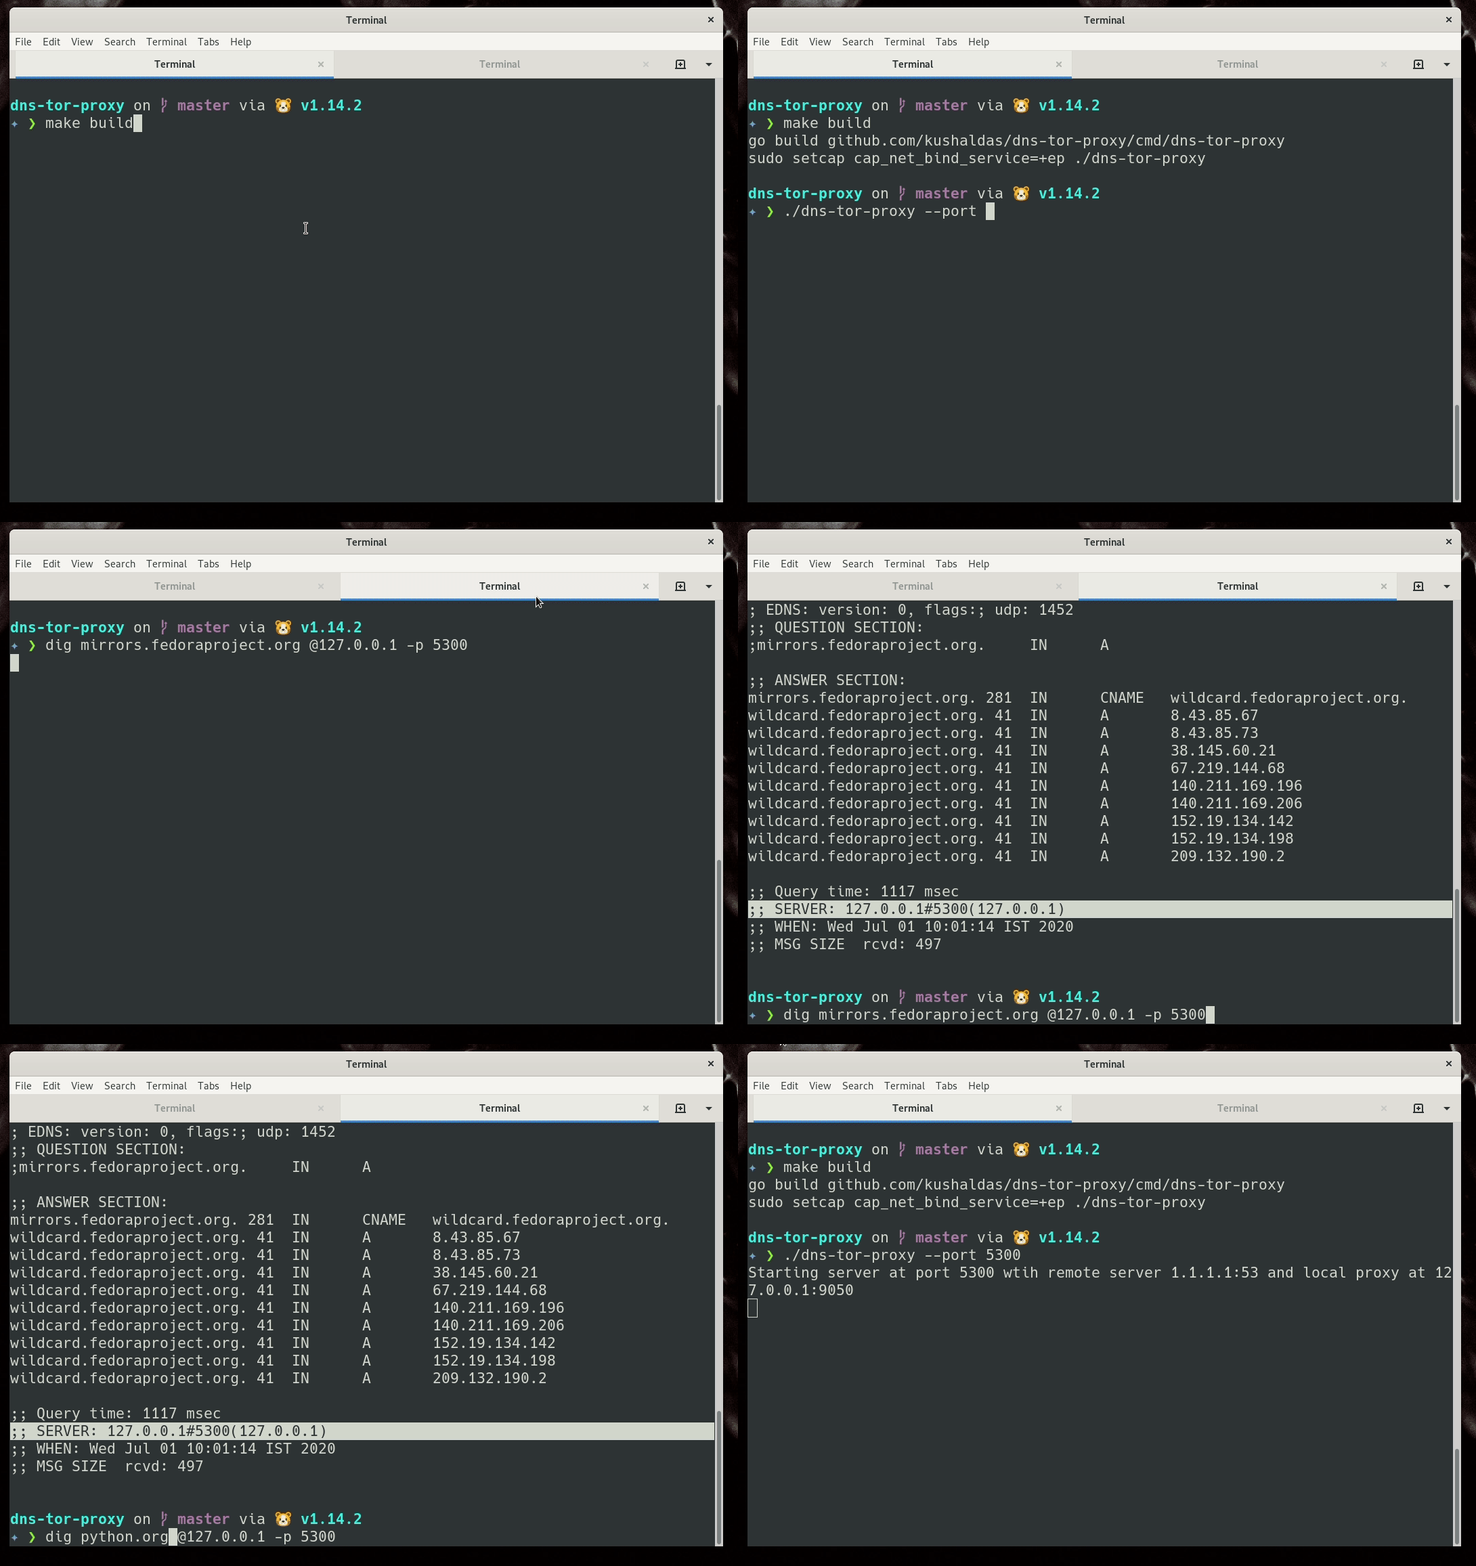
In the following demo I am building the tool, running it at port 5300, and then using dig to find the IP addresses for mirrors.fedoraproject.org and python.org.

demo of dns tor proxy

The -h flag will show you all the available configurable options.

./dns-tor-proxy -h

Usage of ./dns-tor-proxy:
  -h, --help            Prints the help message and exists.
      --port int        Port on which the tool will listen. (default 53)
      --proxy string    The Tor SOCKS5 proxy to connect locally,  IP:PORT format. (default "127.0.0.1:9050")
      --server string   The DNS server to connect IP:PORT format. (default "1.1.1.1:53")
  -v, --version         Prints the version and exists.
Make sure that your Tor process is running and has a SOCKS proxy enabled.

Onion location and Onion names in Tor Browser 9.5

Yesterday the Tor Browser 9.5 was released. I am excited about this release for some user-focused updates.

Onion-Location header

If your webserver provides this one extra header Onion-Location, the Tor Browser will ask the user if they want to visit the onion site itself. The user can even mark to visit every such onion site by default. See it in action here.

To enable this, in Apache, you need a configuration line like below for your websiteā€™s configuration.

Onion location demo

Header set Onion-Location "http://your-onion-address.onion%{REQUEST_URI}s"

Remember to enable rewrite module.

For nginx, add the following in your server configuration.

add_header Onion-Location http://<your-onion-address>.onion$request_uri;

URL which we can remember aka onion names

This is the first proof of concept built along with Freedom of the Press Foundation (yes, my team) and HTTPS Everywhere to help people to use simple names for onion addresses. For example, below, you can see that I typed theintercept.securedrop.tor.onion on the browser, and that took us to The Interceptā€™s SecureDrop address.

Onion name

A few new generation command line tools

Many of us live on the terminal. We use tools which allows us to do things faster and let us stay productive. Most of these tools are old. Sometimes we do pick up a few new generation command line tools. Here is a small list of tools I am using daily. All of these are written in Rust .

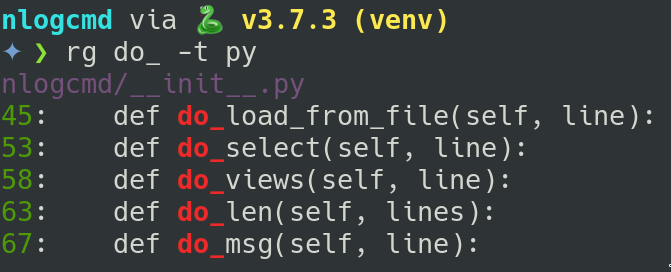
ripgrep

ripgrep screenshot

ripgrep was the first Rust tool I started using daily as a replacement for grep. It is easy to use. The output looks nice, and also works with my vim.

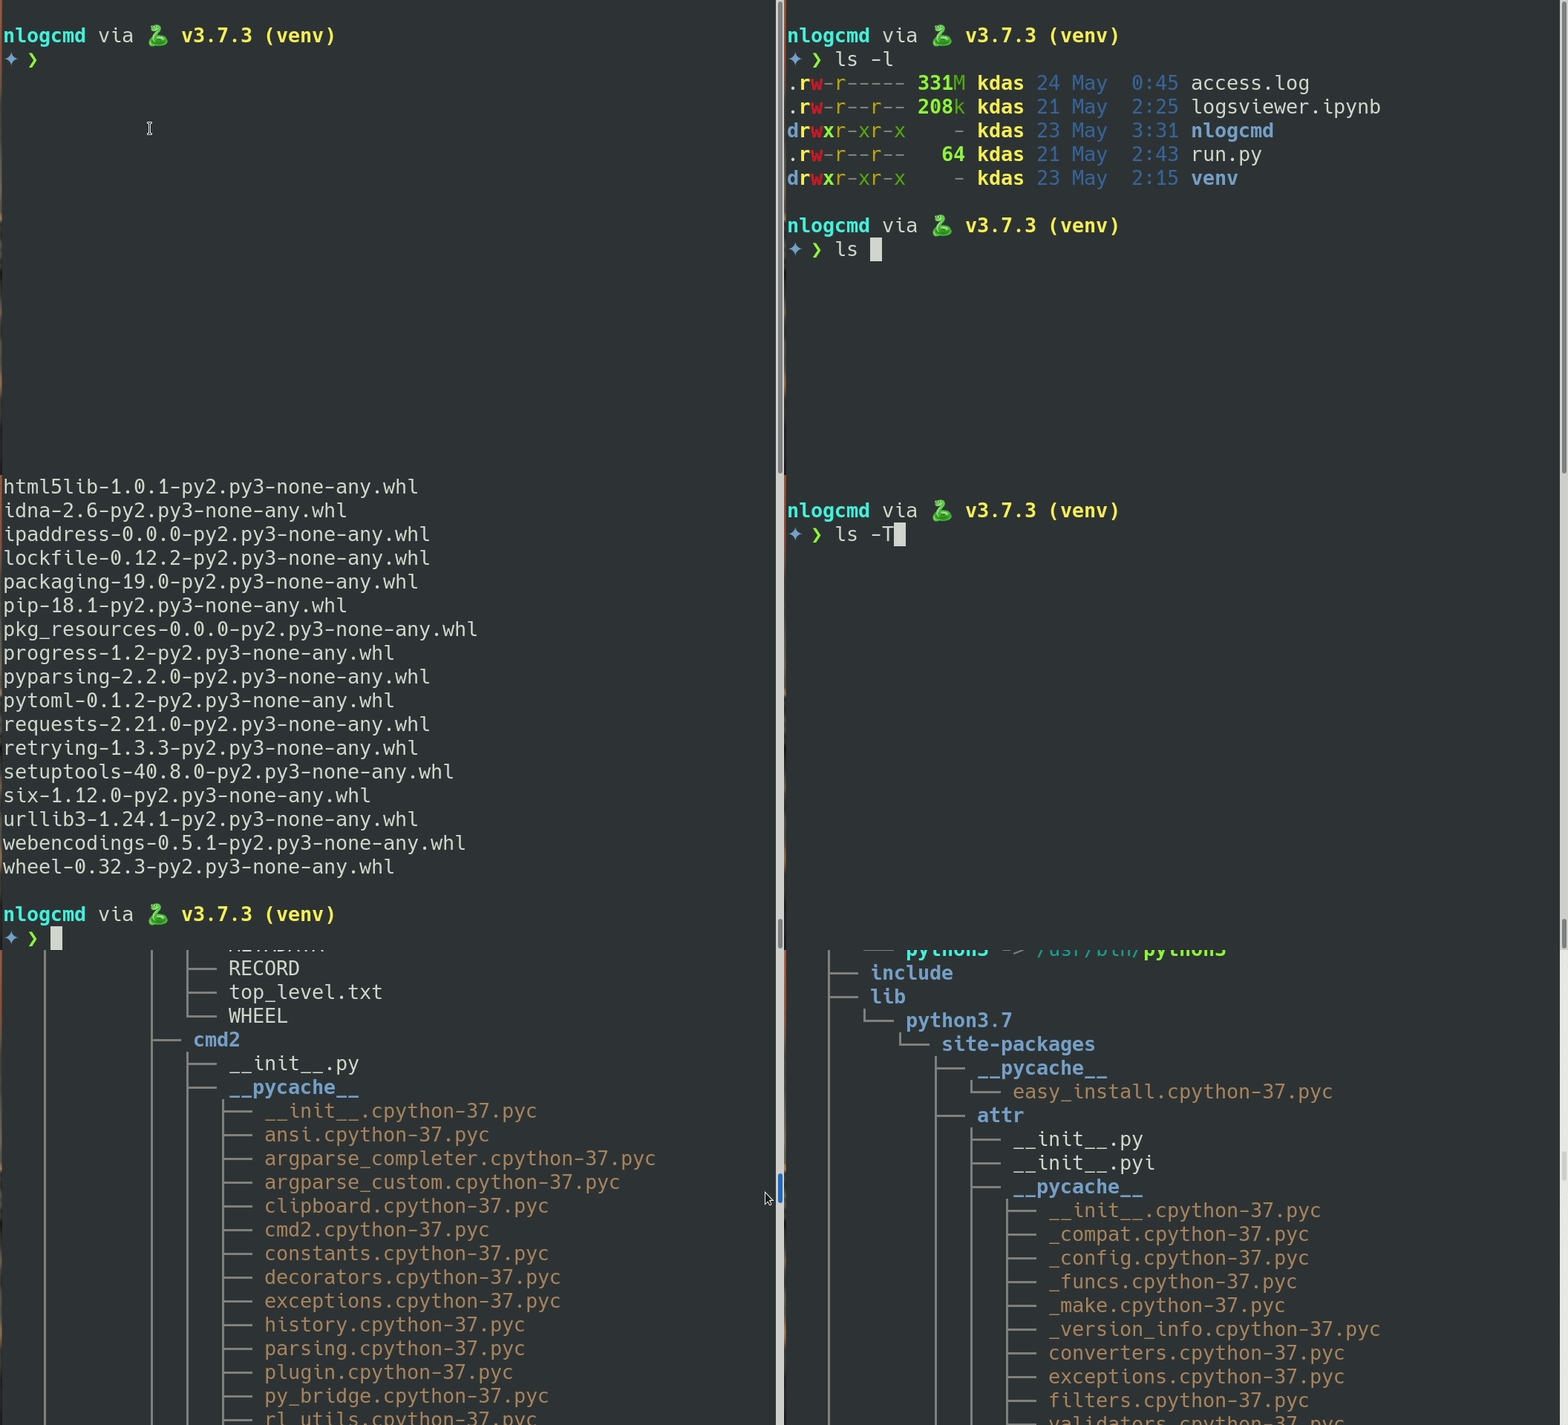
exa

exa is the replacement for ls. It includes many useful flags.

exa demo

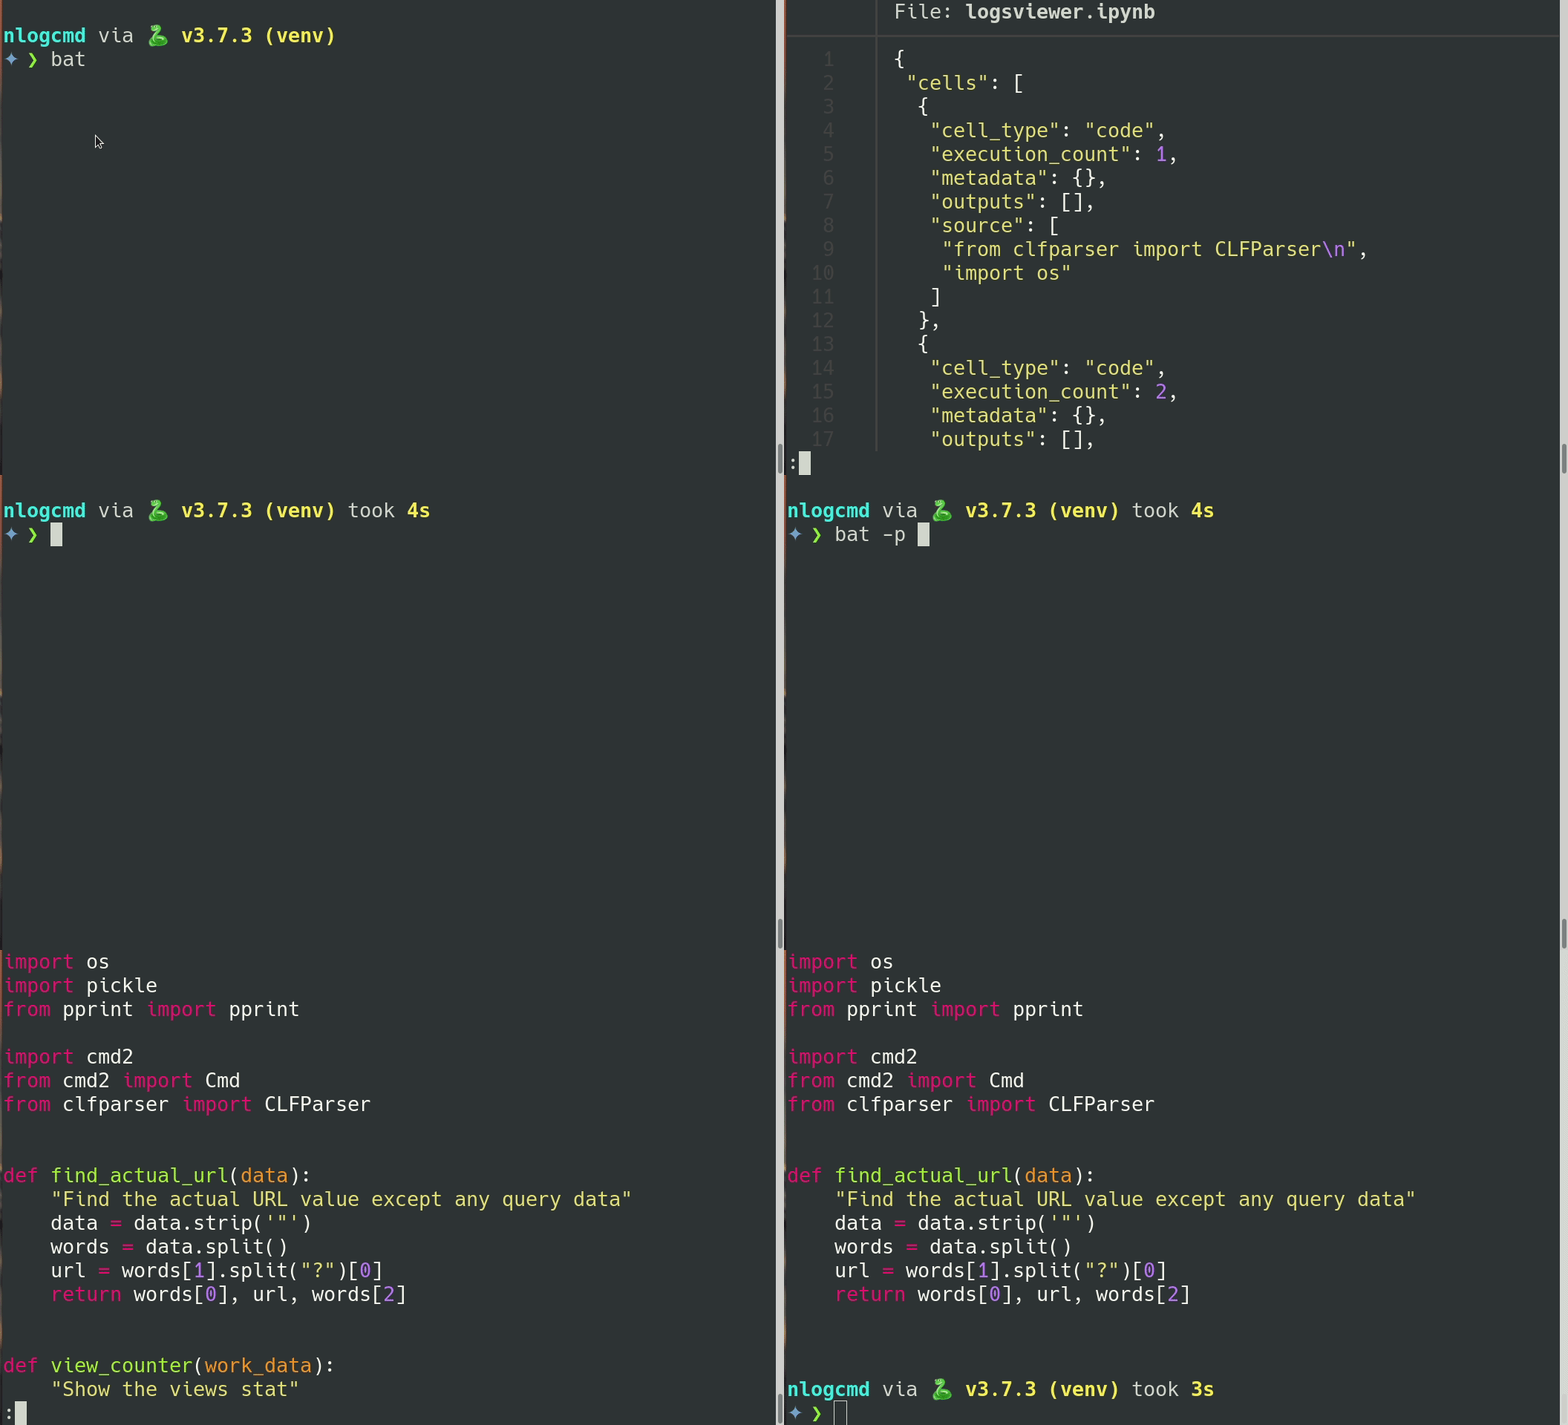
bat

bat is the one stop replacement for cat and less. It also provides syntax highlighting with nice colours. I do have an alias cat=/usr/bin/bat -p.

bat demo

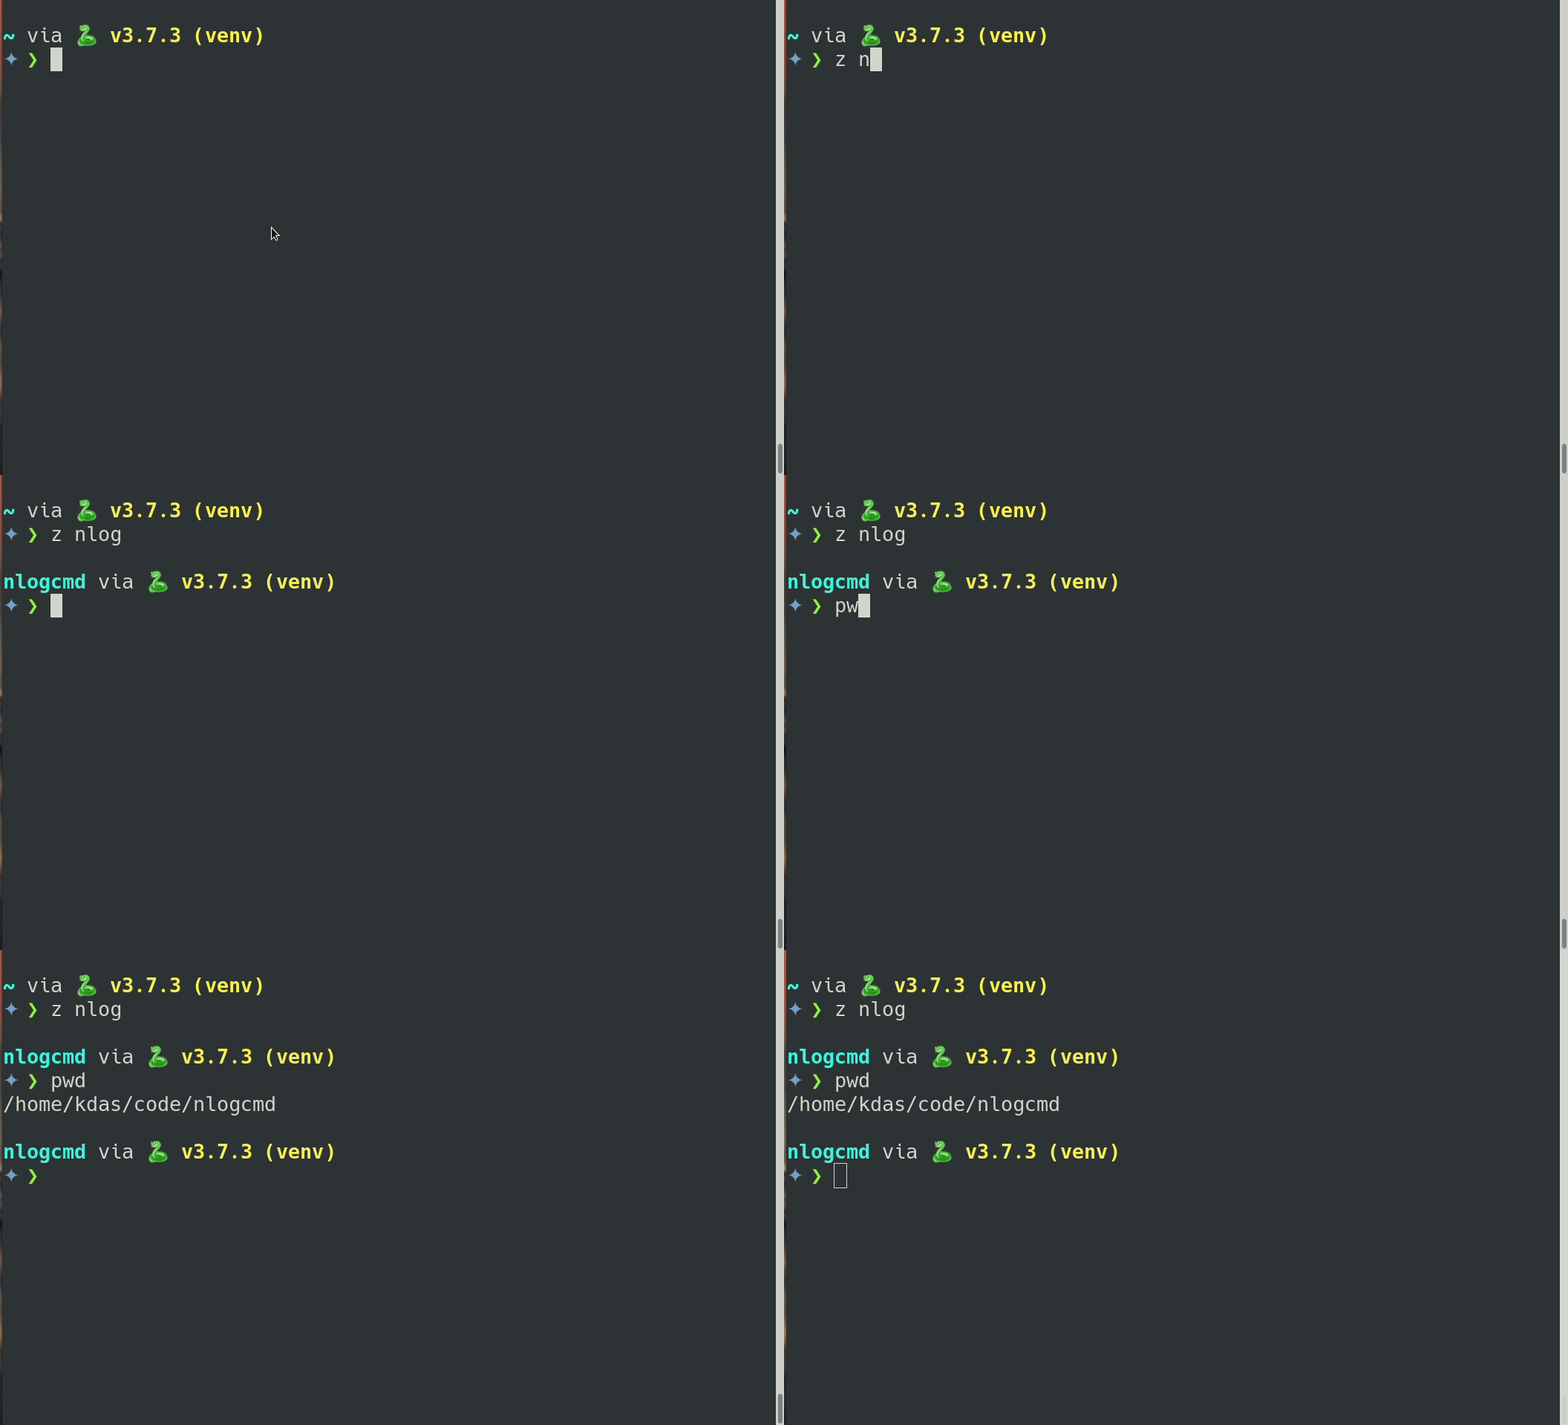
zoxide

zoxide allows to move around directories super fast.

zoxide demo

starship

starship is the shell prompt you can see in all of the GIFs above. It allows a lot of customization.

All of these tools are packaged in Fedora 32 by the amazing fedora-rust SIG.

Introducing ManualBox project

One of the major security features of the QubesOS is the file vaults, where access to specific files can only happen via user input in the GUI applet. Same goes to the split-ssh, where the user has to allow access to the ssh key (actually on a different VM).

I was hoping to have similar access control to important dotfiles with passwords, ssh private keys, and other similar files on my regular desktop system. I am introducing ManualBox which can provide similarly access control on normal Linux Desktops or even on Mac.

GIF of usage

How to install?

Follow the installation guide on the Mac in the wiki. For Linux, we are yet to package the application, and you can directly run from the source (without installing).

git clone https://github.com/kushaldas/manualbox.git
cd manualbox

On Fedora

sudo dnf install python3-cryptography python3-qt5 python3-fusepy python3-psutil fuse -y

On Debian

sudo apt install python3-cryptography python3-pyqt5 python3-fusepy python3-psutil fuse

Usage guide

To start the application from source:

On Linux:

./devscripts/manualbox

On Mac:

Click on the App icon like any other application.

If you are running the tool for the first time, it will create a new manualbox and mount it in ~/secured directory, it will also give you the password, please store it somewhere securely, as you will need it to mount the filesystem from the next time.

initial screen

After selecting (or you can directly type) the mount path (must be an empty directory), you should type in the password, and then click on the Mount button.

File system mounted

Now, if you try to access any file, the tool will show a system notification, and you can either Allow or Deny via the following dialog.

Allow or deny access

Every time you allow file access, it shows the notification message via the system tray icon.

Accessing file msg

To exit the application, first click on the Unmount, and right-click on the systray icon, and click on the Exit or close via window close button.

How to exit from the application

Usage examples (think about your important dotfiles with passwords/tokens)

Note: If you open the mounted directory path from a GUI file browser, you will get too many notifications, as these browsers will open the file many times separately. Better to have you GUI application/command line tool to use those files as required.

Thunderbird

You can store your thuderbird profile into this tool. That way, thunderbird needs your permission for access when you start the application.

ls -l ~/.thunderbird/
# now find your right profile (most people have only one)
mv ~/.thunderbird/xxxxxx.default/logins.json ~/secured/
ln -s ~/secured/logins.json ~/.thunderbird/xxxxxx.default/logins.json

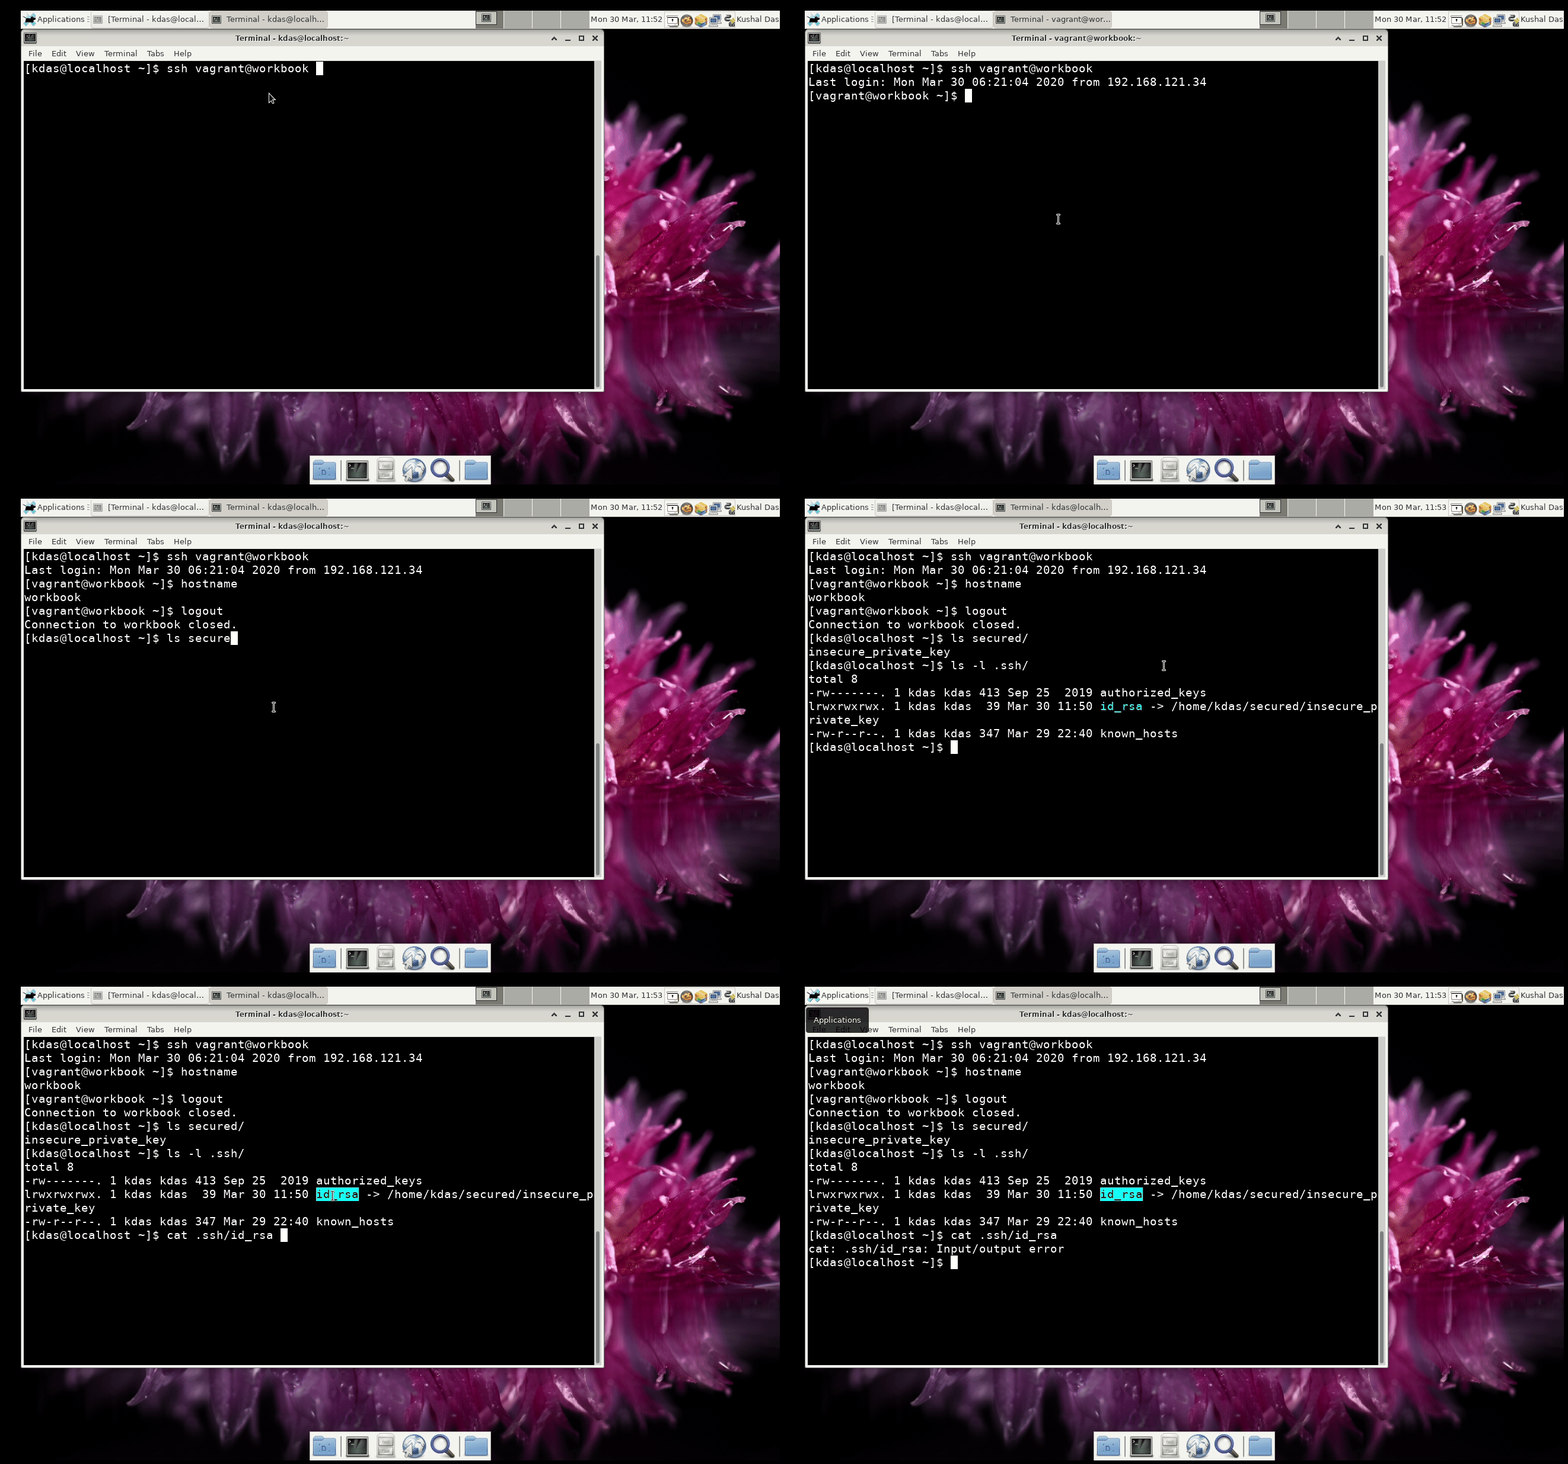
SSH private key

mv ~/.ssh/id_rsa ~/secured/
ln -s ~/secured/id_rsa ~/.ssh/id_rsa

If you have any issues, please file issues or even better a PR along with the issue :)

Maintaining your Qubes system using Salt part 1

Last year I published qubes-ansible project. This enables maintaining your Qubes OS system via Ansible. But, to do the same, you will have to take a few steps as Ansible is not in the default Qubes.

Qubes uses Salt to maintain the system. It also has helpful documentation to explain the idea. In this post and with a few more in the future, I am planning to write a series with basic examples of the same, so that you can maintain your Qubes laptop with the Salt itself.

Working in dom0

You can either directly the required files in dom0, or write them in your standard development VM, and then copy them over to dom0. The choice is yours.

I am directly writing them into dom0 using vim as my editor.

The outcome

I want to create the following:

  • A new template called fancy-template based on debian-10
  • Install a few packages into it.
  • Create a new apt repo for VS Code in it.
  • Install VS Code in it.
  • Create an AppVM called fancy using the template with 3000MB RAM.

Creating .top and .sls files

The .top file will help us to link between any machine (VMs or dom0) and some state files (.sls).

To find the currently enabled top files use the following command:

qubesctl top.enabled

Now, we will create our own top file.

Create the following file as /srv/salt/learnqubes.top

base:
  dom0:
    - fancy-template

Here we are saying for the dom0 machine (VM) use the state file named fancy-template. The state files contain state and configuration of the machines (VMs).

Creating the first state file

Copy paste the following in /srv/salt/fancy-template.sls file.

create-fancy-template:
  qvm.vm:
    - name: fancy-template
    - clone:
      - source: debian-10
      - label: blue
    - tags:
      - add:
        - playground

create-fancy-vm:
  qvm.vm:
    - name: fancy
    - present:
      - template: fancy-template
      - label: red
      - mem: 3000
    - prefs:
      - template: fancy-template

First, we are using a unique name for that step, where we are asking for a qvm.vm (VM), saying that the name is fancy-template, and it is a clone of debian-10. We are also mentioning the label color and adding a tag to the template.

In the next step, we are creating the AppVM named fancy, from the template, red as the label, and 3000MB RAM.

Enabling the .top first

# qubesctl top.enable learnqubes

This command will enable our top file. You can recheck the list of enabled .top files after this.

Applying the state to dom0

# qubesctl --show-output state.highstate

This command will make sure that all the states from all of the enabled top files will be applied to dom0. After this command finished, you should be able to see our new template and the AppVM.

Enabling vscode repo and installing the packages

We will first write a new state file for the steps, write the following to /srv/salt/add-my-fancy-system.sls file.

install-packages:
  pkg.installed:
    - pkgs:
      - htop
      - sl
      - git
  - refresh: True

install-python-apt-for-repo-config:
  pkg.installed:
    - pkgs:
      - python-apt
   
configure-apt-test-apt-repo:
  pkgrepo.managed:
    - name: "deb [arch=amd64] https://packages.microsoft.com/repos/vscode stable main"
    - file: /etc/apt/sources.list.d/vscode.list
    - key_url: "salt://microsoft.asc"
    - clean_file: True # squash file to ensure there are no duplicates
    - require:
      - pkg: install-python-apt-for-repo-config

install-vscode:
  pkg.installed:
    - pkgs:
      - code

You can read all the details about pkg module, and here we are installing a few packages first. While installing the initial packages, we also make sure to refresh the database (think about apt update). To create the apt repository, we used pkgrepo salt module. You will find one interesting thing in that section, and we are mentioning a GPG public key for the repository.

We actually have to download it in a VM and move it to the dom0 in the same /srv/salt directory.

# qvm-run --pass-io devvm ā€˜cat /home/user/microsoft.ascā€™ > /srv/salt/microsoft.asc

Remember to replace devvm with the right AppVM in your system.

We will also update the top file so that it knows to use the make-my-fancy-system.sls file for our fancy-template.

The following is the updated top file.

base:
  dom0:
    - fancy-template

  fancy-template:
    - make-my-fancy-system

Then, we can ask Qubes to apply the state to only the fancy-template VM.

# qubesctl --show-output --skip-dom0 --targets fancy-template state.highstate

This command should create the right state in the fancy-template. Remember to shut down the template and the AppVM (if they are running), and then start the fancy AppVM again. You will find it has all the packages, including VS Code.
Which verison of Python are you running?

The title of the is post is misleading.

I actually want to ask you which version of Python3 are you running? Yes, it is a question I have to ask myself based on projects I am working on. I am sure there are many more people in the world who are also in the similar situation.

Just to see what all versions of Python(3) I am running in different places:

  • Python 3.7.3
  • Python 3.5.2
  • Python 3.6.9
  • Python 3.7.4
  • Python 2.7.5
  • Python 3.7.6

What about you?

Creating password input widget in PyQt

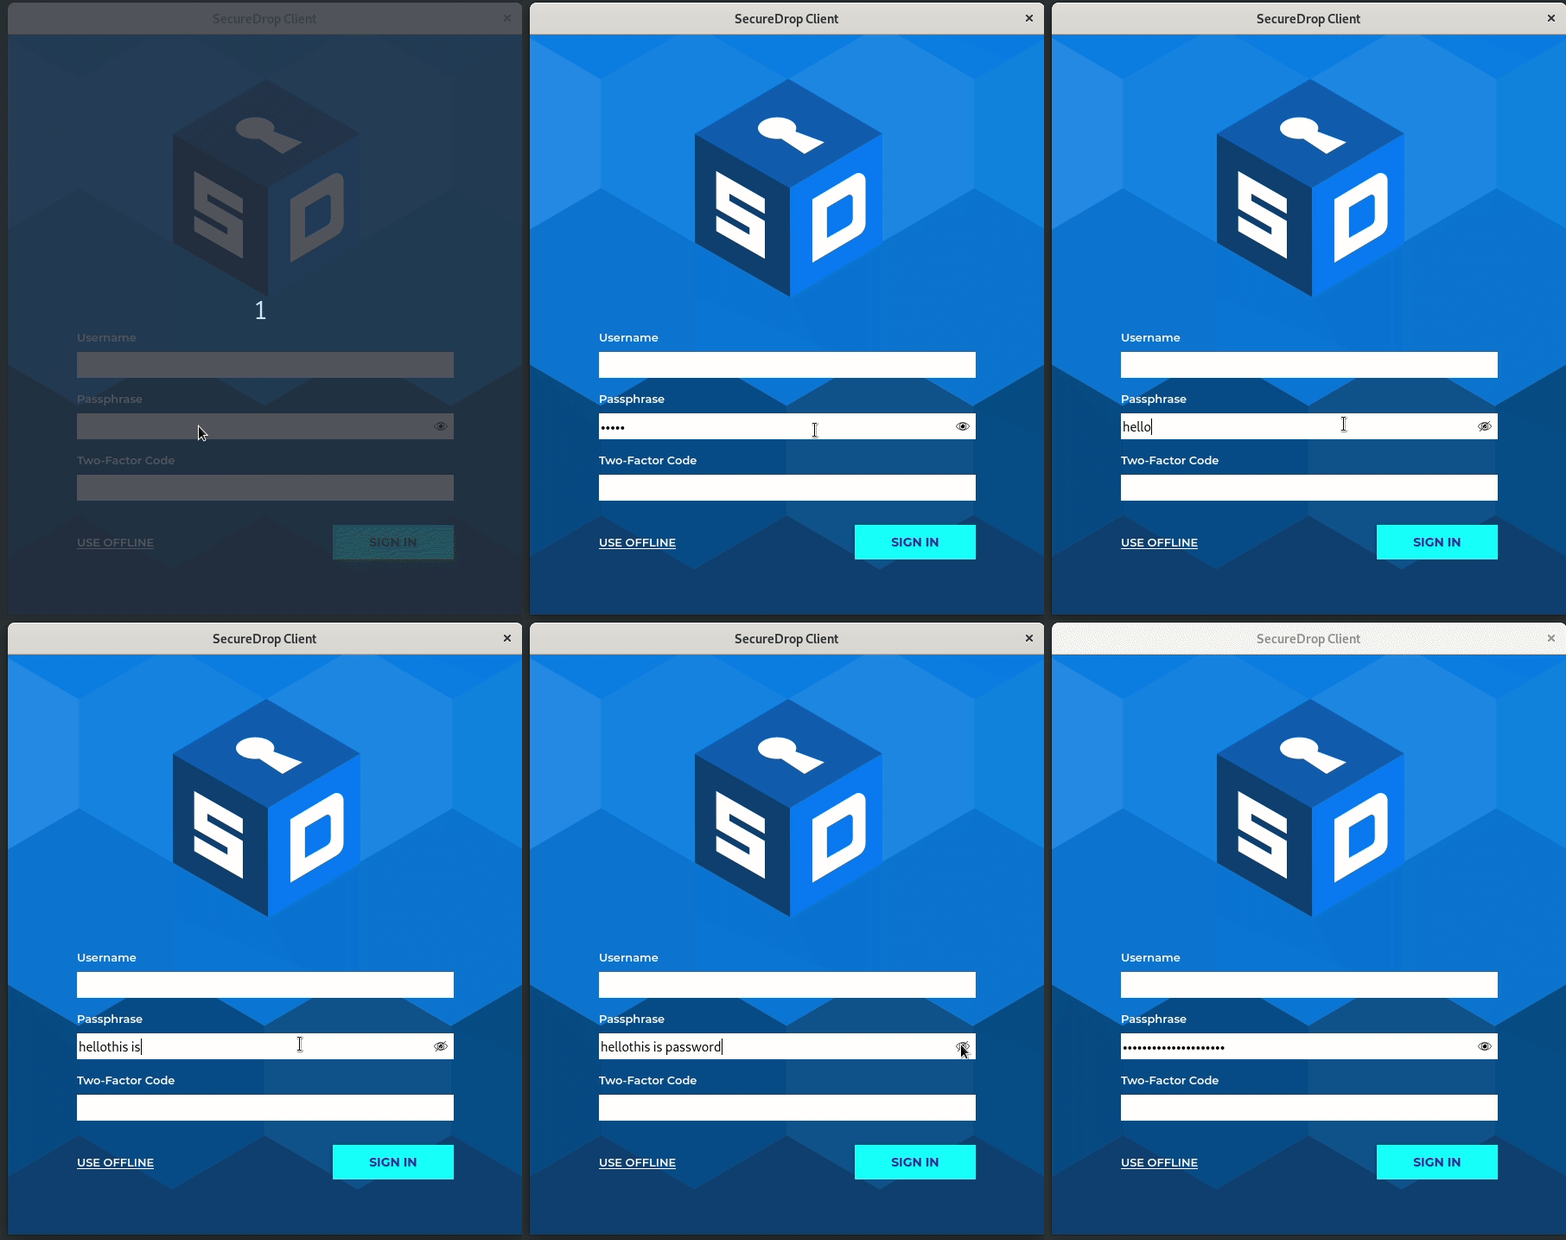
One of the most common parts of writing any desktop tool and taking password input is about having a widget that can show/hide password text. In Qt, we can add a QAction to a QLineEdit to do the same. The only thing to remember, that the icons for the QAction, must be square in aspect ratio; otherwise, they look super bad.

The following code creates such a password input, and you can see it working at the GIF at the end of the blog post. I wrote this for the SecureDrop client project.

class PasswordEdit(QLineEdit):
    """
    A LineEdit with icons to show/hide password entries
    """
    CSS = '''QLineEdit {
        border-radius: 0px;
        height: 30px;
        margin: 0px 0px 0px 0px;
    }
    '''

    def __init__(self, parent):
        self.parent = parent
        super().__init__(self.parent)

        # Set styles
        self.setStyleSheet(self.CSS)

        self.visibleIcon = load_icon("eye_visible.svg")
        self.hiddenIcon = load_icon("eye_hidden.svg")

        self.setEchoMode(QLineEdit.Password)
        self.togglepasswordAction = self.addAction(self.visibleIcon, QLineEdit.TrailingPosition)
        self.togglepasswordAction.triggered.connect(self.on_toggle_password_Action)
        self.password_shown = False

    def on_toggle_password_Action(self):
        if not self.password_shown:
            self.setEchoMode(QLineEdit.Normal)
            self.password_shown = True
            self.togglepasswordAction.setIcon(self.hiddenIcon)
        else:
            self.setEchoMode(QLineEdit.Password)
            self.password_shown = False
            self.togglepasswordAction.setIcon(self.visibleIcon)