Kushal Das

FOSS and life. Kushal Das talks here.

kushal76uaid62oup5774umh654scnu5dwzh4u2534qxhcbi4wbab3ad.onion

ssh authentication using FIDO/U2F hardware authenticators

From OpenSSH 8.2 release it supports authentication using FIDO/U2F. These tokens are required to implement the ECDSA-P256 "ecdsa-sk" key type, but some (say Yubikey) also supports Ed25519 (ed25519-sk) keys. In this example I am using a Yubikey 5.

I am going to generate a non-discoverable key on the card itself. Means along with the card, we will also have a key on disk, and one will need both to authenticate. If someone steals you Yubikey, they will not be able to login just via that.

✦ ❯ ssh-keygen -t ed25519-sk -f .ssh/id_ed25519_sk
Generating public/private ed25519-sk key pair.
You may need to touch your authenticator to authorize key generation.
Enter passphrase (empty for no passphrase): 
Enter same passphrase again: 
Your identification has been saved in .ssh/id_ed25519_sk
Your public key has been saved in .ssh/id_ed25519_sk.pub
The key fingerprint is:
SHA256:CoQKA0blJ8A1xOwri167mIDb7rHxr59TYwI25ChOZ4Y kdas@localhost.localdomain
The key's randomart image is:
+[ED25519-SK 256]-+
|++*=             |
|o.o+o            |
|o +*..           |
|oE.*B            |
|+.+.oo  S        |
|.o . ...+        |
|+ =.  .+ .       |
|o++=. ..         |
|o*=o+++.         |
+----[SHA256]-----+

Here we passed the type of the key using -t flag and saving the private key using -f. I pasted the public key in the server's ~/.ssh/authorized_keys file, and then also configured the ssh client on my laptop to use that specified key via the ~/.ssh/config file.

Host kushaldas.in
  HostName kushaldas.in
  User kushal
  IdentityFile ~/.ssh/id_ed25519_sk

Finally we can login via ssh.

✦ ❯ ssh kushaldas.in
Enter passphrase for key '/home/kdas/.ssh/id_ed25519_sk': 
Confirm user presence for key ED25519-SK SHA256:CoQKA0blJ8A1xOwri167mIDb7rHxr59TYwI25ChOZ4Y
User presence confirmed
$

You will notice that after asking for the passphrase of the key, ssh is asking to touch the Yubikey to confirm the user presence. You can read more in the tutorial from Yubico.

If you miss to touch the Yubikey on time, you will get an error like:

sign_and_send_pubkey: signing failed for ED25519-SK "/home/kdas/.ssh/id_ed25519_sk": invalid format

Reproducible wheel buidling failure on CircleCI container

At SecureDrop project we have Python wheels built for Python 3.7 on Buster in a reproducible way. We use the same wheels inside of the Debian packages. The whole process has checks to verify the sha256sums based on gpg signatures, and at the end we point pip to a local directory to find all the dependencies.

Now, I am working to update the scripts so that we can build wheels for Ubuntu Focal, and in future we can use those wheels in the SecureDrop server side packages. While working on this, in the CI I suddenly noticed that all wheels started failing on the reproducibility test on Buster. I did not make any change other than the final directory path, so was wondering what is going on. Diffoscope helped to find out the difference:

│ -6 files, 34110 bytes uncompressed, 9395 bytes compressed:  72.5%
│ +6 files, 34132 bytes uncompressed, 9404 bytes compressed:  72.4%
├── six-1.11.0.dist-info/METADATA
│ @@ -9,14 +9,15 @@
│  Platform: UNKNOWN
│  Classifier: Programming Language :: Python :: 2
│  Classifier: Programming Language :: Python :: 3
│  Classifier: Intended Audience :: Developers
│  Classifier: License :: OSI Approved :: MIT License
│  Classifier: Topic :: Software Development :: Libraries
│  Classifier: Topic :: Utilities
│ +License-File: LICENSE
│  
│  .. image:: http://img.shields.io/pypi/v/six.svg
│     :target: https://pypi.python.org/pypi/six
│  
│  .. image:: https://travis-ci.org/benjaminp/six.svg?branch=master
│      :target: https://travis-ci.org/benjaminp/six
├── six-1.11.0.dist-info/RECORD
│ @@ -1,6 +1,6 @@
│  six.py,sha256=A08MPb-Gi9FfInI3IW7HimXFmEH2T2IPzHgDvdhZPRA,30888
│  six-1.11.0.dist-info/LICENSE,sha256=Y0eGguhOjJj0xGMImV8fUhpohpduJUIYJ9KivgNYEyg,1066
│ -six-1.11.0.dist-info/METADATA,sha256=vfvF0GW2vCjz99oMyLbw15XSkmo1IxC-G_339_ED4h8,1607
│ +six-1.11.0.dist-info/METADATA,sha256=Beq9GTDD6nYVwLYrN3oOcts0HSPHotfRWQ_Zn8_9a7g,1629
│  six-1.11.0.dist-info/WHEEL,sha256=Z-nyYpwrcSqxfdux5Mbn_DQ525iP7J2DG3JgGvOYyTQ,110
│  six-1.11.0.dist-info/top_level.txt,sha256=_iVH_iYEtEXnD8nYGQYpYFUvkUW9sEO1GYbkeKSAais,4
│  six-1.11.0.dist-info/RECORD,,

It seems somehow the packages were picking up metadata about the LICENSE file. After looking into the environment, I found virtualenv is pulling latest setuptools into the virtualenv. Thus breaking the reproducibility. It was a quick fix. Yes, we do pin setuptools and pip in our wheels repository.

Next, the extension based wheels started failing, and I was going totally crazy to find out why there is some ABI change. I still don't know the correct reason, but noticed that the circleci/python:3.7-buster container image (and the upstream Python container) is using different flags to build the extensions than Debian Buster on vm/bare metal. For example, below on the top we have the command line from the container and then inside of the normal Debian Buster.

creating build/temp.linux-x86_64-3.7/lib/sqlalchemy/cextension
gcc -pthread -Wno-unused-result -Wsign-compare -DNDEBUG -g -fwrapv -O3 -Wall -fPIC -I/home/circleci/project/.venv/include -I/usr/local/include/python3.7m -c lib/sqlalchemy/cextension/processors.c -o build/temp.linux-x86_64-3.7/lib/sqlalchemy/cextension/processors.o
gcc -pthread -shared build/temp.linux-x86_64-3.7/lib/sqlalchemy/cextension/processors.o -L/usr/local/lib -lpython3.7m -o build/lib.linux-x86_64-3.7/sqlalchemy/cprocessors.cpython-37m-x86_64-linux-gnu.so
building 'sqlalchemy.cresultproxy' extension
gcc -pthread -Wno-unused-result -Wsign-compare -DNDEBUG -g -fwrapv -O3 -Wall -fPIC -I/home/circleci/project/.venv/include -I/usr/local/include/python3.7m -c lib/sqlalchemy/cextension/resultproxy.c -o build/temp.linux-x86_64-3.7/lib/sqlalchemy/cextension/resultproxy.o
gcc -pthread -shared build/temp.linux-x86_64-3.7/lib/sqlalchemy/cextension/resultproxy.o -L/usr/local/lib -lpython3.7m -o build/lib.linux-x86_64-3.7/sqlalchemy/cresultproxy.cpython-37m-x86_64-linux-gnu.so
building 'sqlalchemy.cutils' extension
gcc -pthread -Wno-unused-result -Wsign-compare -DNDEBUG -g -fwrapv -O3 -Wall -fPIC -I/home/circleci/project/.venv/include -I/usr/local/include/python3.7m -c lib/sqlalchemy/cextension/utils.c -o build/temp.linux-x86_64-3.7/lib/sqlalchemy/cextension/utils.o
gcc -pthread -shared build/temp.linux-x86_64-3.7/lib/sqlalchemy/cextension/utils.o -L/usr/local/lib -lpython3.7m -o build/lib.linux-x86_64-3.7/sqlalchemy/cutils.cpython-37m-x86_64-linux-gnu.so


creating build/temp.linux-x86_64-3.7/lib/sqlalchemy/cextension
x86_64-linux-gnu-gcc -pthread -DNDEBUG -g -fwrapv -O2 -Wall -g -fstack-protector-strong -Wformat -Werror=format-security -Wdate-time -D_FORTIFY_SOURCE=2 -fPIC -I/home/kdas/code/securedrop-debian-packaging/.venv/include -I/usr/include/python3.7m -c lib/sqlalchemy/cextension/processors.c -o build/temp.linux-x86_64-3.7/lib/sqlalchemy/cextension/processors.o
x86_64-linux-gnu-gcc -pthread -shared -Wl,-O1 -Wl,-Bsymbolic-functions -Wl,-z,relro -Wl,-z,relro -g -fstack-protector-strong -Wformat -Werror=format-security -Wdate-time -D_FORTIFY_SOURCE=2 build/temp.linux-x86_64-3.7/lib/sqlalchemy/cextension/processors.o -o build/lib.linux-x86_64-3.7/sqlalchemy/cprocessors.cpython-37m-x86_64-linux-gnu.so
building 'sqlalchemy.cresultproxy' extension
x86_64-linux-gnu-gcc -pthread -DNDEBUG -g -fwrapv -O2 -Wall -g -fstack-protector-strong -Wformat -Werror=format-security -Wdate-time -D_FORTIFY_SOURCE=2 -fPIC -I/home/kdas/code/securedrop-debian-packaging/.venv/include -I/usr/include/python3.7m -c lib/sqlalchemy/cextension/resultproxy.c -o build/temp.linux-x86_64-3.7/lib/sqlalchemy/cextension/resultproxy.o
x86_64-linux-gnu-gcc -pthread -shared -Wl,-O1 -Wl,-Bsymbolic-functions -Wl,-z,relro -Wl,-z,relro -g -fstack-protector-strong -Wformat -Werror=format-security -Wdate-time -D_FORTIFY_SOURCE=2 build/temp.linux-x86_64-3.7/lib/sqlalchemy/cextension/resultproxy.o -o build/lib.linux-x86_64-3.7/sqlalchemy/cresultproxy.cpython-37m-x86_64-linux-gnu.so
building 'sqlalchemy.cutils' extension
x86_64-linux-gnu-gcc -pthread -DNDEBUG -g -fwrapv -O2 -Wall -g -fstack-protector-strong -Wformat -Werror=format-security -Wdate-time -D_FORTIFY_SOURCE=2 -fPIC -I/home/kdas/code/securedrop-debian-packaging/.venv/include -I/usr/include/python3.7m -c lib/sqlalchemy/cextension/utils.c -o build/temp.linux-x86_64-3.7/lib/sqlalchemy/cextension/utils.o
x86_64-linux-gnu-gcc -pthread -shared -Wl,-O1 -Wl,-Bsymbolic-functions -Wl,-z,relro -Wl,-z,relro -g -fstack-protector-strong -Wformat -Werror=format-security -Wdate-time -D_FORTIFY_SOURCE=2 build/temp.linux-x86_64-3.7/lib/sqlalchemy/cextension/utils.o -o build/lib.linux-x86_64-3.7/sqlalchemy/cutils.cpython-37m-x86_64-linux-gnu.so
installing to build/bdist.linux-x86_64/wheel

If you want to see the difference in the flags, you can try out the following command:

python3 -m sysconfig

Look for PY_CFLAGS and related flags in the command output. Reproducibility depends on the environment, and we should not expect the latest container image (with the latest Python 3.7.x release) creating the same thing like in Debian Buster, but the failure started recently, we did not notice this a few months. Also, this means in future we should enable reproducibility tests on nightlies in CI.

Get a TLS certificate for your onion service

For a long time, I wanted to have a certificate for the onion address of my blog. Digicert was the only CA who was providing those certificates with an Extended Validation. Those are costly and suitable for an organization to get, but not for me personally, especially due to the cost.

TLS certificate working

A few days ago, on IRC, I found out that Harica is providing Domain validation for the onion sites for around €30 per year. I jumped in to get one. At the same time, ahf was also getting his certificate. He helped me with the configuration for nginx.

How to get your own certificate?

  • Make sure you have your site running as Tor v3 onion service
  • Create an account at https://cm.harica.gr/
  • Goto server certificates on the left bar, and make a new request for your domain, provide the onion address as requested in the form.
  • It will give you the option to upload a CSR Certificate Signing Request. You can generate one by openssl req -newkey rsa:4096 -keyout kushaldas.in.onion.key -out csr.csr. For the common name, provide the same onion address.
  • After the click on the website, it will ask you to download a file and put it in your web root inside of .well-known/pki-validation/ directory. Make sure that you can access the file over Tor Browser.
  • When you click the final submission button, the system will take some time to verify the domain. After payment, you should be able to download the certificate with the full chain (the file ending with .p7b). There are 3 options on the webpage, so please remember to download the correct file :)
  • You will have to convert it into PEM format, I used the command ahf showed me: openssl pkcs7 -inform pem -in kushaldas.in.p7b -print_certs -out kushaldas.in.onion.chain.pem -outform pem

Setting up nginx

This part will be the same as any other standard nginx configuration. The following is what I use. Please uncomment the Strict-Transport-Security header line only after you are sure everything is working fine.

server {
	listen unix:/var/run/tor-hs-kushal.sock;

    server_name kushal76uaid62oup5774umh654scnu5dwzh4u2534qxhcbi4wbab3ad.onion;
    access_log /var/log/nginx/kushal_onion-access.log;

    location / {
	return 301 https://$host$request_uri;
    }

}

server {
    listen unix:/var/run/tor-hs-kushal-https.sock ssl http2;

    server_name kushal76uaid62oup5774umh654scnu5dwzh4u2534qxhcbi4wbab3ad.onion;
    access_log /var/log/nginx/kushal_onion-access.log;

    ssl_certificate /etc/pki/kushaldas.in.onion.chain.pem;
	ssl_certificate_key /etc/pki/kushaldas.in.onion.open.key;

    #add_header Strict-Transport-Security "max-age=63072000; includeSubdomains";
	add_header X-Frame-Options DENY;
	add_header X-Content-Type-Options nosniff;
    # Turn on OCSP stapling as recommended at
    # https://community.letsencrypt.org/t/integration-guide/13123
    # requires nginx version >= 1.3.7
    ssl_stapling on;
    ssl_stapling_verify on;

    # modern configuration. tweak to your needs.
    ssl_protocols TLSv1.2;
    ssl_ciphers 'ECDHE-ECDSA-AES256-GCM-SHA384:ECDHE-RSA-AES256-GCM-SHA384:ECDHE-ECDSA-CHACHA20-POLY1305:ECDHE-RSA-CHACHA20-POLY1305:ECDHE-ECDSA-AES128-GCM-SHA256:ECDHE-RSA-AES128-GCM-SHA256:ECDHE-ECDSA-AES256-SHA384:ECDHE-RSA-AES256-SHA384:ECDHE-ECDSA-AES128-SHA256:ECDHE-RSA-AES128-SHA256';
    ssl_prefer_server_ciphers on;

	index index.html;
	root /var/www/kushaldas.in;

	location / {
		try_files $uri $uri/ =404;
	}
}

I also have the following configuration in the /etc/tor/torrc file to use the unix socket files.

HiddenServiceDir /var/lib/tor/hs-kushal/
HiddenServiceVersion 3
HiddenServicePort 80 unix:/var/run/tor-hs-kushal-me.sock
HiddenServicePort 443 unix:/var/run/tor-hs-kushal-https.sock

In case you want to know more about why do you need the certificate for your onion address, the Tor Project has a very nice explanation.

Defending against side channel attacks via dependencies

Yesterday Alex Birsan posted a blog explaining how he made a supply chain attack on various companies via dependencies. I was waiting for this blog from last August when we noticed the mentioned packages on PyPI (and removed). I reached out to Alex to figure out more about the packages, and he said he will write a blog post.

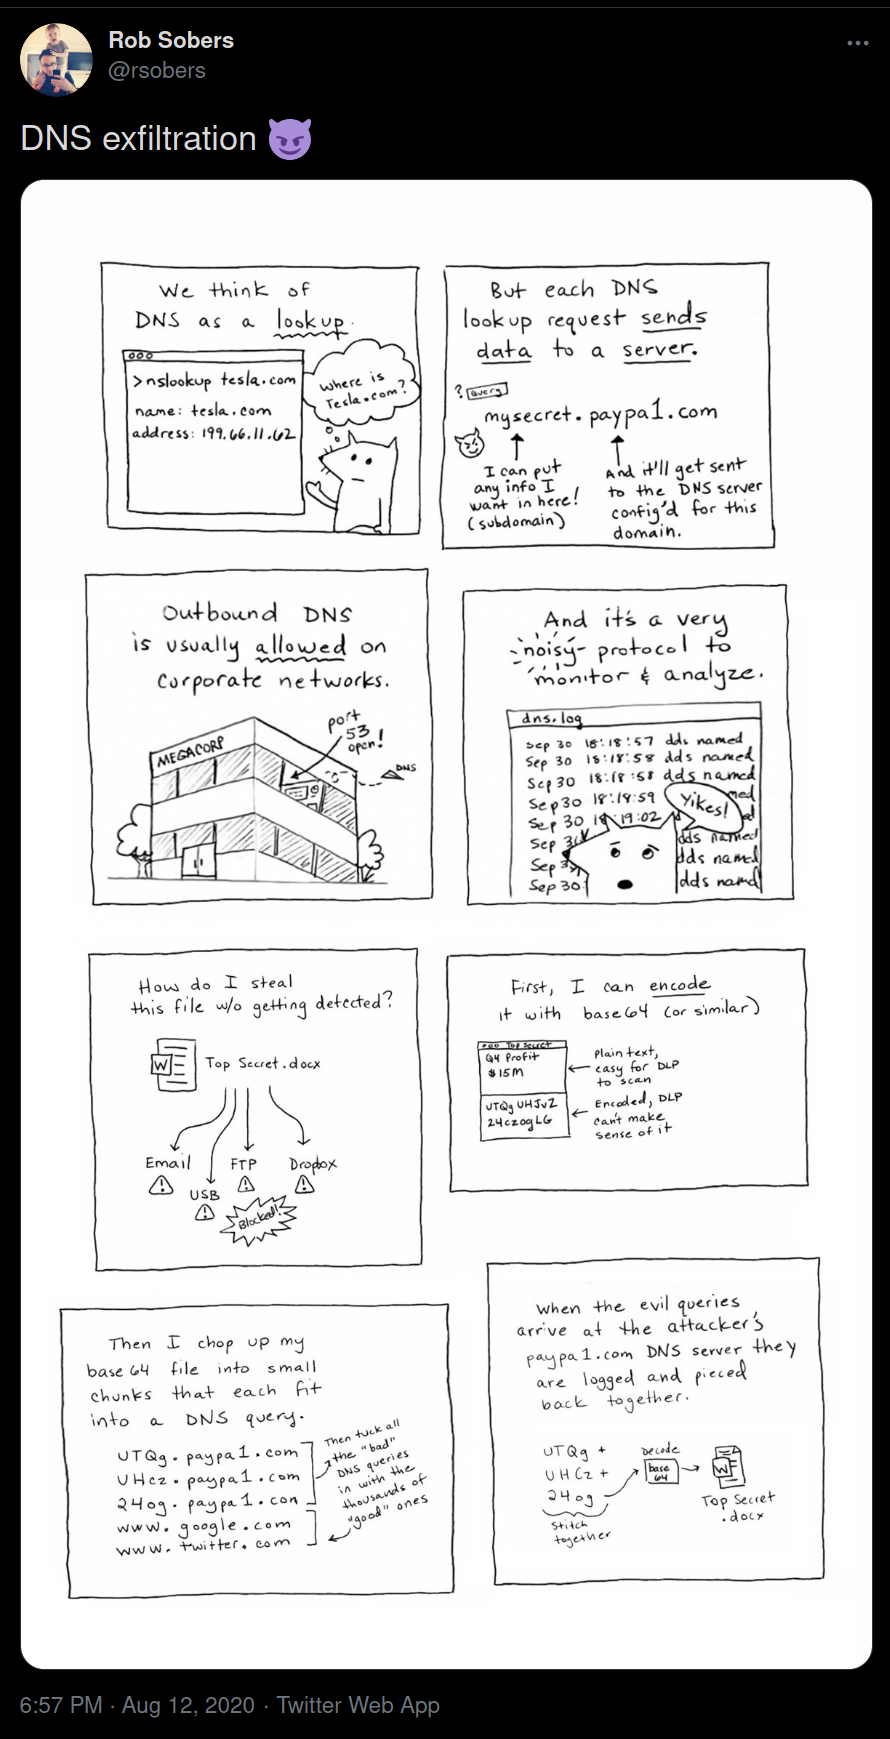
This is the same time when @rsobers also tweeted about how any similar attack works via DNS.

dns data exfiltration

At SecureDrop project, we spend a lot of time figuring out a way to defend against similar attacks. My PyCon US 2019 talk explained the full process. In simple words, we are doing the following:

  • Verify the source of every python dependency before adding/updating them. This is a manual step done by human eyes.
  • Build wheels from the verified source and store them into a package repository along with OpenPGP signed sha256sums.
  • Before building the Debian package, make sure to verify the OpenPGP signature, and also install only from the known package repository using verified (again via OpenPGP signature) wheel hashes (from the wheels we built ourselves).

Now, in the last few months, we modified these steps, and made it even easier. Now, all of our wheels are build from same known sources, and all of the wheels are then built as reproducible and stored in git (via LFS). The final Debian packages are again reproducible. Along with this and the above mentioned OpenPGP signature + package sha256sums verification via pip. We also pass --no-index the argument to pip now, to make sure that all the dependencies are getting picked up from the local directory.

Oh, and I also forgot to mention that all of the project source tarballs used in SecureDrop workstation package building are also reproducible. If you are interested in using the same in your Python project (or actually for any project's source tarball), feel free to have a look at this function.

There is also diff-review mailing list (very low volume), where we post a signed message of any source package update we review.

Johnnycanencrypt 0.4.0 released

Last night I released 0.4.0 of johnnycanencrypt module for OpenPGP in Python. This release has one update in the creating new key API. Now, we can pass one single UID as a string, or multiple in a list, or even pass None to the key creation method. This means we can have User ID-less certificates, which sequoia-pgp allows.

I also managed to fix the bug so that users can use pip to install the latest release from https://pypi.org.

You will need the rust toolchain, I generally install from https://rustup.rs.

For Fedora

sudo dnf install nettle clang clang-devel nettle-devel python3-devel

For Debian/Ubuntu

sudo apt install -y python3-dev libnettle6 nettle-dev libhogweed4 python3-pip python3-venv clang

Remember to upgrade your pip version inside of the virtual environment if you are in Buster.

For macOS

Install nettle via brew.

Installing the package

❯ python3 -m pip install johnnycanencrypt
Collecting johnnycanencrypt
  Downloading https://files.pythonhosted.org/packages/50/98/53ae56eb208ebcc6288397a66cf8ac9af5de53b8bbae5fd27be7cd8bb9d7/johnnycanencrypt-0.4.0.tar.gz (128kB)
     |████████████████████████████████| 133kB 6.4MB/s
  Installing build dependencies ... done
  Getting requirements to build wheel ... done
    Preparing wheel metadata ... done
Building wheels for collected packages: johnnycanencrypt
  Building wheel for johnnycanencrypt (PEP 517) ... done
  Created wheel for johnnycanencrypt: filename=johnnycanencrypt-0.4.0-cp37-cp37m-macosx_10_7_x86_64.whl size=1586569 sha256=41ab04d3758479a063a6c42d07a15684beb21b1f305d2f8b02e820cb15853ae1
  Stored in directory: /Users/kdas/Library/Caches/pip/wheels/3f/63/03/8afa8176c89b9afefc11f48c3b3867cd6dcc82e865c310c90d
Successfully built johnnycanencrypt
Installing collected packages: johnnycanencrypt
Successfully installed johnnycanencrypt-0.4.0
WARNING: You are using pip version 19.2.3, however version 20.2.4 is available.
You should consider upgrading via the 'pip install --upgrade pip' command.

Now, you can import the module inside of your virtual environment :)

Note: In the future, I may change the name of the module to something more meaningful :)

Running SecureDrop inside of podman containers on Fedora 33

Last week, while setting up a Fedora 33 system, I thought of running the SecureDrop development container there, but using podman instead of the Docker setup we have.

I tried to make minimal changes to our existing scripts. Added a ~/bin/docker file, with podman $@ inside (and the sha-bang line).

Next, I provided the proper label for SELinux:

sudo chcon -Rt container_file_t securedrop

The SecureDrop container runs as the normal user inside of the Docker container. I can not do the same here as the filesystem gets mounted as root, and I can not write in it. So, had to modify one line in the bash script, and also disabled another function call which deletes the /dev/random file inside of the container.

diff --git a/securedrop/bin/dev-shell b/securedrop/bin/dev-shell
index ef424bc01..37215b551 100755
--- a/securedrop/bin/dev-shell
+++ b/securedrop/bin/dev-shell
@@ -72,7 +72,7 @@ function docker_run() {
            -e LANG=C.UTF-8 \
            -e PAGE_LAYOUT_LOCALES \
            -e PATH \
-           --user "${USER:-root}" \
+           --user root \
            --volume "${TOPLEVEL}:${TOPLEVEL}" \
            --workdir "${TOPLEVEL}/securedrop" \
            --name "${SD_CONTAINER}" \
diff --git a/securedrop/bin/run b/securedrop/bin/run
index e82cc6320..0c11aa8db 100755
--- a/securedrop/bin/run
+++ b/securedrop/bin/run
@@ -9,7 +9,7 @@ cd "${REPOROOT}/securedrop"
 source "${BASH_SOURCE%/*}/dev-deps"
 
 run_redis &
-urandom
+#urandom
 run_sass --watch &
 maybe_create_config_py
 reset_demo

This time I felt that build time for verifying each cached layer is much longer than what it used to be for podman. Maybe I am just mistaken. The SecureDrop web application is working very fine inside.

Package build containers

We also use containers to build Debian packages. And those molecule scenarios were failing as ansible.posix.synchronize module could not sync to a podman container. I asked if there is anyway to do that, and by the time I woke up, Adam Miller had a branch that fixed the issue. I directly used the same in my virtual environment. The package build was successful. Then, the testinfra tests failed due as it could not create the temporary directory inside of the container. I already opened an issue for the same.

Updates from Johnnycanencrypt development in last few weeks

In July this year, I wrote a very initial Python module in Rust for OpenPGP, Johnnycanencrypt aka jce. It had very basic encryption, decryption, signing, verification, creation of new keys available. It uses https://sequoia-pgp.org library for the actual implementation.

I wanted to see if I can use such a Python module (which does not call out to the gpg2 executable) in the SecureDrop codebase.

First try (2 weeks ago)

Two weeks ago on the Friday, when I sat down to see if I can start using the module, within a few minutes, I understood it was not possible. The module was missing basic key management, more more refined control over creation, or expiration dates.

On that weekend, I wrote a KeyStore using file-based keys as backend and added most of the required functions to try again.

The last Friday

I sat down again; this time, I had a few friends (including Saptak, Nabarun) on video along with me, and together we tried to plug the jce inside SecureDrop container for Focal. After around 4 hours, we had around 5 failing tests (from 32) in the crypto-related tests. Most of the basic functionality was working, but we are stuck for the last few tests. As I was using the file system to store the keys (in simple .sec or .pub files), it was difficult to figure out the existing keys when multiple processes were creating/deleting keys in the same KeyStore.

Next try via a SQLite based KeyStore

Next, I replaced the KeyStore with an SQLite based backend. Now multiple processes can access the keys properly. With a few other updates, now I have only 1 failing test (where I have to modify the test properly) in that SecureDrop Focal patch.

While doing this experiment, I again found the benefits of writing the documentation of the library as I developed. Most of the time, I had to double-check against it to make sure that I am doing the right calls. I also added one example where one can verify the latest (10.0) Tor Browser download via Python.

In case you already use OpenPGP encryption in your tool/application, or you want to try it, please give jce a try. Works on Python3.7+. I tested on Linux and macOS, and it should work on Windows too. I have an issue open on that, and if you know how to do that, please feel free to submit a PR.

SecureDrop QA workflow and how to improve it?

Right now, we are in the QA period for the SecureDrop 1.6.0 release. SecureDrop is an open-source whistleblower submission system that media organisations and NGOs can install to securely accept documents from anonymous sources. It was originally created by the late Aaron Swartz and is now managed by Freedom of the Press Foundation.

In this blog post I am going to explain how we do the QA for the release. I hope you can suggest some ways to improve the steps and make it better.

A few properties of SecureDrop to keep in mind during QA

  • It is a complex web application that gets auto-updated via the Debian package on the servers running around the world.
  • Security has the highest priority.
  • We (the developers) do not have any access to those servers.
  • Most of the servers are maintained by the system administrator from the news organization who very little time to manage and many times no Linux skill set.
  • It is actually 2 servers per installation.
  • Officially supported hardware list contains a few different generations of Intel NUCs, and Mac Minis.
  • We also provide our own kernel package for these systems.

Test plan

The test plan for each release is tracked on the wiki and linked from the release ticket. Each time, we have the following categories of test cases:

  • Application Acceptance Testing (related to general application usage)
  • Basic Tails testing (for the tails updated GUI tool)
  • Release specific changes for each release (detailed tests for new/updated features/fixes)
  • Preflight check (for the release process itself)

We also have a private QA matrix, where we track things for each supported hardware (for update and new install) in a spreadsheet so that it becomes easier to understand if any basic test (say if the system is booting) is failing.

Please go through the test plan and the workflow. If you have any suggestions, you toot/tweet or email me. Your input is precious to make SecureDrop a better and safer tool for whistleblowers around the world.

Securedrop Worktstation and how can you help

Snowden tweet

A few weeks ago on August 12 Freedom of the Press had one event where we talked with Paul Lewis from The Gurdian about their use of SecureDrop project, and how it helps in doing the investigative journalism work. My dear friend Harlo was the host for the evening. You can watch the event on Youtube.

The second half of the event was a live demo of the new SecureDrop Workstation project.

SecureDrop is an open source whistleblower submission system that media organizations and NGOs can install to securely accept documents from anonymous sources. It was originally created by the late Aaron Swartz and is now managed by Freedom of the Press Foundation. SecureDrop is available in 20 languages.

The current SecureDrop is dependent heavily on air-gapped Tails systems. This means increased security but also means a lot of time in accessing the submissions by the journalists. SecureDrop Workstation is the next generation system coming up to help in reducing this and also provide much smoother user experience without giving up the security.

In simple words, it is a system built on top of the QubesOS, where journalists can access the submissions via a desktop application and can communicate with sources with much ease.

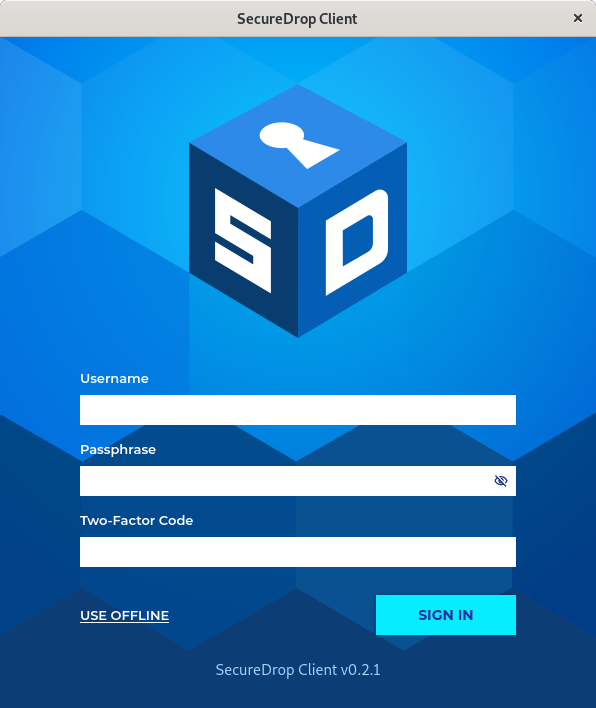
Login window

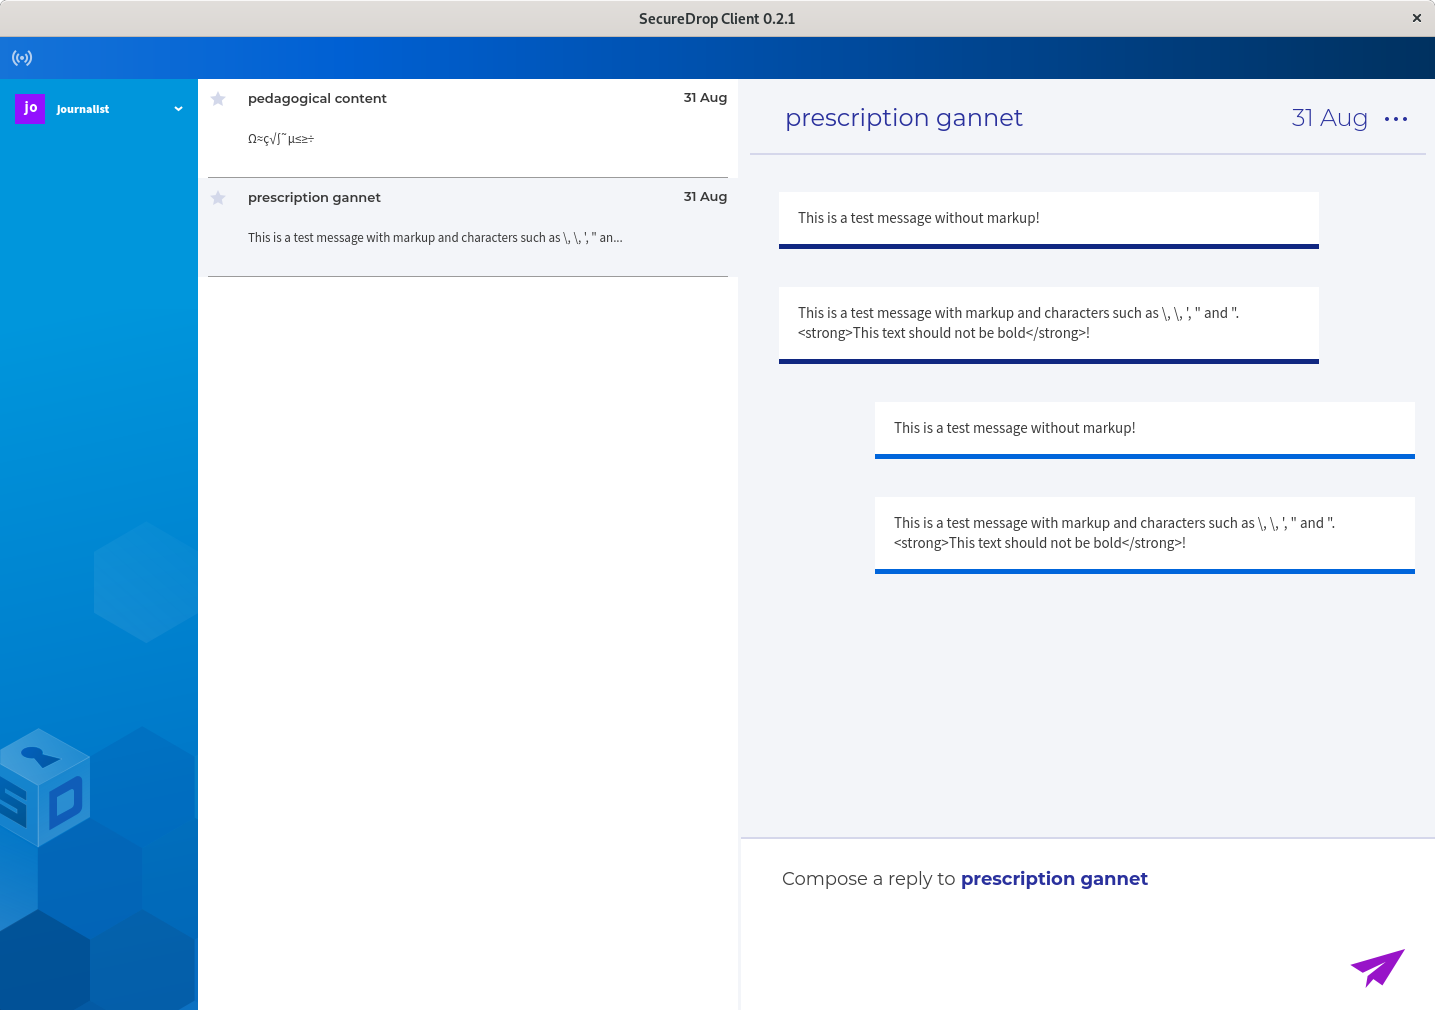
And the view for the journalists.

journalist view

You can read in detail about the idea and reasoning behind this project in this whitepaper.

At the beginning of this year, we also published the news on the first (for alpha release) security audit. You can directly jump into the full audit report too.

If you follow DEF CON, you may remember the last panel in 2019 where the usage of SecureDrop and the security audit was discussed.

You can also watch the talk at USENIX Enigma 2020 by Jennifer Helsby.

Technologies used, and how can you help?

SecureDrop is a Free Software project built with similar technologies that you all see and use every day. The main server side is written in Python, with a lot of Ansible, and molecule to test. The web application is written in Flask and contains tests written in Pytest. The documentation is written in Sphinx and maintained via ReadTheDocs. Development setup can be created using Docker, and full-scale production vms (for testing) can be created using the Vagrant.

The translations are maintained in the Weblate by the amazing community at Localization Lab.

The SecureDrop Workstation client is written in PyQt. There are many related Python modules in our Github. The packages are reproducible builds, except the RPMS.

The sources and journalists access SecureDrop via Tor Project. In Qubes OS we use both Fedora and Debian VMs.

There are many issues opened in all of these project’s repositories, and by using/testing them, you most probably will be able to find more things to be fixed. There are problems which can be solved with people from different experiences.

We do daily standup at 16:00UTC in this meeting link. Please feel free to join in and say hi.

Use DoH over Tor for your Qubes system

I was using my dns-tor-proxy tool in the AppVMs in my QubesOS system. But, at the same time I was trying to figure out how to make it the default DNS system for the whole Qubes.

ahf provided me a shell script showing how he is forwarding the DNS requests to a VPN interface. I modified the same so that all of standard DNS queries become DoH queries over the Tor network.

Setting up sys-firewall

In the following example, I am setting up the sys-firewall service VM. All other AppVMs connected to this VM as netvm will be use dns-tor-proxy without any modification.

Make sure that the template for sys-firewall has the latest Tor installed. You can get it from the official Tor repository.

Download (or build) the latest dns-tor-proxy 0.3.0 release, and put the file (as executable) in /rw/config/ directory.

Next, modify the /rw/config/rc.local file & add the following lines.

systemctl start tor
sh /rw/config/dns.sh
/rw/config/dns-tor-proxy --doh &

As you can see, we are executing another script at /rw/config/dns.sh, which has the following content. Remember to modify the DNS value to the right IP for your sys-firewall vm.


#!/bin/sh

QUBES_DNS_SERVERS="10.139.1.1 10.139.1.2"
DNS=10.137.0.x

# accept DNS requests from the other vms

iptables -I INPUT -i vif+ -p udp --dport 53 -j ACCEPT
iptables -I INPUT -i vif+ -p tcp --dport 53 -j ACCEPT

# Clean up our NAT firewall rules.
iptables --flush PR-QBS --table nat

# We take incoming traffic on TCP and UDP port 53 and forward to
# our DNS server.
for QUBES_DNS_SERVER in ${QUBES_DNS_SERVERS} ; do
    iptables --append PR-QBS --table nat --in-interface vif+ --protocol tcp --destination "${QUBES_DNS_SERVER}" --dport 53 --jump DNAT --to-destination "${DNS}":53
    iptables --append PR-QBS --table nat --in-interface vif+ --protocol udp --destination "${QUBES_DNS_SERVER}" --dport 53 --jump DNAT --to-destination "${DNS}":53
done

# Log *other* DNS service connections. This part is optional, but ensures that
# you can monitor if one of your VM's is making any traffic on port 53 with
# either TCP or UDP. If you want to log *every* DNS "connection", including the
# ones to QUBES_DNS_SERVERS, you can either move these commands up before the
# for-loop in this file or change the --apend option to be an --insert instead.
iptables --append PR-QBS --table nat --in-interface vif+ --protocol tcp --dport 53 --jump LOG --log-level 1 --log-prefix 'DNS Query: '
iptables --append PR-QBS --table nat --in-interface vif+ --protocol udp --dport 53 --jump LOG --log-level 1 --log-prefix 'DNS Query: '

Now, restart your sys-firewall vm. And you are all set for your DNS queries.