Kushal Das

FOSS and life. Kushal Das talks here.

kushal76uaid62oup5774umh654scnu5dwzh4u2534qxhcbi4wbab3ad.onion

Introducing Tugpgp

At Sunet, we have heavy OpenPGP usage. But, every time a new employee joins, it takes hours (and sometime days for some remote folks) to have their Yubikey + OpenPGP setup ready.

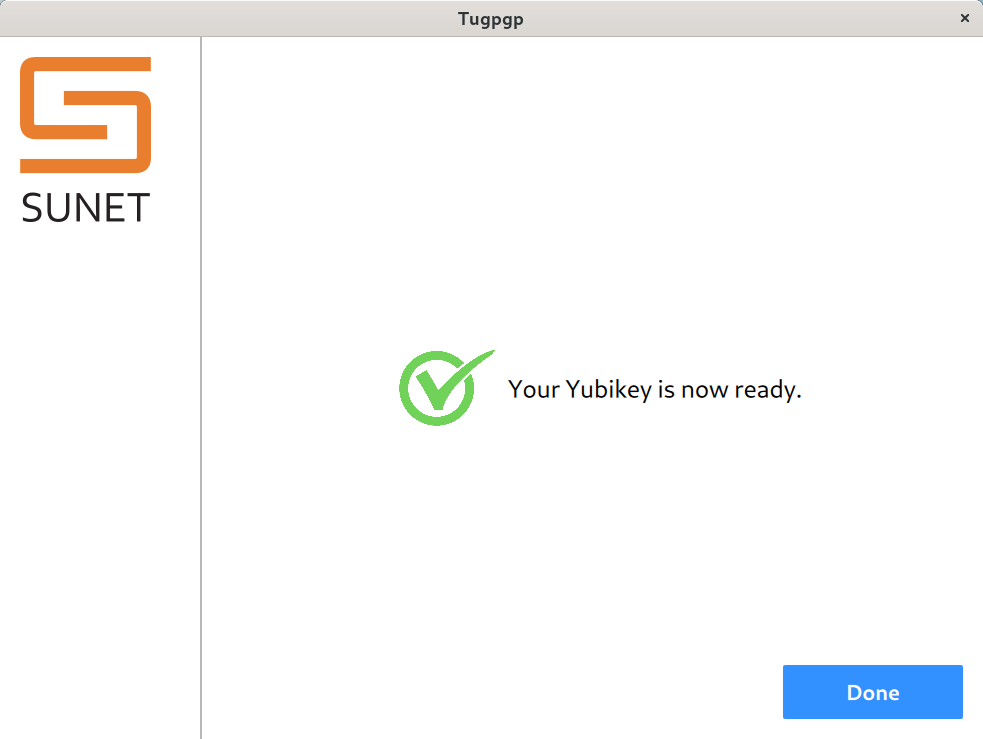
Final screen

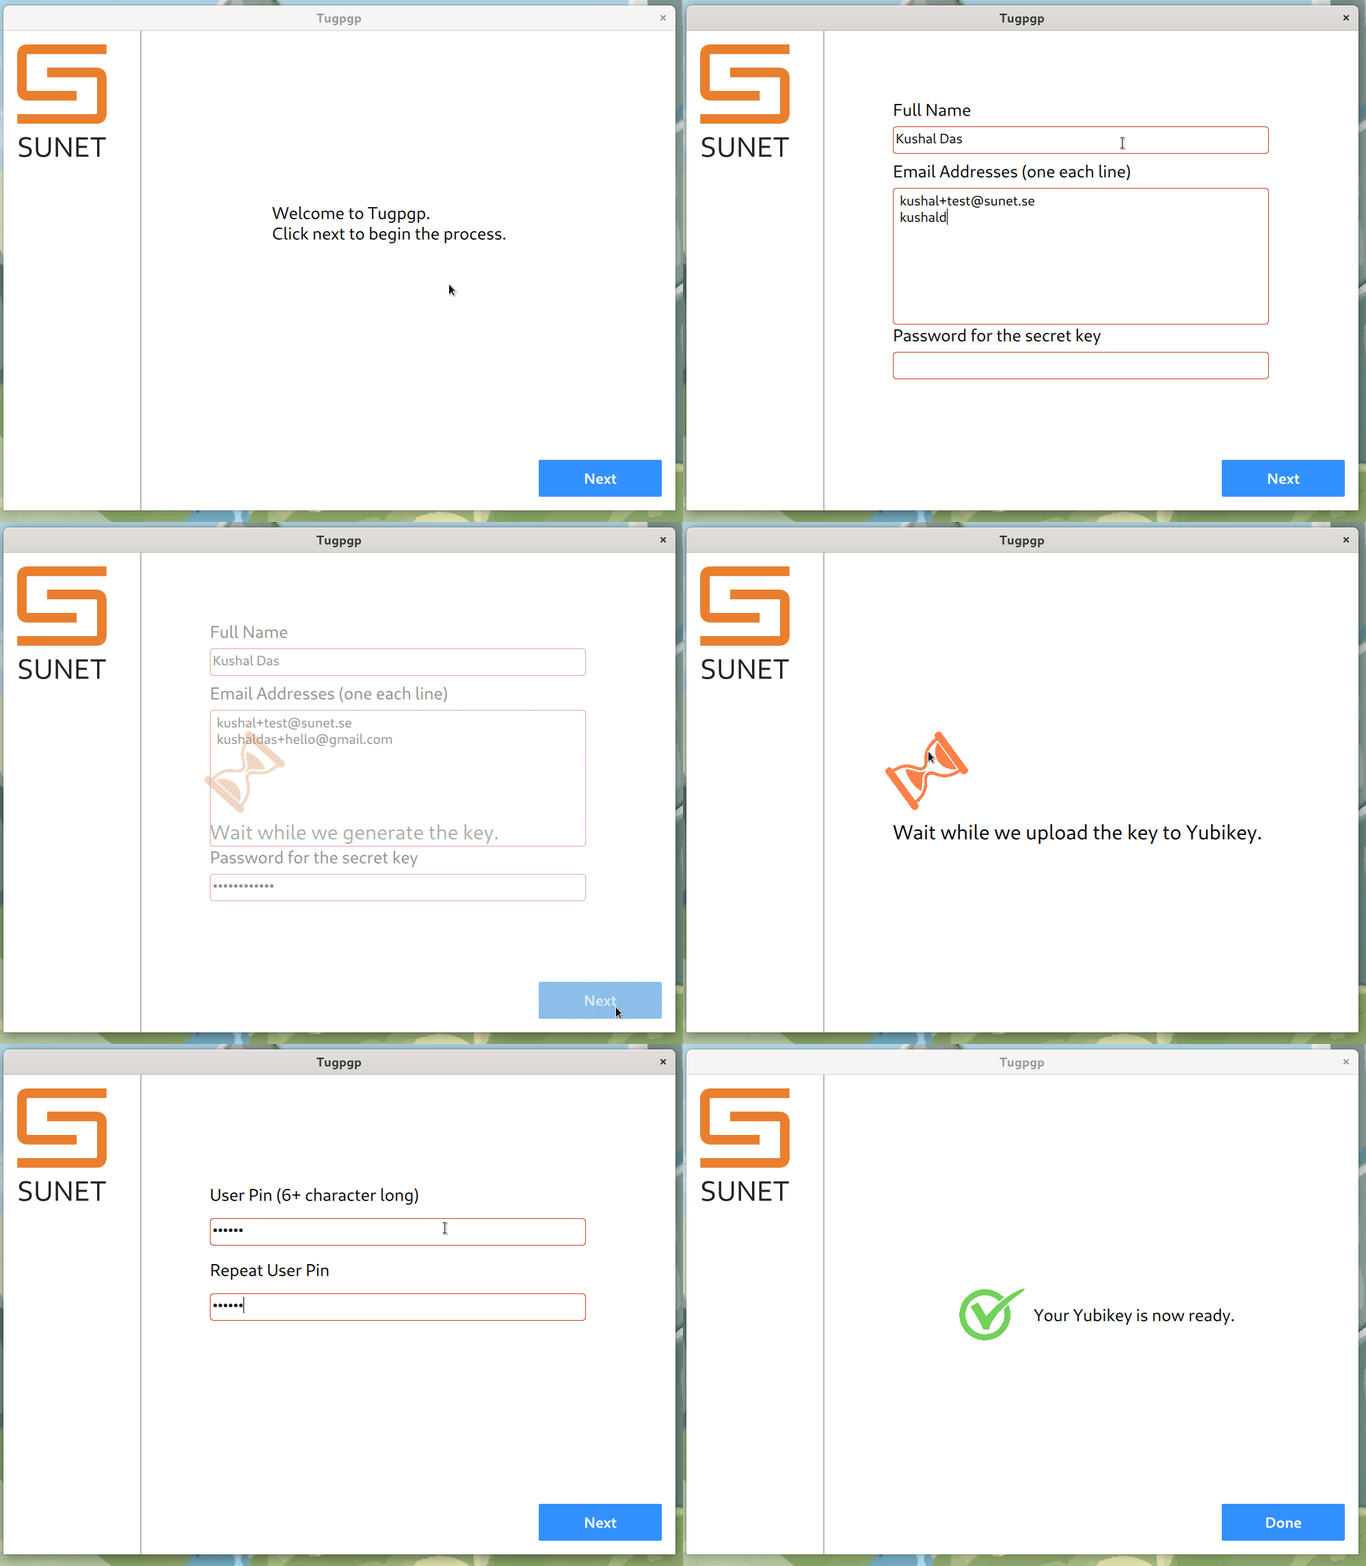
Tugpgp is a small application built with these specific requirements for creating OpenPGP keys & uploading to Yubikeys as required in Sunet. The requirements are the following:

  • It will create RSA 4096 Key
  • There will be a primacy key with Signing & Certification capability.
  • There will be an encryption and one authentication subkey.
  • All keys have 1 year expiry date.
  • During the process the secret key will not be written to the disk.
  • Encryption & signing has touch policy fixed in the Yubikey (it can not be changed).
  • Authentication has touch policy on (means it can be turned off by the user).
  • The OTP application in the Yubikey will be disabled at the end.

We have an Apple Silicon dmg and AppImage (for Ubuntu 20.04 onwards) in the release page. This is my first ever AppImage build, the application still needs pcscd running on the host system. I tested it on Debian 11, Fedora 37 with Yubikey 4 & Yubikey 5.

Oh, there is also a specific command line argument if you really want to save the private key :) But, you will have to find it yourself :).

demo gif

If you are looking for the generic all purpose application which will allow everyone of us to deal with OpenPGP keys and Yubikeys, then you should check the upcoming release of Tumpa, we have a complete redesign done there (after proper user research done by professionals).

Johnnycanencrypt 0.13.0 released

I just now released v0.13.0 of my johnnycanencrypt project. It is a Python module written in Rust, which provides OpenPGP functionality including allows usage of Yubikey 4/5 as smartcards. From 0.12.0 it is now licensed as LGPL-3.0-or-later.

Major updates in this release (and in the previous one are):

  • Adds enable_otp_usb in rjce.
  • Adds disable_otp_usb in rjce.
  • Changed license to LGPL-3.0-or-later
  • We can now disable OTP for both YubiKey4/5 #131.

For many folks disabling the OTP application in the Yubikey is must, otherwise we all saw random bytes dropping on the shell/document/chat thanks to a touch to the key. I tested the code in both Yubikey 4 and 5. I hope this will work well in the field.

Johnnycanencrypt 0.11.0 released

A couple of days ago I released Johnnycanencrypt v0.11.0. It is a Python module for OpenPGP written in Rust.

The most interesting update is for Linux users, now we have pre-built wheels for Python 3.8, 3.9, 3.10 & 3.11. You can just install that via python3 -m pip install johnnycanencrypt. You can also do the same on Intel Macs (for Python 3.10 and 3.11). But, I failed to build for Apple Silicon systems. I will work on it in the coming weeks.

To know the Yubikey card version we can call get_card_version function written in Rust.

>>> rjce.get_card_version()
(4, 3, 1)

Or directly use the function get_card_touch_policies to get a list of policies for the current Yubikey.

>>> import johnnycanencrypt as jce
>>> jce.get_card_touch_policies()
[TouchMode.On, TouchMode.Off, TouchMode.Fixed]

Then we now can also set the touch policies for a given Yubikey. For example:

rjce.set_keyslot_touch_policy(
    b"12345678", rjce.KeySlot.Authentication, rjce.TouchMode.On
)

It will be nice to see what people will build on top this. I also missed to blog about the v0.10.0 release. You should that changelog too.

Introducing pyarti, python module for the Tor Project

python3 -m pip install pyarti

pyarti is a Python module written in Rust using Arti from the Tor Project. Right now pyarti is in the initial stage, and you can create a SOCKS5 proxy object, and pass any Python connection via it. The following example creates a default proxy at port 9150 , and then verifies that the connection works. Finally we fetch a web page and print the text.

from pyarti import OnionProxy
import httpx
from httpx_socks import SyncProxyTransport

URL = "https://httpbin.org/get"

p = OnionProxy()
assert p.verify(blocking=True)
# Now we can use the proxy
transport = SyncProxyTransport.from_url("socks5://127.0.0.1:9150")
with httpx.Client(transport=transport) as client:
    res = client.get(URL)
    assert res.status_code == 200
    print(res.text)

In the coming months I am hoping to add more detailed API to the module. For now you can read the documentation.

Johnnycanencrypt 0.9.0 release

3 days ago I released Johnnycanencrypt 0.9.0. Here is the changelog:

- Adds `setuptools-rust` as build system.
- Key.uids now contains the certification details of each user id.
- `merge_keys` in rjce now takes a force boolean argument.
- `certify_key` can sign/certify another key by both card and on disk primary key.

The first biggest change is related to build system, now we are using setuptools-rust to build. This change happened as dkg is working towards packaging the module for Debian.

The other big change is about certifying someone's key. We can use the primary key (either on disk or on Yubikey) to do the signing.

k = ks.certify_key(
    my_key,
    k,
    ["Kushal Das <kushaldas@gmail.com>", "Kushal Das <kushal@fedoraproject.org>"],
    jce.SignatureType.PositiveCertification,
    password=password,
)

In the above example I am signing two user ids of the key k using my_key with a PositiveCertification.

johnnycanencrypt 0.7.0 released

Today I released Johnnycanencrypt 0.7.0. It has breaking change of some function names.

  • create_newkey renamed to create_key
  • import_cert renamed to import_key

But, the major work done are in few different places:

  • Handling errors better, no more normal Rust panics, instead providing better Python exceptions as CryptoError.
  • We can now sign bytes/files in both detached & in normal compressed binary form.
  • Signature can be done via smartcards, and verification works as usual.

In the Github release page you can find an OpenPGP signature, which you can use to verify the release. You can also verify via sigstore.

SIGSTORE_LOGLEVEL=debug python -m sigstore verify --cert-email mail@kushaldas.in --cert-oidc-issuer https://github.com/login/oauth johnnycanencrypt-0.7.0.tar.gz
DEBUG:sigstore._cli:parsed arguments Namespace(subcommand='verify', certificate=None, signature=None, cert_email='mail@kushaldas.in', cert_oidc_issuer='https://github.com/login/oauth', rekor_url='https://rekor.sigstore.dev', staging=False, files=[PosixPath('johnnycanencrypt-0.7.0.tar.gz')])
DEBUG:sigstore._cli:Using certificate from: johnnycanencrypt-0.7.0.tar.gz.crt
DEBUG:sigstore._cli:Using signature from: johnnycanencrypt-0.7.0.tar.gz.sig
DEBUG:sigstore._cli:Verifying contents from: johnnycanencrypt-0.7.0.tar.gz
DEBUG:sigstore._verify:Successfully verified signing certificate validity...
DEBUG:sigstore._verify:Successfully verified signature...
DEBUG:urllib3.connectionpool:Starting new HTTPS connection (1): rekor.sigstore.dev:443
DEBUG:urllib3.connectionpool:https://rekor.sigstore.dev:443 "POST /api/v1/index/retrieve/ HTTP/1.1" 200 85
DEBUG:urllib3.connectionpool:https://rekor.sigstore.dev:443 "GET /api/v1/log/entries/362f8ecba72f4326972bc321d658ba3c9197b29bb8015967e755a97e1fa4758c13222bc07f26d27c HTTP/1.1" 200 None
DEBUG:sigstore._verify:Successfully verified Rekor entry...
OK: johnnycanencrypt-0.7.0.tar.gz

I took 8 months for this release, now time to write some tools to use it in more places :)

Tor sysadmin 101 workshop for new relay operators

Tor log

On 4th June, at 19:00 UTC, we are doing an online workshop to help out new relay operators. If you ever wanted to help the Tor Project, or just curious about what is required to become a relay/bridge operator, you should join into the workshop.

The workshop is specially geared towards folks who are new to the land of Internet facing services. You will get to chat with many other operators and people from the Tor Project, and ask any doubts you have.

Register for the event, and share the news at your local groups/lists. Ask your friends to join :)

Using your OpenPGP key on Yubikey for ssh

Last week I wrote about how you can generate ssh keys on your Yubikeys and use them. There is another way of keeping your ssh keys secure, that is using your already existing OpenPGP key (along with authentication subkey) on a Yubikey and use it for ssh.

In this post I am not going to explain the steps on how to move your key to a Yubikey, but only the steps required to start using it for ssh access. Feel free to have a look at Tumpa if you want an easy way to upload keys to your card.

Enabling gpg-agent for ssh

First we have to add gpg-agent.conf file with correct configuration. Remember to use a different pinentry program if you are on Mac or KDE.

❯ echo "enable-ssh-support" >> ~/.gnupg/gpg-agent.conf
❯ echo "pinentry-program $(which pinentry-gnome)" >> ~/.gnupg/gpg-agent.conf
❯ echo "export SSH_AUTH_SOCK=$(gpgconf --list-dirs agent-ssh-socket)" >> ~/.bash_profile
❯ source ~/.bash_profile 
❯ gpg --export-ssh-key <KEYID> > ~/.ssh/id_rsa_yubikey.pub

At this moment your public key (for ssh usage) is at ~/.ssh/id_rsa_yubikey.pub file. You can use it in the ~/.ssh/authorized_keys file on the servers as required.

We can then restart the gpg-agent using the following command and then also verify that the card is attached and gpg-agent can find it.

❯ gpgconf --kill gpg-agent
❯ gpg --card-status

Enabling touch policy on the card

We should also enable touch policy on the card for authentication operation. This means every time you will try to ssh using the Yubikey, you will have to touch the interface (it will be flashing the light till you touch it).

❯ ykman openpgp keys set-touch aut On
Enter Admin PIN: 
Set touch policy of authentication key to on? [y/N]: y

If you still have servers where you have only the old key, ssh client will be smart enough to ask you the passphrase for those keys.

Using onion services over unix sockets and nginx

I have explained before about how to create Onion services, this provides an easy solution to expose any service from inside of your home network to the Internet, in a secured manner (authorized services). But, in all of those examples I used an IP/port combination to expose/talk to the internal service. Instead you can also use unix sockets to do the same.

To do so, use the following style in your torrc file, this example is from my blog.

HiddenServiceDir /var/lib/tor/hidden/
HiddenServiceVersion 3
HiddenServicePort 80 unix:/var/run/tor-hs-kushal.sock
HiddenServicePort 443 unix:/var/run/tor-hs-kushal-https.sock

And the corresponding nginx configuration parts:

server {
    listen unix:/var/run/tor-hs-kushal.sock;

    server_name kushal76uaid62oup5774umh654scnu5dwzh4u2534qxhcbi4wbab3ad.onion;
    access_log /var/log/nginx/kushal_onion-access.log;

    location / {
        return 301 https://$host$request_uri;
    }

}

server {
    listen unix:/var/run/tor-hs-kushal-https.sock ssl http2;

    server_name kushal76uaid62oup5774umh654scnu5dwzh4u2534qxhcbi4wbab3ad.onion;
    access_log /var/log/nginx/kushal_onion-access.log;
    ...

Now if you start tor and also nginx pointing to the same unix domain, things will go fine. But, nginx will fail to restart, you will have to remove the socket files by hand to restart. This happens due to a bug in nginx. You can edit the restart process and fix this issue.

systemctl restart nginx

Add the following the configuration file in the correct location (between the comments):

### Editing /etc/systemd/system/nginx.service.d/override.conf
### Anything between here and the comment below will become the new contents of the file

### Editing /etc/systemd/system/nginx.service.d/override.conf Anything between here and the comment below will become the new contents of the file
[Service]
ExecStop=
ExecStop=-/sbin/start-stop-daemon --quiet --stop --retry TERM/5 --pidfile /run/nginx.pid

### Lines below this comment will be discarded

If you go and read the original ExecStop value, you will find that it is using SIGQUIT, but that does not remove the socket files, only a SIGTERM does. You can read more in the []upstream bug](https://trac.nginx.org/nginx/ticket/753).

After this nginx should be able to restart without any trouble.

Thank you reader who emailed and asked for this.

Setting up local mTLS environment using mkcert

mTLS or mutual TLS is a way of doing mutual authentication. When we talk about TLS in general, we only about TLS for the servers/services. There the clients can verify that they are connected to the right server. But, the server does not know much about the clients themselves. This can be done via mTLS, say for services talking to each other. To know more please read the Cloudflare writeup on mTLS.

In this blog post we will see how we can use the mkcert from Filippo Valsorda to setup a local environment, so that you can play-around & learn.

Install nss-tools package for your system

For Fedora, I installed it via dnf.

$ sudo dnf install nss-tools -y

Getting mkcert

I grabbed the latest release from the gitub release page.

$ wget https://github.com/FiloSottile/mkcert/releases/download/v1.4.3/mkcert-v1.4.3-linux-amd64
$ mv mkcert-v1.4.3-linux-amd64 ~/bin/mkcert
$ chmod +x ~/bin/mkcert

Setting up the local CA

$ mkcert -install
Created a new local CA 💥
The local CA is now installed in the system trust store! ⚡️
The local CA is now installed in the Firefox trust store (requires browser restart)! 🦊

This will create two important files inside of your user home directory.

❯ ls -l .local/share/mkcert/
.r--------@ 2.5k kdas 20 Dec 12:14 rootCA-key.pem
.rw-r--r--@ 1.8k kdas 20 Dec 12:14 rootCA.pem

Note:: The rootCA-key.pem is an important file and it can allow people to decrypt traffic from your system. Do not share or randomly copy it around.

The rootCA.pem file contains the public key, we can use the openssl tool to inspect it.

❯ openssl x509 -text -noout -in ~/.local/share/mkcert/rootCA.pem
Certificate:
    Data:
        Version: 3 (0x2)
        Serial Number:
            91:71:92:a2:d0:ac:9a:27:88:85:e0:30:40:b0:1d:e9
        Signature Algorithm: sha256WithRSAEncryption
        Issuer: O = mkcert development CA, OU = kdas@localhost.localdomain (Kushal Das), CN = mkcert kdas@localhost.localdomain (Kushal Das)
        Validity
            Not Before: Dec 20 11:14:33 2021 GMT
            Not After : Dec 20 11:14:33 2031 GMT
        Subject: O = mkcert development CA, OU = kdas@localhost.localdomain (Kushal Das), CN = mkcert kdas@localhost.localdomain (Kushal Das)
        Subject Public Key Info:
            Public Key Algorithm: rsaEncryption
                RSA Public-Key: (3072 bit)
                Modulus:
                    00:d4:67:ae:92:75:5e:ff:8b:26:0f:c4:e1:c5:61:
                    90:3a:4d:2e:1e:bf:bb:d5:77:2d:b0:fc:8d:10:5d:
                    1d:52:67:44:65:a0:1f:59:ee:37:69:39:d9:94:9c:
                    c2:0d:39:11:c3:8b:71:94:3a:75:a9:46:ad:5f:ed:
                    4f:7c:3b:6e:75:21:5a:41:70:e0:21:4b:dc:cf:2e:
                    b0:85:e6:29:db:3d:6a:50:71:0f:9f:63:bd:39:89:
                    53:d8:ae:ad:81:97:b3:8d:7b:95:95:18:d9:f2:9d:
                    7d:cb:71:27:b3:8e:62:1b:70:0f:03:2d:03:e5:9b:
                    9f:70:7e:db:3b:73:3a:c1:ea:d1:a7:0b:a9:1b:e0:
                    df:99:92:79:01:e1:db:22:9e:b2:3e:82:86:a7:8e:
                    8b:00:cf:0a:4f:be:81:4e:b4:a2:ef:b3:c4:4a:14:
                    6d:d2:28:ba:62:26:cf:13:3e:68:cd:96:3e:54:a5:
                    16:1d:6f:d4:a7:9b:7f:04:ac:b9:7b:8a:4e:73:5c:
                    a0:19:7d:0b:47:22:e0:2f:1a:88:68:c5:9d:84:b9:
                    1e:1e:45:58:15:bc:6a:cf:57:c4:a7:52:6f:92:70:
                    53:54:07:4b:35:4f:40:31:7b:86:fc:fa:95:b3:ce:
                    67:0a:ae:11:5f:e7:44:9a:6e:32:bf:89:63:26:88:
                    db:c4:50:bc:fa:67:cb:64:92:e3:9e:fa:f1:d3:b6:
                    f9:7f:1f:2c:16:15:24:7c:96:56:f6:b6:b6:bf:d1:
                    7a:88:5a:a4:03:3a:ca:91:ae:7e:1b:c4:84:20:96:
                    11:52:35:bb:10:eb:42:85:18:6d:7a:4c:3c:38:b7:
                    e6:04:97:5d:c3:ab:cf:ce:16:b1:7b:01:a5:92:6f:
                    f1:ee:82:8c:87:6b:a2:a4:dd:f6:bc:5b:3c:58:81:
                    0d:a8:1f:38:78:0e:d0:16:68:dd:c5:3a:5f:2b:f1:
                    b5:56:e4:9f:f5:ba:c5:08:66:89:55:53:8c:cd:c6:
                    09:d2:06:9d:33:17:98:12:fd:cf
                Exponent: 65537 (0x10001)
        X509v3 extensions:
            X509v3 Key Usage: critical
                Certificate Sign
            X509v3 Basic Constraints: critical
                CA:TRUE, pathlen:0
            X509v3 Subject Key Identifier: 
                33:C5:DF:AA:92:BA:30:44:A0:04:96:72:81:D7:46:31:32:AC:30:D0
    Signature Algorithm: sha256WithRSAEncryption
         a9:f6:e7:50:46:e9:62:12:e3:97:c9:23:bd:5a:d6:50:eb:94:
         7f:7d:7a:3f:f9:c1:f2:37:3c:d0:e7:d8:1b:90:83:b6:77:ec:
         fa:a9:1c:5a:88:4a:8d:00:cc:0a:ff:8e:e6:5a:6e:ad:40:de:
         98:ba:73:b0:67:8a:37:93:ba:a0:c3:18:e0:37:6a:47:36:5c:
         a0:9e:7a:18:ca:ad:79:c9:ca:2d:3c:39:f6:38:a7:f4:0f:c8:
         86:25:a5:45:63:ce:66:d6:dc:8f:68:69:a5:bb:45:b8:85:4f:
         59:71:98:0a:c2:07:c9:88:6e:b5:26:3a:e4:2e:a7:94:e4:bf:
         5a:71:58:38:40:88:0d:7b:78:cc:f8:3f:a7:6c:dc:15:7d:55:
         e5:2d:42:22:a1:2d:d1:87:15:a8:58:99:26:20:58:7c:33:fd:
         74:c6:72:b0:57:fc:94:a5:36:64:5a:84:ba:44:ff:5f:00:f2:
         cb:b4:ac:79:34:5d:2e:78:0f:34:3b:ad:0d:12:5c:e3:d6:0e:
         0b:2a:61:43:21:72:47:2b:a3:2b:15:83:1a:eb:26:96:a1:05:
         36:83:75:7f:78:1d:b8:67:a0:e7:f5:29:c2:d1:1e:40:5e:5a:
         1c:92:4f:32:ae:c2:ca:43:8e:0b:16:5e:5f:28:5b:97:22:e5:
         c7:a3:a6:19:ca:cc:b7:31:8a:7d:0c:09:7f:09:18:6d:9c:21:
         34:b7:bf:65:ac:c3:d1:a2:aa:80:30:18:be:3e:fb:18:2d:de:
         cc:d3:61:e7:8b:26:b4:84:b6:74:c9:2f:4c:ca:b1:35:05:a3:
         87:54:11:4c:32:fb:ab:5e:20:45:8f:c2:52:3d:d6:45:08:43:
         23:f8:7b:29:85:5b:d5:4d:2f:94:ef:94:4f:b3:3d:6e:6b:7e:
         5d:4e:fc:8e:86:2f:fa:86:a4:ba:4a:71:f0:ac:3c:5e:b9:20:
         25:2b:43:f3:45:5d:86:d6:d6:25:b7:b5:d7:8b:2c:2e:2e:f5:
         76:eb:6c:ea:a4:83

If you look closely at the X509v3 extensions section of the output, you will notice two important things:

  • It is a CA certificate
  • pathlen 0 means it can not sign/create any new CA but only sign leaf certificates. Do man x509v3_config to learn more.

Setting up certificate for local development

❯ cd ~/code/mtls-example
❯ mkcert localhost 127.0.0.1 ::1

Created a new certificate valid for the following names 📜
 - "localhost"
 - "127.0.0.1"
 - "::1"

The certificate is at "./localhost+2.pem" and the key at "./localhost+2-key.pem" ✅

It will expire on 20 March 2024 🗓

Starting a nginx podman container with the certificate

Next we will start a podman nginx container to try to out the certificate. On my Fedora machine, I will also have take care of SELinux. First let us create a default.conf.

server {
  listen [::]:443 ssl http2 ipv6only=on;
  listen 443 ssl http2;
  server_name  localhost;
  ssl_protocols TLSv1.3;
  ssl_certificate /etc/nginx/conf.d/localhost+2.pem;
  ssl_certificate_key /etc/nginx/conf.d/localhost+2-key.pem;

  location / {
    root   /usr/share/nginx/html;
    index  index.html index.htm;
  }
  error_page   500 502 503 504  /50x.html;
  location = /50x.html {
    root   /usr/share/nginx/html;
  }
}

Then, I will copy the rootCA.pem file in the current directory and start the container.

❯ cp ~/.local/share/mkcert/rootCA.pem .
❯ chcon -Rt svirt_sandbox_file_t .
❯ podman run --rm -p 8080:443 -v $PWD:/etc/nginx/conf.d/ nginx

and from another terminal I can verify the setup using curl.

❯ curl --tlsv1.3 https://localhost:8080
<!DOCTYPE html>
<html>
<head>
<title>Welcome to nginx!</title>
<style>
html { color-scheme: light dark; }
body { width: 35em; margin: 0 auto;
font-family: Tahoma, Verdana, Arial, sans-serif; }
</style>
</head>
<body>
<h1>Welcome to nginx!</h1>
<p>If you see this page, the nginx web server is successfully installed and
working. Further configuration is required.</p>

<p>For online documentation and support please refer to
<a href="http://nginx.org/">nginx.org</a>.<br/>
Commercial support is available at
<a href="http://nginx.com/">nginx.com</a>.</p>

<p><em>Thank you for using nginx.</em></p>
</body>
</html>

Same via Python httpx module (includes commands to create and activate the Python virtualenv).

❯ python3 -m venv .venv
❯ source .venv/bin/activate
❯ python3 -m pip install httpx
>>> import httpx
>>> r = httpx.get("https://localhost:8080/", verify="./rootCA.pem")
>>> r
<Response [200 OK]>

Now let us enable client side certificate and verification in nginx

We will modify the default.conf to the following.

server {
  listen [::]:443 ssl http2 ipv6only=on;
  listen 443 ssl http2;
  server_name  localhost;
  ssl_protocols TLSv1.3;
  ssl_certificate /etc/nginx/conf.d/localhost+2.pem;
  ssl_certificate_key /etc/nginx/conf.d/localhost+2-key.pem;
  ssl_client_certificate /etc/nginx/conf.d/rootCA.pem;
  ssl_verify_client on;
  ssl_verify_depth  3;

  location / {
    root   /usr/share/nginx/html;
    index  index.html index.htm;
  }
  error_page   500 502 503 504  /50x.html;
  location = /50x.html {
    root   /usr/share/nginx/html;
  }
}

and restart the podman container.

Now, let us try the same curl command and Python code.

❯ curl --tlsv1.3 https://localhost:8080
<html>
<head><title>400 No required SSL certificate was sent</title></head>
<body>
<center><h1>400 Bad Request</h1></center>
<center>No required SSL certificate was sent</center>
<hr><center>nginx/1.21.4</center>
</body>
</html>
>>> r = httpx.get("https://localhost:8080/", verify="./rootCA.pem")
>>> r
<Response [400 Bad Request]>

Creating a client side certificate and using the same

Here we are saying to use the name nehru in the client certificate. Note: I am running the commands in a different day, that is why the dates will not match with the CA certificate date :)

❯ mkcert -client nehru

Created a new certificate valid for the following names 📜
 - "nehru"

The certificate is at "./nehru-client.pem" and the key at "./nehru-client-key.pem" ✅

It will expire on 22 March 2024 🗓

If you use the openssl x509 -text -noout -in ./nehru-client.pem and check the details of the certificate, you will notice the following:

        X509v3 extensions:
            X509v3 Key Usage: critical
                Digital Signature, Key Encipherment
            X509v3 Extended Key Usage: 
                TLS Web Client Authentication, TLS Web Server Authentication

Next, we will use the same certificates in curl.

❯ curl --tlsv1.3 --key nehru-client-key.pem --cert nehru-client.pem https://localhost:8080

And then in Python.

>>> cert = ("./nehru-client.pem", "./nehru-client-key.pem")
>>> r = httpx.get("https://localhost:8080/", verify="./rootCA.pem", cert=cert)
>>> r
<Response [200 OK]>

I hope this will help you to start trying out mTLS on your local development environment. In future posts we will learn more in depth examples.