Kushal Das

FOSS and life. Kushal Das talks here.

kushal76uaid62oup5774umh654scnu5dwzh4u2534qxhcbi4wbab3ad.onion

Setting up a retro gaming console at home

Commodore 64 was the first computer I ever saw in 1989. Twice in a year I used to visit my grandparents' house in Kolkata, I used to get one or two hours to play with it. I remember, after a few years how I tried to read a book on Basic, with the help of an English-to-Bengali dictionary. In 1993, my mother went for a year-long course for her job. I somehow managed to convince my father to buy me an Indian clone of NES (Little Master) in the same year. That was also a life event for me. I had only one game cartridge, only after 1996 the Chinese NES clones entered our village market.

Bringing back the fun

During 2014, I noticed how people were using Raspberry Pi(s) as NES consoles. I decided to configure my own on a Pi2. Last night, I re-installed the system.

Introducing RetroPie

RetroPie turns your Raspberry Pi into a retro-gaming console. You can either download the pre-installed image from the site, or you can install it on top of the rasbian-lite. I followed the latter path.

As a first step I downloaded Raspbian Lite. It was around 200MB in size.

# dcfldd bs=4M if=2017-01-11-raspbian-jessie-lite.img of=/dev/mmcblk0

I have used the dcfldd command, you can use dd command too. Detailed instructions are here.

After booting up the newly installed Raspberry Pi, I just followed the manual installation instructions from the RetroPie wiki. I chose basic install option on the top of the main installation screen. Note that the screenshot in the wiki is old. It took a few hours for the installation to finish. I have USB gamepads bought from Amazon, which got configured on the first boot screen. For the full instruction set, read the wiki page.

Happy retro gaming everyone :)

Updates from PyCon Pune, 12th January

This is a small post about PyCon Pune 2017. We had our weekly volunteers meet on 12th January in the hackerspace. You can view all the open items in the GitHub issue tracker. I am writing down the major updates below:

Registration

We have already reached the ideal number of registrations for the conference. The registration will be closed tomorrow, 15th of January. This will help us to know the exact number of people attending, thus enabling us to provide the better facility.

Hotel and travel updates

All international speakers booked their tickets, the visa application process is going on.

Child care

Nisha made a contact with the Angels paradise academy for providing childcare.

T-shirts for the conference

T-shirts will be ordered by coming Tuesday. We want to have a final look at the material from a different vendor on this Sunday.

Speakers’ dinner

Anwesha is working on identifying the possible places.

Food for the conference

Nisha and Siddhesh identified Rajdhani as a possible vendor. They also tried out the Elite Meal box, and it was sufficient for one person. By providing box lunches, it will be faster and easier to manage the long lunch queues.

Big TODO items

  • Design of the badge.
  • Detailed instruction for the devsprint attendees.

Next meeting time

From now on we will be having two volunteers meet every week. The next meet is tomorrow 3pm, at the hackerspace. The address is reserved-bit, 337, Amanora Chambers (Above Amanora Mall), Hadapsar, Pune.

Hackerspace in Pune

More than 10 years back, I met some genius minds from CCC Berlin at foss.in, Harald Welte, Milosch Meriac and Tim Pritlove. I was in complete awe mode by seeing the knowledge they have, by looking at how helpful they are. Milosch became my mentor, and I learned a lot of things from him, starting from the first steps of soldering to how to compile firmware on my laptop.

In 2007, I visited Berlin for LinuxTag. I was staying with Milosch & Brita. I managed to spend 2 days in the CCC Berlin and that was an unbelievable experience for me. All of the knowledge on display and all of the approachable people there made me ask Milosch about how can we have something similar? The answer was simple, if there is no such club/organization, then create one with friends. That stayed in my mind forever.

In 2014, I gave a presentation in Hackerspace Santa Barbara, thanks to Gholms. I also visited Hackerspace SG during FOSSASIA 2015 and made many few friends. I went back to the Hackerspace SG again in 2016 after dropping our bags at the hotel, I just fall in love with the people and the place there.

Meanwhile, over the years, we tried to have a small setup downstairs in the flat where Sayan and Chandan used to live. We had our regular Fedora meetups there, and some coding sessions for new projects. But it was not a full-time place for everyone to meet and have fun by building things. We could not afford to rent out space anywhere nearby, even with 4-5 friends joining in together. I discussed the dream of having a local hackerspace with our friends, Siddhesh and Nisha Poyarekar, and that made a difference.

Birth of Hackerspace Pune

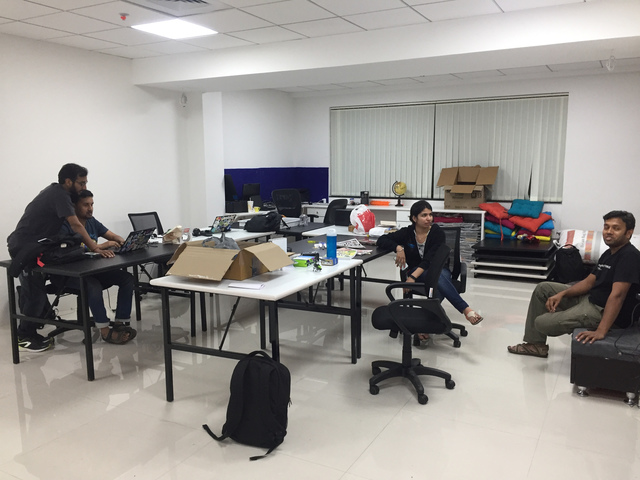
Nisha went ahead with the idea and founded https://reserved-bit.com, a hackerspace/makerspace in Pune. Last month I had to visit Kolkata urgently, it also means that I missed the initial days of setting up space. But as soon as we came back to Pune, I visited the space.

It is located at 337, the Amanora Chambers, just on top of the East Block at Amanora Mall. The location is great for another reason - if you are tired of hacking on things, you can go down and roam around in the mall. That also means we have Starbucks, KFC, and other food places just downstairs :)

There are lockers available for annual members. There is no place for cooking, but there is a microwave. You can find many other details on the website. For now, I am working from there in the afternoons and evenings. So, if you have free time, drop by to this new space, and say hi :)

Note1: Today we are meeting there at 3pm for the PyCon Pune volunteers meet.

Building command line tools in Python with click

Sometimes I get requests from new programmers to help them to learn to develop command line tools. They ask for any easy tutorial and howtos. My answer used to be argparse module, and the official tutorial on the same topic is simple to understand.

But now I recommend people use click module. Like any other project from Armin Ronacher, it has great documentation. In this post, I am going to write a beginners tutorial, you should the read the documentation for any more details and examples.

Installation, and development tips

Using virtualenv is highly recommended for developing ‘click’ applications. I am going to assume that we are in an empty directory and the continue from there. To start, we will have a simple hello.py file with the following content:

def cli():
	print(‘Hello World’)

Now we will need a setup.py file. This will help us to use the python module we are writing as a command line tool. It is also the recommended way to write command line tools in python, then directly using shebang based scripts.

from setuptools import setup

setup(
    name="myhello",
    version='0.1',
    py_modules=['hello'],
    install_requires=[
        'Click',
    ],
    entry_points='''
        [console_scripts]
        myhello=hello:cli
    ''',
)

You can see that we mentioned the starting point of our tool in the entry_points, hello:cli points to the right function to start with. We can then install this on the virtualenv locally. I will also create the virtualenv below so that becomes easier others. To learn more, read this chapter later.

$ python3 -m venv env
$ source env/bin/activate
$ pip install --editable .
Obtaining file:///home/kdas/code/practice/yoclick
Collecting Click (from myhello==0.1)
  Using cached click-6.7-py2.py3-none-any.whl
Installing collected packages: Click, myhello
  Running setup.py develop for myhello
Successfully installed Click-6.7 myhello

$ myhello
Hello World

Now to convert the same script into a click based tool, we will make the following modifications. Now when we execute the command again, we see nothing changed visually, but it magically has a --help command line argument (which is optional).

$ myhello 
Hello World
$ myhello --help
Usage: myhello [OPTIONS]

Options:
  --help  Show this message and exit.

Using echo for printing text

The click module suggests using echo function to print, rather than the standard print function. So, we will make the required change in our code.

import click

@click.command()
def cli():
    click.echo("Hello World")

Boolean flags

In a command line tool, we sometimes want to have a boolean option. If the option is provided then do something, if not provided, then do something else. In our example, we will call the flag as --verbose, it is provided, then we will print some extra text.

import click

@click.command()
@click.option('--verbose', is_flag=True, help="Will print verbose messages.")
def cli(verbose):
    if verbose:
        click.echo("We are in the verbose mode.")
    click.echo("Hello World")

We added another decorator to the cli function. In click.option() decorator, first we passed the flag using ‘--verbose’, then marked this option as a boolean flag, and then finally added the help text.

$ myhello --help
Usage: myhello [OPTIONS]

Options:
  --verbose  Will print verbose messages.
  --help     Show this message and exit.
$ myhello --verbose
We are in the verbose mode.
Hello World

By default, any boolean flag is treated as false.

Standard options in the command line

We can now add more options to our tool. For example, we will have a --name option which will take a string as input.

import click

@click.command()
@click.option('--verbose', is_flag=True, help="Will print verbose messages.")
@click.option('--name', default='', help='Who are you?')
def cli(verbose,name):
    if verbose:
        click.echo("We are in the verbose mode.")
    click.echo("Hello World")
    click.echo('Bye {0}'.format(name))
$ myhello --help
Usage: myhello [OPTIONS]

Options:
  --verbose    Will print verbose messages.
  --name TEXT  Who are you?
  --help       Show this message and exit.
$ myhello
Hello World
Bye 
$ myhello --name kushal
Hello World
Bye kushal

Same option multiple times

We may want to take the same option multiple times. Click has a very simple way to do so.

import click

@click.command()
@click.option('--verbose', is_flag=True, help="Will print verbose messages.")
@click.option('--name', '-n', multiple=True, default='', help='Who are you?')
def cli(verbose,name):
    if verbose:
        click.echo("We are in the verbose mode.")
    click.echo("Hello World")
    for n in name:
        click.echo('Bye {0}'.format(n))

In the above example, you can see that we specified the --name as a multiple options. It also means the name parameter in the cli function is now a tuple.

Help text for the script

We can add help text for the script using python docstrings. For example:

import click

@click.command()
@click.option('--verbose', is_flag=True, help="Will print verbose messages.")
@click.option('--name', '-n', multiple=True, default='', help='Who are you?')
def cli(verbose,name):
    """This is an example script to learn Click."""
    if verbose:
        click.echo("We are in the verbose mode.")
    click.echo("Hello World")
    for n in name:
        click.echo('Bye {0}'.format(n))
$ myhello --help
Usage: myhello [OPTIONS]

  This is an example script to learn Click.

Options:
  --verbose        Will print verbose messages.
  -n, --name TEXT  Who are you?
  --help           Show this message and exit.

Super fast way to accept password with confirmation

Click provides a password_option() decorator, which can be used to accept a password over hidden prompt and second confirmation prompt. Btw, I am printing the password here as an example, never print the password to stdout in any tool.

import click

@click.command()
@click.option('--verbose', is_flag=True, help="Will print verbose messages.")
@click.option('--name', '-n', multiple=True, default='', help='Who are you?')
@click.password_option()
def cli(verbose,name, password):
    """This is an example script to learn Click."""
    if verbose:
        click.echo("We are in the verbose mode.")
    click.echo("Hello World")
    for n in name:
        click.echo('Bye {0}'.format(n))
    click.echo('We received {0} as password.'.format(password))

The output looks like below:

$ myhello --help
Usage: myhello [OPTIONS]

  This is an example script to learn Click.

Options:
  --verbose        Will print verbose messages.
  -n, --name TEXT  Who are you?
  --password TEXT
  --help           Show this message and exit.
$ myhello
Password: 
Repeat for confirmation: 
Hello World
We received hello as password.

To learn the full usage of password prompts, read this section.

Must have arguments

You can also add arguments to your tool. These are must haves, and if no default value is provided, they are assumed to be strings. In the below example, the script is expecting a county name to be specified.

import click

@click.command()
@click.option('--verbose', is_flag=True, help="Will print verbose messages.")
@click.option('--name', '-n', multiple=True, default='', help='Who are you?')
@click.argument('country')
def cli(verbose,name, country):
    """This is an example script to learn Click."""
    if verbose:
        click.echo("We are in the verbose mode.")
    click.echo("Hello {0}".format(country))
    for n in name:
        click.echo('Bye {0}'.format(n))

The output looks like:

$ myhello
Usage: myhello [OPTIONS] COUNTRY

Error: Missing argument "country".
$ myhello India
Hello India

Click has many other useful features, like yes parameter, file path input. I am not going to write about all of those here, but you can always from the upstream documentation.

Using rkt and systemd

Few days back, I wrote about my usage of rkt containers. As rkt does not have any daemon running, the simplest way to have a container running is to start it inside some screen or tmux session. I started following the same path, I used a tmux session.

But then I wanted to have better control over the containers, to start or stop them as required. Systemd is the solution for all the other services in the system, that makes it an ideal candidate for this case too.

Example of a service file

[Unit]
Description=ircbot
Documentation=https://github.com/kushaldas/ircbot
Requires=network-online.target

[Service]
Slice=machine.slice
MemoryLimit=500M
ExecStart=/usr/bin/rkt --insecure-options=image --debug run --dns=8.8.8.8 --volume mnt,kind=host,source=/some/path,readOnly=false  /mnt/ircbot-latest-linux-amd64.aci
ExecStopPost=/usr/bin/rkt gc --mark-only
KillMode=mixed
Restart=always

The path of the service file is /etc/systemd/system/ircbot.service. In the [Unit] section, I mentioned a super short Description, and link to the documentation of the project. I also mentioned that this service requires network-online.target to be available first.

The [Service] is the part where we define all the required configurations. The first value we mention is the Slice.

Slices, a way to do resource control

Systemd uses slices to group a number of services, and slices in a hierarchical tree. This is built on top of the Linux Kernel Control Group feature. In a system by default, there are four different slices.

  • -.slice : The root slice.
  • system.slice : All system services are in this slice.
  • machine.slice : All vms and containers are in this slice.
  • user.slice : All user sessions are in this slice.

We can see the whole hierarchy using the systemd-cgls command. For example:

Control group /:
-.slice
├─machine.slice
│ ├─ircbot.service
│ │ ├─11272 /usr/bin/systemd-nspawn --boot --register=true -Zsystem_u:system_r:container_t:s0:c447,c607 -Lsystem_u:object_r:container_file_t:s0:c447,
│ │ ├─init.scope
│ │ │ └─11693 /usr/lib/systemd/systemd --default-standard-output=tty
│ │ └─system.slice
│ │   ├─ircbot.service
│ │   │ └─11701 /usr/bin/ircbot
│ │   └─systemd-journald.service
│ │     └─11695 /usr/lib/systemd/systemd-journald
├─user.slice
│ └─user-1000.slice
│   ├─session-31.scope
│   │ ├─16228 sshd: kdas [priv]
│   │ ├─16231 sshd: kdas@pts/0
│   │ ├─16232 -bash
│   │ ├─16255 sudo su -
│   │ ├─16261 su -
│   │ └─16262 -bash

You can manage various resources using cgroups. Here, in our example service file, I mentioned that memory limit for the service is 500MB. You can read more here on resource management.

There is also systemd-cgtop tool, which will give you a top like view for the various resources consumed by the slices.

# systemd-cgtop -M rkt-250d0c2b-0130-403b-a9a6-3bb3bde4e934

Control Group                                                           Tasks   %CPU   Memory  Input/s Output/s
/machine.slice/ircbot.service                                             9      -   234.0M        -        -
/machine.slice/ircbot.service/system.slice                                -      -     5.0M        -        -
/machine.slice/ircbot.service/system.slice/ircbot.service                 -      -     5.0M        -        -

The actual command which we used to run the container is mentioned in ExecStart.

Using the service

I can now use the standard systemctl commands for this new ircbot service. For example:

# systemctl start ircbot
# systemctl enable ircbot
# systemctl stop ircbot
# systemctl status ircbot

You can also view the log of the application using journalctl command.

# journalctl -u ircbot

The documentation from rkt has more details on systemd and rkt.

Tools I use daily

In this post, I am going to talk about the tools that I use daily on my computer. This is a personal choice, I don’t intend to spark off a vim vs Emacs debate as an outcome of this blog post.

Operating System

I use Fedora as my primary Operating System. I am currently running Fedora 25 in all my boxes except one home server, which runs Fedora 24. In the data center, I have CentOS on the bare-metal, and Fedora in the VM(s). The very same goes for any quick VM that I create over Fedora Infra Cloud.

Desktop

Last June, I moved to i3wm from Gnome. I started with the configuration from Adam Miller and then modified according to my preferences. This morning, I updated it further so I could use my Kinesis keyboard along with it. For the last few months, I was using my Das Keyboard for a change. I am back to my most favorite keyboard now. :)

The only problem I encountered with i3wm is with projectors. Not all projectors work out of the box with my system. Maybe it is a problem with the configuration that I have. It at least works with my external monitor or the TV at home. It also works properly with a few of the projectors in the local Red Hat office.

Mail

I use mbsync tool from isync package to sync all my emails locally. In the past, I used offlineimap, but mbsync seems to be a little faster in syncing e-mails. This helps when mailboxes are as big as mine.

I use Kolabnow as my primary e-mail service provider, I still use my Gmail id as it is configured with a few too many things. I am very happy with Kolab’s service, and I think it is a perfect service to pay for.

Mutt is the choice of mail client. Most of the other mail clients fail to open or function properly with the large size maildirs that I have. To send out the mail, I use msmtp tool on the laptop.

Editor + IDE

Vim is my first choice as editor. I use it daily for most of my work; right from writing e-mails in mutt to doing the final review of my blog posts before publishing. I don’t use any plugin as I like to have the same experience in every server I use, and I don’t particularly like installing random plugins in the servers. You can find my simple vimrc here.

I also use PyCharm IDE from JetBrains. It actually stole the first place for Python projects from Vim. A few months back, I also found the golang plugin for it, and then started using it for all of my golang development too. It is an extremely nice IDE. You can download the community edition and start using it.

For writing any other text, I mostly used Vim. Around a month back though, I found Focuswriter. With a little bit of color changing in the theme, it has now become my standard tool for distraction-free writing. I generally prefer to put my headphones on, play some random music (Often, I do not even know the music that is playing) and then write in Focuswriter. This tool is the newest addition to my daily usage list and, seriously, one of the best finds for me in 2016. For some odd reason, I actually went through the whole source code of Focuswriter. I generally don’t do that for most of the tools I use.

Browser

I use both Firefox and Chrome with a few add-ons. Chrome loves to take up all the RAM I have. Maybe someday it will get better with RAM usage.

IRC

I use Xchat as my primary IRC client. Currently, I host a ZNC instance inside an rkt container in my server, and my Xchat connects to it. People continue to suggest other IRC clients, but I never managed to try them. I do have one irssi session running from another server for emergencies.

Blog / Website

I use Shonku, a static blogging tool I wrote back in 2013 as my blogging platform. It uses simple Markdown as the input format of the blog posts. The uses of Markdown helps me to focus on the content than on the formatting.

While I am writing this post, I am trying to remember other tools that I use regularly. I don’t see any other tool open in any current workspace in the laptop though. I find it kind of funny that even though I have so many applications installed on the computer, I only use a few of them actively. I also prefer to use the tools that have a good user base. This helps to find an answer to any question I might have. Though I keep looking at the blog posts for all the new modern and shiny tools, but for my personal usage, I am stuck with the tools I trust for a long time. In the end, I should also mention Python. I have various scripts for automating my tasks in the system, and almost all of them are written in Python. One of the last addition was the weekly status tool I started writing a few weeks back.

Note:: In the real world, Coffee is the other must-have tool for my brain to work properly. Without it, I often only keep staring at the screen without doing much. Thanks to my incredible friends, I source my coffee from all across the world. That’s a story for another day.

Looking back at 2016 blog posts

Writing more blog posts was one of my goal in 2016. Every time I tried that before, I slowly moved into a writer's block mode. But, finally, it seems to be working for me.

Number of posts

In 2016, I wrote 53 blog posts, in 2015 the number was 37.

Number of words

I wrote around 23704 words in 2016, the year before, around 13.5k words.

Change in the workflow/tools

I am still using Shonku as my blogging tool. But, I am writing the posts first on focuswriter, and later I am moving them into the right place. I use vim for the final edit, before pushing them live. A few days back, I added AMP support in Shonku, it currently lives on a private git branch. I will push it out after few more days of testing it on my blog.

I will be writing more in the coming months. I generally speak a lot, but never managed to write down my ideas. I hope, I will be doing that regularly now.

PyCon Pune updates January, 2017

We have only a month left for first ever PyCon Pune. This is a short post with the latest updates from the conference organizing team. I am listing them below without any particular order.

  • Talk selection completed on time, and the schedule is now live.
  • We announced the availability of child care facility during the conference. The form is here.
  • From January 1st, the conference ticket price has gone up.
  • Most of the keynote speakers have booked their flight tickets.
  • Managing finances was going to be tricky and we needed a single point of contact to accept sponsorship money and reimburse expenses so that managing the money was as uncomplicated as possible. reserved-bit, a newly launched makerspace in Pune offered to help with that and Siddhesh has taken up the task of accounting for the conference, bringing in his experience of managing money for FUDCon Pune 2015.
  • We will resume our physical volunteer meetings from next week.

rkt image build command reference

In my last post, I wrote about my usage of rkt. I have also posted the basic configuration to create your own container images. Today we will learn more about those various build commands of the .acb files. We use these commands with the acbuild tool.

begin

begin starts a new build. The build information is stored inside the .acbuild directory in the current directory. By default, it starts with an empty rootfs. But we can pass some options to change that behavior. We can start with either a local filesystem, or a local aci image, or even from a remote aci image. To create the Fedora 25 aci image, I extracted the rootfs on a local directory and used that with begin command. Examples:

begin /mnt/fedora
begin ./fedora-25-linux-amd64.aci

dep

dep command is used to add any separate aci as a dependency to the current aci. In the rootfs the current aci will be on top of any dependency image. The order of the dependencies is important, so keep an eye to that while working on a new aci image. For example to build any image on top of the Fedora aci image we use the following line

dep add kushal.fedorapeople.org/rkt/fedora:25

run

We can execute any command inside the container we are building using the run command. For example to install a package using dnf we will use the following line:

run -- dnf install htop -y

The actual command (which will run inside the container) is after --, anything before that is considered part of the dep command itself.

environment

We can also add or remove any environment variable in the container image. We use environment command for the same.

environment add HOME /mnt
environment add DATAPATH /opt/data

copy

copy command is used to copy a file or a directory from the local filesystem to the aci image. For example, here we are coping dnf.conf file to the /etc/dnf/ directory inside the container image.

copy ./dnf.conf /etc/dnf/dnf.conf

mount

We use mount command to mark a location in the aci image which should be mounted while running the container. Remember one thing about mount points (this is true for ports too), they worked based on the name you give. Here, we are creating a mount point called apphome and then the next command we are actually specifying the host mount point for the same.

mount add apphome /opt/app/data
rkt run --volume apphome,kind=host,source=/home/kushal/znc,readOnly=false my-image.aci

port

Similar to the mount command, we can use the port command to mark any port of the container which can be mapped to the host system. We need to specify a name, the protocol (can be either udp or tcp) and finally the port number. We use the provided name to map it to a host port in the host.

port add http tcp 80
port add https tcp 443

set-user

set-user command specifies the user which will be used in the container environment.

set-user kushal

Remember to create the user before you try to use it.

set-group

Similar to the set-user command, it specifies the group which will be used to run the application inside the container.

set-working-directory

set-working-directory is used to set the working directory for the application inside the container.

set-working-directory /opt/data

set-exec

Using set-exec we specify a command to run as the application. In the below example we are running the znc command as the application in the container.

set-exec -- /usr/bin/znc --foreground

write

The final command for today is write. Using this command we create the final image from the current build environment. There is --overwrite flag, using which we can overwrite the image file we are creating.

write --overwrite znc-latest-linux-amd64.aci

I hope this post will help to understand the build commands, and you can use the same to build your own rkt images. In future, if I need to find the command reference, I can read this blog post itself.

Using rkt on my Fedora servers

Many of you already know that I moved all my web applications into containers on Fedora Atomic image based hosts. In the last few weeks, I moved a few of them from Docker to rkt on Fedora 25. I have previously written about trying out rkt in Fedora. Now I am going to talk about how can we build our own rkt based container images, and then use them in real life.

Installation of rkt

First I am going to install all the required dependencies, I added htop and tmux and vim on the list because I love to use them :)

$ sudo dnf install systemd-container firewalld vim htop tmux gpg wget
$ sudo systemctl enable firewalld
$ sudo systemctl start firewalld
$ sudo firewall-cmd --add-source=172.16.28.0/24 --zone=trusted
$ sudo setenforce Permissive

As you can see in the above-mentioned commands, rkt still does not work well with the SELinux on Fedora. We hope this problem will be solved soon.

Then install the rkt package as described in the upstream document.

$ sudo rkt run --interactive --dns=8.8.8.8 --insecure-options=image kushal.fedorapeople.org/rkt/fedora:25

The above-mentioned command downloads the Fedora 25 image I built and then executes the image. This is the base image for all of my other work images. You may not have to provide the DNS value, but I prefer to do so. The --interactive provides you an interactive prompt. If you forget to provide this flag on the command line, then your container will just exit. I was confused for some time and was trying to find out what was going on.

Building our znc container image

Now the next step is to build our own container images for particular applications. In this example first I am going to build one for znc. To build the images we will need acbuild tool. You can follow the instructions here to install it in the system.

I am assuming that you have your znc configuration handy. If you are installing for the first time, you can generate your configuration with the following command.

$ znc --makeconf

Now below is the znc.acb file for my znc container. We can use acbuild-script tool to create the container from this image.

#!/usr/bin/env acbuild-script

# Start the build with an empty ACI
begin

# Name the ACI
set-name kushal.fedorapeople.org/rkt/znc
dep add kushal.fedorapeople.org/rkt/fedora:25

run -- dnf update -y
run -- dnf install htop vim znc -y
run -- dnf clean all

mount add znchome /home/fedora/.znc
port add znc tcp 6667

run --  groupadd -r fedora -g 1000 
run -- useradd -u 1000 -d /home/fedora -r -g fedora fedora

set-user fedora

set-working-directory /home/fedora/
set-exec -- /usr/bin/znc --foreground 

# Write the result
write --overwrite znc-latest-linux-amd64.aci

If you look closely to the both mount and port adding command, you will see that I have assigned some name to the mount point, and also to the port (along with the protocol). Remember that in the rkt world, all mount points or ports work based on these assigned names. So, for one image HTTP name can be assigned to the standard port 80, but in another image, the author can choose to use port 8080 with the same name. While running the image we choose to decide how to map the names to the host side or vice-versa. Execute the following command to build our first image.

$ sudo acbuild-script znc.acb

If everything goes well, you will find an image named znc-latest-linux-amd64.aci in the current directory.

Running the container

$ sudo rkt --insecure-options=image --debug run --dns=8.8.8.8  --set-env=HOME=/home/fedora --volume znchome,kind=host,source=/home/kushal/znc,readOnly=false  --port znc:8010 znc-latest-linux-amd64.aci

Now let us dissect the above command. I am using --insecure-options=image option as I am not verifying the image, --debug flag helps to print some more output on the stdout. This helps to find any problem with a new image you are building. As I mentioned before I passed a DNS entry to the container using --dns=8.8.8.8. Next, I am overriding the $HOME environment value, I still have to dig more to find why it was pointing to /root/, but for now we will remember that --set-env can help us to set/override any environment inside the container.

Next, we mount /home/kushal/znc directory (which has all the znc configuration) in the mount name znchome and also specifying that it is not a readonly mount. In the same way we are doing a host port mapping of 8010 to the port named znc inside of the container. As the very last argument, I passed the image itself.

The following is the example where I am copying a binary (the ircbot application written in golang) into the image.

#!/usr/bin/env acbuild-script

# Start the build with an empty ACI
begin

# Name the ACI
set-name kushal.fedorapeople.org/rkt/ircbot
dep add kushal.fedorapeople.org/rkt/fedora:25

copy ./ircbot /usr/bin/ircbot

mount add mnt /mnt

set-working-directory /mnt
set-exec -- /usr/bin/ircbot

# Write the result
write --overwrite ircbot-latest-linux-amd64.aci

In future posts, I will explain how can you run the containers as systemd services. For starting, you can use a tmux session to keep them running. If you have any doubt, remember to go through the rkt documents. I found them very informative. You can also try to ask your doubts in the #rkt channel on Freenode.net.

Now it is an exercise for the reader to find out the steps to create an SELinux module from the audit log, and then use the same on the system. The last step should be putting the SELinux back on Enforcing mode.

$ sudo setenforce Enforcing