Kushal Das

FOSS and life. Kushal Das talks here.

kushal76uaid62oup5774umh654scnu5dwzh4u2534qxhcbi4wbab3ad.onion

Updating Qubes OS

Using updated software is a normal thing, also a few of us get more excited and use latest (not so stable) packages from the testing branch. This helps to detect bugs in the software before they go out the general availability.

As I was already using the RC1 release of Qubes, I thought of upgrading to the latest testing packages.

$ sudo qubes-dom0-update --enablerepo=qubes-dom0-current-testing

As we already know that dom0 does not connect to the network, it actually uses an UpdateVM to download the packages first, and then the packages are sent to dom0. DNF takes care of the actual install/update of the package.

I rebooted the box after the update was done. One of the major change I can see is with copy/pasting text. It is not asking to confirm the extra dialog box while pasting. I can simply copy text, press Ctrl+shift+c and then go to another domain and press Ctrl+shift+v, and then right click and paste (or press Ctrl+v).

I have also updated the Fedora25 templateVM to the latest from my local Fedora mirror. While trying to attach a local image file using loop device (in dom0) to a VM I got into this issue.

I could not find any Fedora 26 repo for Qubes yet, Fedora 25 is the latest there. Fedora 27 release date is in less than 2 months. And then in another month Fedora 25 will be EOL. I hope developers will release packages to upgrade to F26 at least by then.

Qubes OS part 2

In this post, I am going to talk about sharing data between domains. You can read part one here.

Update: Read part 3 about network isolation.

One of the most common operation while working on many domains is copy/pasting text or files. Though it is something very much necessary, at the same time this can be a security risk. Randomly copy pasting data or file into a trusted domain, can be dangerous. We also have to make sure that random scripts can not copy paste without proper authorization. Qubes uses Xen shared memory for copying files instead of any block device.

Copy pasting text

One can copy text to the clipboard of the VM as usual, and then one can press Ctrl+Shift+c, then if one press Ctrl+Shift+v in any VM, it will ask for a menu like below screenshot to confirm if you want to paste to that VM's clipboard. After that, you can normally paste with Ctrl+v or from the GUI.

Copying file to another VM

We can copy a file to another VM using the file browser. Just right click on any file, and click copy to the right VM. The following screenshots shows this way.

The other way to copy paste is using the command line. For example, the following command copies hello.txt file to the personal VM.

$ qvm-copy-to-vm personal hello.txt
sent 0/1 KB

Executing any command on a given VM

dom0 is the privileged domain in the system. From that, you can actually execute any command to another domain. In the following example, I am running the date command in the personal domain. With the --pass-io command line flag, we are saying to pass across the STDOUT and STDIN from the remote VM to dom0.

$ qvm-run --pass-io personal date
Tue Sep  5 17:42:11 IST 2017

Introduction to Qubes

I heard the name Qubes OS as an Operating System which was built while keeping security in mind, and also they used Fedora as the base Operating System. A reasonably secure operating system is the tagline and they also have a few testimonials in the site, I guess the most famous one is the following tweet.

The name again came up this week. This time I thought of trying it out, but, this is something I had to do on a bare-metal box, than on a VM. Luckily I bought extra drives in the last PyCon trip. I downloaded the stable 3.2 release, but the installer was failing into a Dracut shell saying /dev/mapper/live-rw is write protected. So, I moved on to the 4.0RC1 image. The installer is a modified Anaconda, means something very familiar to any Fedora/CentOS/Red Hat user. 4.0RC1 is based on Fedora 25, means more known points there.

Qubes uses Xen to manage VMs (for the rest of the post, I will keep using both VM, and domain interchangeably). The dom0 is the initial domain which comes up on boot. It is a short form of Domain 0. This is a privileged domain which manages all the other domains (domU). The default desktop for 4.0rc1 is XFCE. The dom0 does not have standard networking enabled. Actually, to have a working network to connect to outside world, the OS creates two special VMs.

sys-firewall

This special VM is the firewall for every other application VMs. You can actually create more than one firewall VMs and have a different set of rules.

sys-net

This VM has access to the network hardware and can create a connection with your local Wi-Fi or LAN/cable network. In my case, Fedora was failing to create internal interfaces which are being used by sys-firewall, so I rebooted the VM with a Debian-8 template. It solved my networking issue.

Regular Application VMs

When you first install the system, the installer will create a few domains for you, personal, work, untrusted, vault. It will create proper application shortcuts in the menu. This means when you click on the application menu for the Terminal for personal domain, it will first start the domain, and then open up the gnome-terminal for you. Each domain also gets a /rw partition which gets mounted as home. For every reboot, they start from a clean template, with only home consistent between boots.

This also means there is no easy way for applications/malware to talk between different VMs. If you open up a wrong website (with malware) on the untrusted domain, it will not have access to the filesystem under your work domain. There are special ways to copy/paste text between domains.

You can see in the above screenshot, the applications from each domain have different colors, that helps for quick recognition of each application for different domains. You can also see details about the running VMs by clicking on the Qubes icon on the tray in the menubar.

Disposable domains

There are times when you want to open a downloaded file (say PDF or a spreadsheet) on a VM which is only for single use. As soon as you close the application, the VM gets destroyed. For more details, read this document.

VMs without network access

The Vault is a special domain which does not connect to any network. You can also create new VMs in the same way, which does not connect to any firewall VM. The isolation from the network means nothing will go out in case of a malware in the file.

The following screenshot is showing the output of the qvm-ls command in dom0.

I will write more posts in future as I figure out things. Running F26 on the VMs is one them, because Python3.6 :) #qubes channel on Freenode is not that very active, but you will be able to find help in the channel if you wait.

No Flock for me in 2017

Even though the whole travel plan was ready, the recent health issues became a bigger problem. Both of my doctor and my physiotherapist told me not to travel. Now, I find it a great suggestion as I am having pain to sit on a chair for few hours, the 24+ hours' travel would have been a disaster.

But, this also means I am going to miss my only chance to meet the whole Fedora family. I will have to wait till next year to meet everyone. This is the 2nd time I became sick before the Flock travel. Just bad timing.

Encrypting drives with LUKS

Encrypting hard drives should be a common step in our regular computer usage. If nothing else, this will help you sleep well, in case you lose your computer (theft) or that small USB disk you were carrying in your pocket. In this guide, I’ll explain how to encrypt your USB disks so that you have peace of mind, in case you lose them.

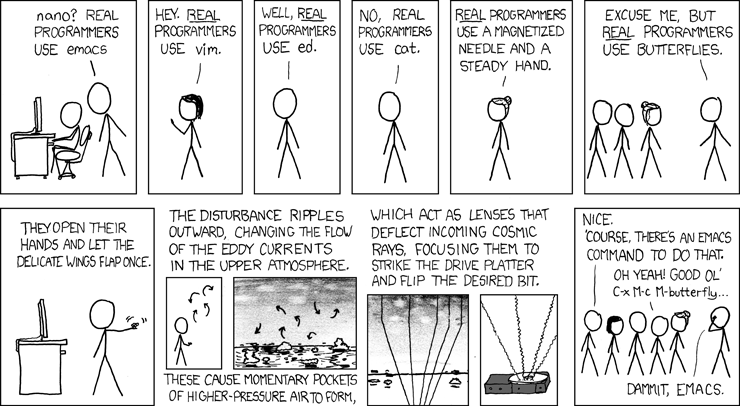
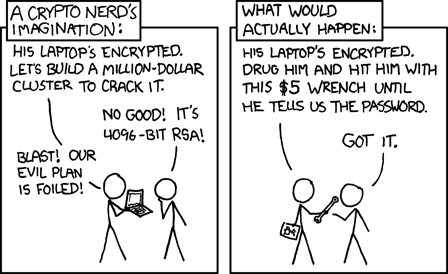
But, before we dig into the technical details, always remember the following from XKCD.

What is LUKS?

LUKS or Linux Unified Key Setup is a disk encryption specification, first introduced in 2004 by Clemens Fruhwirth. Notice the word specification; instead of trying to implement something of its own, LUKS is a standard way of doing drive encryption across tools and distributions. You can even use drives from Windows using the LibreCrypt application.

For the following example, I am going to use a standard 16 GB USB stick as my external drive.

Formatting the drive

Note: check the drive name/path twice before you press enter for any of the commands below. A mistake, might destroy your primary drive, and there is no way to recover the data. So, execute with caution.

In my case, the drive is detected as /dev/sdb. It is always a good idea to format the drive before you start using it. You can use wipefs tool to clean any signature from the device,

$ sudo wipefs -a /dev/sdb1

Then you can use fdisk tool to delete the old partitions , and create a new primary partition.

Next step is to create the LUKS partition.

$ sudo cryptsetup luksFormat /dev/sdb1

WARNING!
========
This will overwrite data on /dev/sdb1 irrevocably.

Are you sure? (Type uppercase yes): YES
Enter passphrase: 
Verify passphrase:

Opening up the encrypted drive and creating a filesystem

Next, we will open up the drive using the passphrase we just gave, and create a filesystem on the device.

$ sudo cryptsetup luksOpen /dev/sdb1 reddrive
Enter passphrase for /dev/sdb1
$ ls -l /dev/mapper/reddrive
lrwxrwxrwx. 1 root root 7 Jul 17 10:18 /dev/mapper/reddrive -> ../dm-5

I am going to create an EXT4 filesystem on here.
Feel free to create which ever filesystem you want.

$ sudo mkfs.ext4 /dev/mapper/reddrive -L reddrive
mke2fs 1.43.4 (31-Jan-2017)
Creating filesystem with 3815424 4k blocks and 954720 inodes
Filesystem UUID: b00be39d-4656-4022-92ea-6a518b08f1e1
Superblock backups stored on blocks: 
        32768, 98304, 163840, 229376, 294912, 819200, 884736, 1605632, 2654208

Allocating group tables: done                            
Writing inode tables: done                            
Creating journal (16384 blocks): done
Writing superblocks and filesystem accounting information: done   

Mounting, using, and unmounting the drive

The device is now ready to use. You can manually mount it with the mount command. Any of the modern desktops will ask you to unlock using the passphrase if you connect the device (or try to double click on the file browser).

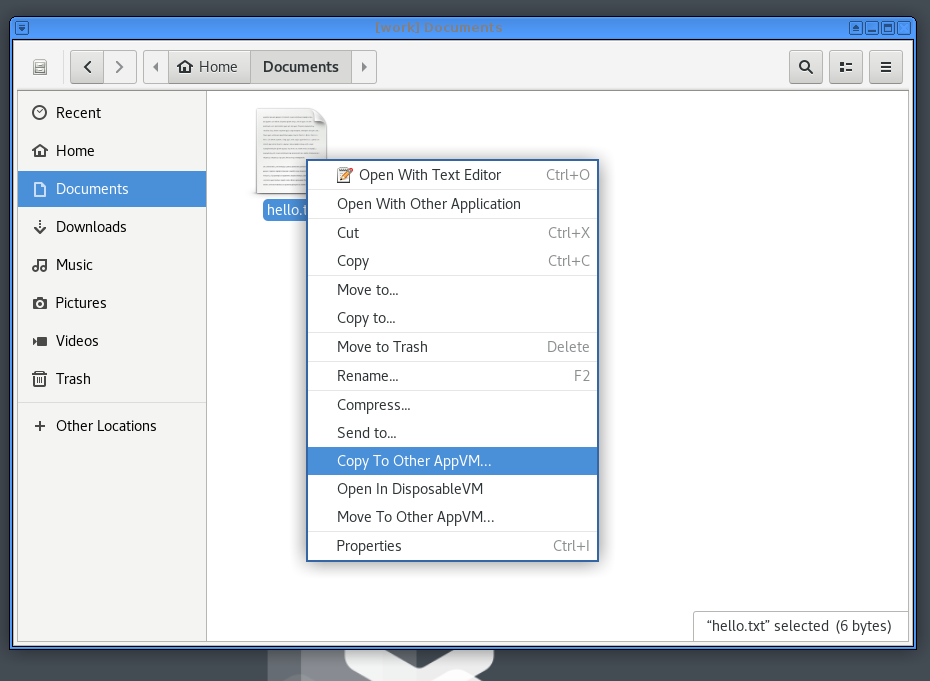
I will show the command line option. I will create a file hello.txt as an example.

$ sudo mount /dev/mapper/reddrive /mnt/red
$ su -c "echo hello > /mnt/red/hello.txt"
Password:
$ ls -l /mnt/red
total 20
-rw-rw-r--. 1 root root     6 Jul 17 10:26 hello.txt
drwx------. 2 root root 16384 Jul 17 10:21 lost+found
$ sudo umount /mnt/red
$ sudo cryptsetup luksClose reddrive

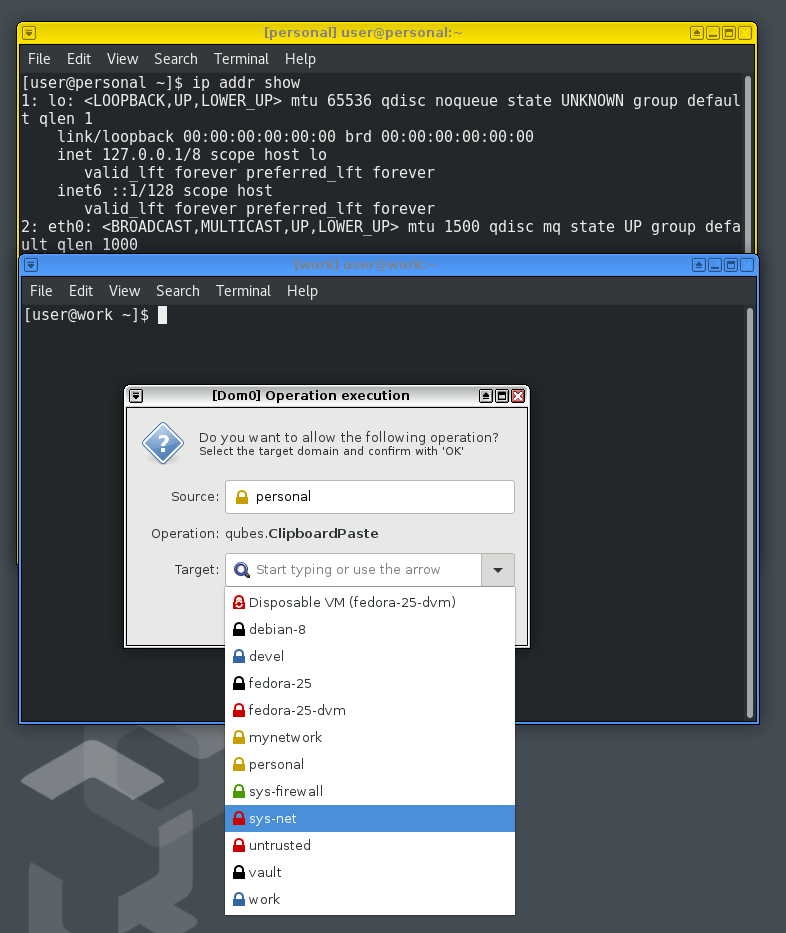
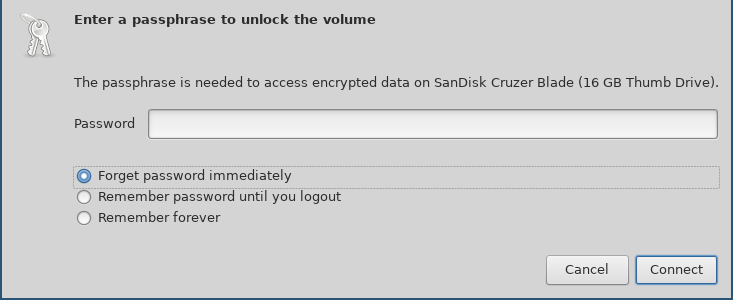
When I attach the drive to my system, the file browser asks me to unlock it using the following dialog. Remember to choose forget immediately so that the file browser forgets the password.

On passphrases

The FAQ entry on cryptsetup page, give us hints and suggestions about passphrase creation.

If paranoid, add at least 20 bit. That is roughly four additional characters for random passphrases and roughly 32 characters for a random English sentence.

Key slots aka different passphrases

In LUKS, we get 8 different key slots (for passphrases) for each device(partition). You can see them using luksDump sub-command.

$ sudo cryptsetup luksDump /dev/sdb1 | grep Slot
Key Slot 0: ENABLED
Key Slot 1: DISABLED
Key Slot 2: DISABLED
Key Slot 3: DISABLED
Key Slot 4: DISABLED
Key Slot 5: DISABLED
Key Slot 6: DISABLED
Key Slot 7: DISABLED

Adding a new key

The following command adds a new key to the drive.

$ sudo cryptsetup luksAddKey /dev/sdb1 -S 5
Enter any existing passphrase: 
Enter new passphrase for key slot: 
Verify passphrase:

You will have to use any of the existing passphrases to add a new key.

$  sudo cryptsetup luksDump /dev/sdb1 | grep Slot
Key Slot 0: ENABLED
Key Slot 1: DISABLED
Key Slot 2: DISABLED
Key Slot 3: DISABLED
Key Slot 4: DISABLED
Key Slot 5: ENABLED
Key Slot 6: DISABLED
Key Slot 7: DISABLED

Removing a passphrase

Remember that removing a passphrase is based on the passphrase itself, not by the key slot number.

$ sudo cryptsetup luksRemoveKey /dev/sdb1
Enter passphrase to be deleted: 
$ sudo cryptsetup luksDump /dev/sdb1 | grep Slot
Key Slot 0: ENABLED
Key Slot 1: DISABLED
Key Slot 2: DISABLED
Key Slot 3: DISABLED
Key Slot 4: DISABLED
Key Slot 5: DISABLED
Key Slot 6: DISABLED
Key Slot 7: DISABLED

Now in case you don't know the passphrase, then you can use luksKillSlot.

$ sudo cryptsetup luksKillSlot /dev/sdb1 3
Enter any remaining passphrase:

Overview of the disk layout

The disk layout looks like the following. The header or phdr contains various details like magic value, version, cipher name, following the 8 keyblocks (marked as kb1, kb2.. in the drawing), and then the encrypted bulk data block. We can see all of those details in the C structure.

struct luks_phdr {
        char            magic[LUKS_MAGIC_L];
        uint16_t        version;
        char            cipherName[LUKS_CIPHERNAME_L];
        char            cipherMode[LUKS_CIPHERMODE_L];
        char            hashSpec[LUKS_HASHSPEC_L];
        uint32_t        payloadOffset;
        uint32_t        keyBytes;
        char            mkDigest[LUKS_DIGESTSIZE];
        char            mkDigestSalt[LUKS_SALTSIZE];
        uint32_t        mkDigestIterations;
        char            uuid[UUID_STRING_L];

        struct {
                uint32_t active;

                /* parameters used for password processing */
                uint32_t passwordIterations;
                char     passwordSalt[LUKS_SALTSIZE];

                /* parameters used for AF store/load */
                uint32_t keyMaterialOffset;
                uint32_t stripes;
        } keyblock[LUKS_NUMKEYS];

        /* Align it to 512 sector size */
        char                _padding[432];
};

Each (active) keyblock contains an encrypted copy of the master key. When we enter the passphrase, it unlocks the master key, that in turn unlocks the encrypted data.

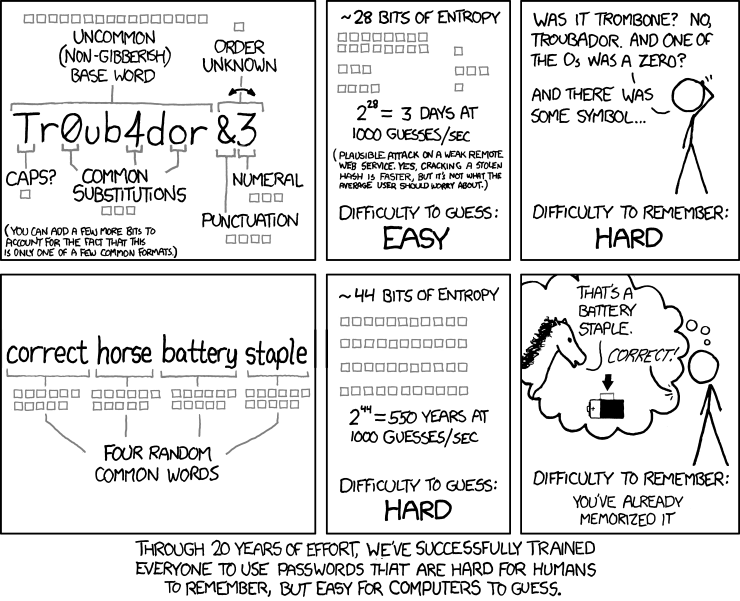
But, remember, all of this is of no use if you have a very simple passphrase. We have another XKCD to explain this.

I hope this post encourages you to use encrypted drives more. All of my computers have their drives encrypted; (I do that while installing the Operating System.) This means, without decrypting the drive you can not boot the system properly. On a related note, remember to turn off your computer completely, (not hibernation or suspend mode) when you’re traveling.

Article on Hacker Ethic and Free Software movement

As I have mentioned in the dgplug summer training page, focusing on the Free Software movement is a big part of this year's training program. A few weeks back there was a tweet from @gnome about travel ban, and many could not figure out why Gnome was writing about this topic. Amongst the many proper replies, Miguel de Icaza’s reply was to the point. This incident made Anwesha and me stop and think; and then made us rethink, about how we wanted to conduct the sessions on the Free Software movement and Software Licensing.

I was born in the beginning of the 80s and Anwesha even later. Our introduction to the movement was from the stories we heard (from many people); from Levy’s famous book, Hackers: Heroes of the Computer Revolution and the seminal Free as in Freedom.

My introduction to the FSF came through ilug-calcutta, and from Sayamindu. Later, at foss.in 2005, I made another friend (for life), Praveen A (he is from the same batch). And even later through out various conferences, I was introduced to other members of FSF India. In 2007, I was part of the 4th GPLv3 meet organizing team in Bangalore. That was my introduction to RMS, and his personality (I will write a blog post later about various incidents from that conference). That had a big impact on me.

Coming back to the story of the tweet, we also saw similar ignorance from newcomers, as they never got a chance to learn about the past, nor did get to meet the various people involved (distance and time). So, Anwesha and I, tried to write a brief history, including the hacker ethic, and beginning of the Free Software movement. A lot of stories mentioned in the article are from the books mentioned above. At the very end, I have written about how the different software we use everyday came about initially. I took the help of various FSF bulletins for the same.

This Monday I took a session on the same topic in the #dgplug IRC channel. When I made mention of the GNU C Library and the time Ronald McGrath started it, Siddhesh called attention to an announcement he (Ronald) made a few days ago (about stepping down from maintainership of that same GNU Library). I also pointed that Siddhesh is now one of the maintainer of Glibc. That gave the students a sense of impact and immediacy; a feeling of involvement and ownership.

Today evening from 13:30 UTC, Anwesha took a session on Software Licenses 101 in the #dgplug channel on Freenode. There will be more follow up sessions in the coming days.

Link to the article once again

Switching to Emacs land

After 16 years with Vi(m), a week back I switched to Emacs as my primary editor. I used Emacs for a few days in 2010, when it was suggested to me by the #lisp channel. But, neither I continued, nor I understood the keystrokes well.

But, why now?

I was trying out Org Mode in Vim. Looking at the strange key-combinations, I felt it is not for me. I decided to give Emacs a proper try for the first time. If you know about our summer training, or saw me discussing about GNU/Linux world in any college, you would have seen me to suggest vim to everyone as a starting point. Mostly because of two reasons.

  • It is there on default Fedora installation.
  • I still think it is easy enough for the beginners to start with.

For me, to learn anything new, I prefer to use it regularly. Let it be a programming language, or a particular tool. I wanted to see how Org Mode works in Emacs, but, to do so well I had to use it myself. That also means I will have to use Emacs regularly.

How did I start?

I used a few different sources to start reading, and also configuring my init.el file. Shakthi Kannan has some excellent articles on Emacs. I also found another site which introduces Emacs and related configurations well. I am going to suggest both sites to anyone starting with Emacs. Shakthi also has a very good reference card for the keystrokes.

In the #dgplug IRC channel, maxking suggested to start using eshell and magit inside of Emacs. I am using the presentation from Shakthi to learn magit.

The last few blog posts (including this one), and also a few commits in random places were done using this setup (inside of Emacs).

The problems

I am not going to say this was very smooth. Remembering the keystrokes is always difficult. Getting them into the muscle memory is even more time consuming. But, there are few things which I found really difficult (for me).

  • Marking for cut/copy/paste.
  • Sometimes I see the same buffer in two split areas, just can not close them easily.
  • Spell check keystrokes

All the other regular Emacs users I know, are using it for more than 10 years. I am not trying to hurry, I will slowly learn the various facts and HOWTOs. The famous XKCD post fits well in this regard.

Story of mashing in Bodhi (Fedora updates system)

Bodhi mash

This is mostly Fedora release engineering work specific post. Feel free to skip if you are not into Fedora land.

I started packaging for Fedora from 2006, back in Fedora Extras repository days. Now, we have only one big repo. Packagers can just submit their new packages or updates to this repository. Now, to do so, first, we will have to get the package reviewed (in the case of new packages). Later, after getting a git repo for the spec file, one can build the package in Koji, this will create the RPMs and the SRPM in the koji server. Next, we mark the package for a push to the testing repository (or after certain criteria, mark them to push to the stable repository). For rawhide (the latest of everything) repository, we don't have to do this, everything we build for rawhide will be automatically pushed.

What happens after we mark the package ready for push?

Every day, someone from the Fedora release engineering team is on push duty. This person calls bodhi-push commands, which in turn generates a fedmsg, which then consumed by a the consumer, defined in bodhi masher.py to generate new repos from the updates, and also mark the packages properly in koji. It also composes the ostree tree. We will now dig into the source of this command to see what all happens.

The work starts at line 271 At line 290, it initiates the state. There are use cases when it resumes from the middle of a previous mash, the if-else block at line 301 helps to load or save the state of the mash accordingly. To load or save it actually reads up a JSON file and a few other steps.

Next, at line 306, it calls a function load_updates. This function talks to the database and finds out the list of packages which need to be pushed (the final repo will be generated from all the packages in that particular tag) for updates. Now all of this work happens based on a unique tag, like f25-updates. The verify_updates function makes sure that list of the updates has the right updates for the current tag (it can happen that someone tries to mark an F24 build as the F25 update).

We have to do some more checks if this push is for stable repositories, like if the build has enough positive karma, or has it spent 7 days in the testing repository. At line 310, the perform_gating function does these gating checks.

At line 312, in the determine_and_perform_tag_actions functions, we talk to Koji and update the tags in Koji as required. Either it adds a new tag or moves the build to a new tag. Like, from candidate to the testing. After that we update the bugzilla bug entries if there are any update with a bug associated, and in the next few lines we remove any extra tags, and also update the comps files (from the git repo). At line 321, we create a new thread which does the real mash work using the mash command from the package with the same name. While we wait for this thread to finish on line 330, we have already created some digest mail information, and other updateinfo (in the uinfo variable, which is the content of updateinfo.xml). In line 337 we check if we are supposed to do build ostree repos for atomic, if yes, then we call the compose_atomic_trees function.

Then we sync the newly generated repo with the master mirror, and wait for it to finish (on line 345). After that it sends out fedmsg notifications, modifies the bugs in the bugzilla, adds comments to the koji updates, and also does the announcement emails (the function calls are documented).

The main reason I wanted to write this post is the upcoming change where we will stop using the mash command, and instead call pungi to do the work. As pungi can also do ostree tree compose.

I want to specially thank Patrick who helped me to understand this piece of code (as he does for many other things).

Touch Typing

Learning new things, is an essential part of life. While we try to spend a lot of time learning various tricks about our tools or a particular programming language, many newcomers miss another important common skill.

The art of Touch Typing.

Ever since, I started going to conferences, I met many people who do touch type, and they generally type really fast. I found that to be very common, in our circles. But, when we meet beginners and discuss the things they should learn, we completely miss talking about this point. Most of the beginners I’ve met can’t type well. And most of the errors people ask about, are caused by, guess what?

Typing mistakes.

Also, because they type very slow, beginners lag behind in workshops.

GNU Typist

In the dgplug summer training, just about after we’re done with the communication sessions, we ask people to start spending some time learning to type.

My favorite tool is GNU Typist. It’s a small command line tool which can help anyone learn touch typing in a few days. Remember that the package name is gtypist.

In the main menu, you choose one of the many courses shown. The “Quick QWERTY” course is powerful enough to give you a start. After a few screens of description, about how to use the tool, you get into a screen like the one shown below.

As you see, any error will be marked by the tool. In the beginning, it is okay if you keep checking where your fingers are. If you spend a week with this tool, you should be able to start typing faster, and with fewer errors. Your muscle memory will kick in, and you’ll will be amazed by your new super power :) When I first used the Das Ultimate (no relation :P) or the Kinesis Advantage keyboard, I spent the first few minutes in gtypist to become familiar with them.

KDE Touch

KDE Touch is a GUI application to learn how to type. It will give you similar levels of detail, using various pretty looking graphs & charts. If you do not like the command line tools, you can always start learning using this tool.

There is also the Tux Typing tool, which is aimed more at kids. The tool shows various words and if you can type them properly, you will be able to provide to food to the nice little penguin.

People who are reading this, most probably will spend the rest of our lives in front of computers (for various reasons). Learn to type well; having that muscle memory is a powerful tool and will be a be source of great strength for you.

Installing Python3.6.1 in your Fedora24/25

Yesterday, one of the participant in the dgplug summer training was trying to use Python3.6.1 in the Fedora 24 box. There was some issues in the installation, I actually don't know how the installation was done. So, I just suggested to build Python 3.6.1 from source. Then have as many virtual environments as required to learn Python.

The following commands can help anyone to build from source on Fedora 24 or on Fedora 25.

$ sudo dnf install dnf-plugins-core wget make gcc
$ sudo dnf builddep python3
$ wget https://www.python.org/ftp/python/3.6.1/Python-3.6.1.tgz
$ ,tar -xvf Python-3.6.1.tgz
$ cd Python-3.6.1
$ ./configure --with-pydebug
$ make -j2

After the above command, you will have a python binary. Now, next step is to create a virtual environment.

$ ./python -m venv myenv
$ source myenv/bin/activate
(myenv)$ python

Now you have your own Python 3.6.1. Happy hacking :)