Kushal Das

FOSS and life. Kushal Das talks here.

kushal76uaid62oup5774umh654scnu5dwzh4u2534qxhcbi4wbab3ad.onion

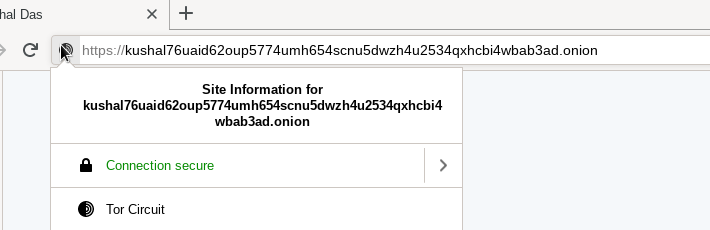
Get a TLS certificate for your onion service

For a long time, I wanted to have a certificate for the onion address of my blog. Digicert was the only CA who was providing those certificates with an Extended Validation. Those are costly and suitable for an organization to get, but not for me personally, especially due to the cost.

TLS certificate working

A few days ago, on IRC, I found out that Harica is providing Domain validation for the onion sites for around €30 per year. I jumped in to get one. At the same time, ahf was also getting his certificate. He helped me with the configuration for nginx.

How to get your own certificate?

  • Make sure you have your site running as Tor v3 onion service
  • Create an account at https://cm.harica.gr/
  • Goto server certificates on the left bar, and make a new request for your domain, provide the onion address as requested in the form.
  • It will give you the option to upload a CSR Certificate Signing Request. You can generate one by openssl req -newkey rsa:4096 -keyout kushaldas.in.onion.key -out csr.csr. For the common name, provide the same onion address.
  • After the click on the website, it will ask you to download a file and put it in your web root inside of .well-known/pki-validation/ directory. Make sure that you can access the file over Tor Browser.
  • When you click the final submission button, the system will take some time to verify the domain. After payment, you should be able to download the certificate with the full chain (the file ending with .p7b). There are 3 options on the webpage, so please remember to download the correct file :)
  • You will have to convert it into PEM format, I used the command ahf showed me: openssl pkcs7 -inform pem -in kushaldas.in.p7b -print_certs -out kushaldas.in.onion.chain.pem -outform pem

Setting up nginx

This part will be the same as any other standard nginx configuration. The following is what I use. Please uncomment the Strict-Transport-Security header line only after you are sure everything is working fine.

server {
	listen unix:/var/run/tor-hs-kushal.sock;

    server_name kushal76uaid62oup5774umh654scnu5dwzh4u2534qxhcbi4wbab3ad.onion;
    access_log /var/log/nginx/kushal_onion-access.log;

    location / {
	return 301 https://$host$request_uri;
    }

}

server {
    listen unix:/var/run/tor-hs-kushal-https.sock ssl http2;

    server_name kushal76uaid62oup5774umh654scnu5dwzh4u2534qxhcbi4wbab3ad.onion;
    access_log /var/log/nginx/kushal_onion-access.log;

    ssl_certificate /etc/pki/kushaldas.in.onion.chain.pem;
	ssl_certificate_key /etc/pki/kushaldas.in.onion.open.key;

    #add_header Strict-Transport-Security "max-age=63072000; includeSubdomains";
	add_header X-Frame-Options DENY;
	add_header X-Content-Type-Options nosniff;
    # Turn on OCSP stapling as recommended at
    # https://community.letsencrypt.org/t/integration-guide/13123
    # requires nginx version >= 1.3.7
    ssl_stapling on;
    ssl_stapling_verify on;

    # modern configuration. tweak to your needs.
    ssl_protocols TLSv1.2;
    ssl_ciphers 'ECDHE-ECDSA-AES256-GCM-SHA384:ECDHE-RSA-AES256-GCM-SHA384:ECDHE-ECDSA-CHACHA20-POLY1305:ECDHE-RSA-CHACHA20-POLY1305:ECDHE-ECDSA-AES128-GCM-SHA256:ECDHE-RSA-AES128-GCM-SHA256:ECDHE-ECDSA-AES256-SHA384:ECDHE-RSA-AES256-SHA384:ECDHE-ECDSA-AES128-SHA256:ECDHE-RSA-AES128-SHA256';
    ssl_prefer_server_ciphers on;

	index index.html;
	root /var/www/kushaldas.in;

	location / {
		try_files $uri $uri/ =404;
	}
}

I also have the following configuration in the /etc/tor/torrc file to use the unix socket files.

HiddenServiceDir /var/lib/tor/hs-kushal/
HiddenServiceVersion 3
HiddenServicePort 80 unix:/var/run/tor-hs-kushal-me.sock
HiddenServicePort 443 unix:/var/run/tor-hs-kushal-https.sock

In case you want to know more about why do you need the certificate for your onion address, the Tor Project has a very nice explanation.

dns-tor-proxy 0.2.0 aka DoH release

I just now released 0.2.0 of the dns-tor-proxy tool. The main feature of this release is DNS over HTTPS support. At first I started writing it from scratch, and then decided to use modified code from the amazing dns-over-https project instead.

Demo

demo of the DoH support in the tool

✦ ❯ ./dns-tor-proxy -h
Usage of ./dns-tor-proxy:
      --doh                 Use DoH servers as upstream.
      --dohaddress string   The DoH server address. (default "https://mozilla.cloudflare-dns.com/dns-query")
  -h, --help                Prints the help message and exists.
      --port int            Port on which the tool will listen. (default 53)
      --proxy string        The Tor SOCKS5 proxy to connect locally, IP:PORT format. (default "127.0.0.1:9050")
      --server string       The DNS server to connect IP:PORT format. (default "1.1.1.1:53")
  -v, --version             Prints the version and exists.
Make sure that your Tor process is running and has a SOCKS proxy enabled.

Now you can pass --doh flag to enable DoH server usage, by default it will use https://mozilla.cloudflare-dns.com/dns-query. But you can pass any server using --dohaddress flag. I found the following servers are working well over Tor.

  • https://doh.libredns.gr/dns-query
  • https://doh.powerdns.org
  • https://dns4torpnlfs2ifuz2s2yf3fc7rdmsbhm6rw75euj35pac6ap25zgqad.onion/dns-query
  • https://dnsforge.de/dns-query

The release also has a binary executable for Linux x86_64. You can verify the executable using the signature file available in the release page.

Access Riseup email over Onion service

Email service (📧) is another excellent example that can be accessed safely over Tor Onion services. This is in particular useful in places where people in power do not like their citizens accessing privacy-focused email providers. I know, you must be thinking about your own country, but no worries, we all are in the same place :)

In this post, I will explain how one can access their emails via IMAP, and send using SMTP over onion services. I am taking Riseup as an example because they provide this option to the users, and also because I personally use their service. This document assumes that you already have tor service running on your system.

Riseup Tor Onion services address

Riseup and Tor

Riseup has a page listing all the Onion service addresses they provide. You can also verify the signed address from the signed file in the same page. For the rest of this post, we will use 5gdvpfoh6kb2iqbizb37lzk2ddzrwa47m6rpdueg2m656fovmbhoptqd.onion as the address for both IMAP and SMTP services. In the normal Internet, those are imap.riseup.net and smtp.riseup.net.

Getting the SSL certificate for the service for verification

Riseup uses Let's Encrypt for the SSL certificates. We have to pin them for the above-mentioned onion address so that we can use them in our system.

mkdir -p ~/.cert
torify openssl s_client -connect 5gdvpfoh6kb2iqbizb37lzk2ddzrwa47m6rpdueg2m656fovmbhoptqd.onion:993 -showcerts 2>&1 < /dev/null | sed -ne '/-BEGIN CERTIFICATE-/,/-END CERTIFICATE-/p' | sed -ne '1,/-END CERTIFICATE-/p' > ~/.cert/riseuponion.pem

openssl x509 -in .cert/riseuponion.pem -noout -sha256 -fingerprint
SHA256 Fingerprint=C6:BB:7B:04:97:54:05:65:76:81:4D:56:22:CE:50:6C:91:53:D3:3E:27:95:CC:C9:B8:B7:19:A5:E9:31:7D:15

The first command fetches the SSL certification from the given onion addresses, and stores it in the ~/.cert/riseuponion.pem file. The second command gives us the fingerprint for the same. You can verify these values by running the command against imap.riseup.net:993 and comparing the values.

By the way, remember that these values will change every 3 months (like any other Let's Encrypt certificate).

Setting up mbsync for IMAP access of the emails

I prefer to use the mbsync command from the imap package. The following the configuration for the same.

IMAPAccount riseup
# Address to connect to
Host 5gdvpfoh6kb2iqbizb37lzk2ddzrwa47m6rpdueg2m656fovmbhoptqd.onion
Port 993
User <my full email address without angle brakets>
PassCmd "/usr/bin/pass riseup"
# Use SSL
AuthMechs PLAIN
SSLType IMAPS
SSLVersions TLSv1 TLSv1.1 TLSv1.2
CertificateFile /home/kdas/.cert/riseuponion.pem

IMAPStore riseup-remote
Account riseup

MaildirStore riseup-local
# The trailing "/" is important
Path ~/.imap-mail/riseup/
Inbox ~/.imap-mail/riseup/Inbox

Channel riseup
Master :riseup-remote:
Slave :riseup-local:
# Exclude certain things
# Or include everything
Patterns *
# Automatically create missing mailboxes, both locally and on the server
Create Both
# Save the synchronization state files in the relevant directory
SyncState *

You can notice that I am using the CertificateFile key to point to the certificate we downloaded previously.

Now, I can sync the emails using the torify along with the regular mbsync command.

torify mbsync -a riseup 

Setting up msmtp to send emails

The following is my msmtp configuration

# riseup
account riseup
host 5gdvpfoh6kb2iqbizb37lzk2ddzrwa47m6rpdueg2m656fovmbhoptqd.onion
port 587
auth on
proxy_host 127.0.0.1
proxy_port 9050
tls on
tls_fingerprint C6:BB:7B:04:97:54:05:65:76:81:4D:56:22:CE:50:6C:91:53:D3:3E:27:95:CC:C9:B8:B7:19:A5:E9:31:7D:15
user <my full email address without angle brakets>
passwordeval "/usr/bin/pass riseup"
maildomain riseup.net
from <my full email address without angle brakets>

One thing to notice that msmtp actually allows us to directly mention the tor socks proxy details in the configuration file. And then in my mutt configuration, I mentioned

set sendmail="/usr/bin/msmtp -a riseup"

Onion service v2 deprecation timeline

On Monday June 15, the developers of the Tor Project announced the initial plan for the deprecation of Onion services v2. You can identify v2 addresses easily as they are only 16 character long, where as the v3 addresses are 56 character long.

Why?

The v2 services used RSA1024, where as v3 uses ed25519, means better cryptography. We can also have offline keys for the onion service. You can read all other benefits in the v3 spec.

Timeline

According to the email to the list, the following the current timeline:

  • On 2020-09-15 with 0.4.4.x release Tor will start informing v2 onion service operators that v2 is deprecated.
  • On 2021-07-15 with 0.4.6.x release Tor will stop supporting v2 onion addresses, and all related source code will be removed.
  • On 2021-10-15 there will be a new stable version release which will disable using v2 onion services on the Tor network.

How can you prepare as an Onion service provider?

If you are using/providing any v2 onion service, you should enable v3 service for the same service. This will help you to test your v3 configuration while keeping the v2 on, and then you can retire your v2 address. If you need help in setting authenticated v3 service, you can follow this blog post. I wrote another post which explains how can you generate the keys using Python cryptography module.

Read the full announcement in the list archive.

Securing your Elastic services using authenticated onion services

Last year I set up an ElasticSearch box to monitor a few of my servers. The goal was to learn the basics of the elastic ecosystem. I know how powerful it is but never played enough with it before.

While doing the setup, I was wondering about how to secure communication between nodes. I can not send data over plain HTTP to the nodes, and also have to make sure to have some amount of authentication. I was a bit confused about the subscriptions options.

Authenticated onion services to rescue

I use authenticated onion services in many of my regular services. It provides an easy way to connect to services (over TCP) along with encryption and authentication.

Using the same in the logstash server is an even better option for me as I do not have to open up any port in the firewall. As the logstash was listening to 5044 on localhost, I added the following configuration to the /etc/tor/torrc in the logstash server. You should use v3 addresses, and this blog post will explain how to configure that.

HiddenServiceDir /var/lib/tor/logstash
HiddenServiceVersion 2
HiddenServicePort 5044 127.0.0.1:5044
HiddenServiceAuthorizeClient stealth logstash

In the client nodes, I first had to configure Tor to reach my Onion service (details is in the blog post above). Next, I added the server address and local proxy (from Tor) details to /etc/filebeat/filebeat.yml.

output.logstash:
  # The Logstash hosts
  hosts: ["youronionaddress.onion:5044"]
  proxy_url: socks5://localhost:9050
  proxy_use_local_resolver: false
  index: "filebeat-kushaldas"

And done :) Just start the logstash server, and also the filebeat service in every node. The data will start flowing in.

If you have query about the Tor Project, you can visit our new https://community.torproject.org/ site.