Kushal Das

FOSS and life. Kushal Das talks here.

kushal76uaid62oup5774umh654scnu5dwzh4u2534qxhcbi4wbab3ad.onion

Fedora 29 on Qubes OS

I spent most of my life using Fedora as my primary operating system on my desktop/laptops. I use CentOS on my servers, sometimes even Fedora, and a few special cases, I use *BSD systems.

But, for the last one year I am running Qubes OS as my primary operating system on my laptop. That enables me to still keep using Fedora in the AppVMs as I want, and I can also have different work VMs in Debian/Ubuntu or even Windows as required. Moving to a newer version of Fedora is just about installing the new template and rebooting any AppVM with the newest template.

Fedora 29 will release on 30th October, and Qubes team already built a template for the same and pushed to the testing repository. You can install it by the following command.

$ sudo qubes-dom0-update qubes-template-fedora-29 --enablerepo=qubes-templates-itl-testing

After this, I just installed all the required packages and setup the template as I want using my Qubes Ansible project. It took only a few minutes to move all of my development related VMs into Fedora 29 and this still keeps the option open to go back to Fedora 28 the moment I want. This is one of the beauty of Qubes OS and of course there are the regular security aspects too.

If you are a software developer using Linux, and also care about security practices, give Qubes OS a try. It has also a very active and helpful user community. I am sure it will not disappoint you.

Using Ansible to maintain your Qubes system

From the time I have started using Qubes OS, How to create and setup new AppVMs in an efficient way? remained an open question for me. I was mostly using the command line tool to create any new AppVMs and then manually setting all the properties after creation. I also did the package installations and other setup inside of the VMs manually.

If you never heard of Qubes before, you should check it out. Qubes takes a different approach to security, security by compartmentalization, different applications are separated by Qubes (VMs) . The base is running Fedora and then all other VMs are on top of Xen. It also provides a very tight integration of the tools to give a pleasant experience.

When I asked about how people maintain different VMs or templateVMs (from which the normal VMs spawn off), the answer was mostly bash scripts. The tools provided by the Qubes team are friendly to scripting. Though the official way to managing VMs is done by Salt project.

As we (at Freedom of the Press Founation) are working towards a Qubes based desktop client for SecureDrop, we also started using Salt to maintain the states of the VMs. I personally found Salt to be very confusing and a bit difficult to learn.

From the mailing list I also found out about https://github.com/Rudd-O/ansible-qubes, but, as I started reading the README, I figured that Salt is being used here too in the background. That made me rethink about the Ansible as a choice to maintain my Qubes.

Last weekend I pinged Trishna for some pointers on writing new plugins for Ansible, and later at night I also talked with Toshio about the Ansible plugins + modules.

Introducing Qubes Ansible

The result of those chats is Qubes Ansible. It has a qubesos module and a qubes connection plugin for Ansible.

I already have a PR opened to add the connection plugin into Ansible.

The actual module will still require a lot of work to become feature complete with the existing command line tools and also with the Salt. This project is under active development.

Good thing is that I am getting feedback+patches from the #qubes IRC channel (on Freenode). From the Qubes development team, marmarek provided some real valuable input to make the plugin easier to use.

Example playbook

---
- hosts: localhost
  connection: local

  tasks:
    - name: Make sure the development VM is present
      qubesos:
        guest: development2
        state: present
        properties:
          memory: 1200
          maxmem: 1400
          netvm: 'sys-firewall'
          template: 'debian-9'
          label: "blue"

    - name: Run the VM
      qubesos:
        guest: development2
        state: running

You can use the above playbook to create a development2 AppVM with the exact properties you want. The examples page has all the available options documented.

If you are using Qubes, please give it a try, and tell us how can we improve your experience of maintaining the system with Ansible. You can provide feedback in a Github issue or talk directly in the #qubes IRC channel.

Aadhaar, the mass surveillance system

If you are following me on Twitter, you have already seen a lot of (re)tweets related to Aadhaar. For the people first time hearing this term, it is a 12 digit unique identification number provided by the Unique Identification Authority of India (UIDAI). It is also the world’s largest bio-metric ID system. It is supposed to be a voluntary service.

From the very beginning, this project tried to hide the details from the Indian citizens. Let it be privacy advocates or security researchers or human rights activists, everyone predicted that this will become a monster, a mass surveillance system, a tool of choice of the power hungry dictators.

Like any other complex system, the majority of the people only see the advertisements from the government and completely miss all the problems and horror stories this project is creating. Here are a few links below for the interested people to read.

Neither my wife, nor our daughter has an Aadhaar (I also don’t have one), that means Py (our daughter) did not get admission to any school last year.

Whenever security researchers or journalists tried to report on the project, the UIDAI tried to hide behind denials and police complaints against the journalists or researchers. There are various reports on how one can get access (both read/write) to the actual production database with as little as $10-30. We now have examples of terrorist organizations having access to the same database. The UIDAI kept telling how this is an unhackable technology and for security they have a 13 feet wall outside of the data center which in turn will keep all hackers away.

They have already build 360 degree databases on top of Aadhaar, and now they are trying to link DNA to the same system.

The current government of India tried their level best to argue in the Supreme Court of India to tell that Indians don’t have any rights to privacy. But, thankfully they failed in this effort, and the Supreme Court ruled privacy as a fundamental right. We are now waiting for the judgment on the Aadhaar (which will hopefully come out in the next few weeks).

Meanwhile, the evil nexus is pushing down Aadhaar to the throats of the Indian citizens and Pakistani spies and gods.

A few days ago, in an event in Jaipur, they asked Edward Snowden the following question.

How big of an issue is privacy?

The answer started with from where that argument comes from.

The answer is that Nazi Germany. The nazi minister of propaganda Joseph Goebbels did this. Because he was trying to change the conversation away from “What are your rights?” and “What evidences must the government show?” to violet them, to intrude into your private life and instead said “Why do you need your rights?”, “How can you justify your rights?”, “Isn’t strange that you are invoking your rights? Isn’t that unusual?”. But, in a free society this is the opposite of the way it is supposed to work. We don’t need to explain why you have a right. You don’t need to explain why it is valuable, why you need it. It is for the government to explain why you don’t deserve it. They go to a court, they show that you are a criminal. This is increasingly falling out of favor, because the governments and companies think that it is inefficient. It is too much work. Life would be easier, life would be more convenient for them, life would be more profitable for them if we didn’t have any rights at all.

But, privacy isn’t about something to hide, privacy is about something to protect. And that is the very concept of liberty. It is the idea that there can be some part of you, of your life, of your ideas that belong to you, not to society. And you get to make the decision about who you share that with. -- Edward Snowden

Why are we reading this in your blog?

This might a question for many of you. Why are reading this in a blog post or in a planet? Because we, the people with the knowledge of technology are also part of these evil plans. We now know about many private companies taking part with their local government to build 360 degree profiles, to track the citizens and to run the mass surveillance systems. For example, related to Aadhaar, for the last 4 years, Google silently pushed the Aadhaar support phone number (which now UIDAI is trying to stay away from) to every Google Android phone in India. When they got caught red handed, they claimed that they did it inadvertently. Finacle software by Infosys denies creation of bank accounts without Aadhaar. Microsoft is working to link Skype with Aadhaar. Bill Gates is trying to push the idea that Aadhaar is all good, and does not have any issues.

What can you do?

You can start by educating yourself first. Read more about the technologies which controls our lives. Have doubt about the things and try to understand how they actually work. Write about them, ask questions to the people in power. Talk about the issues to your friends and family.

This is not gong to be an easy task, but, we all should keep fighting back to make sure of a better future for our next generation.

vcrpy for web related tests

Couple of weeks ago, Jen pointed me to vcrpy. This is a Python implementation of Ruby’s library with same name.

What is vcrpy?

It is a Python module which helps to write faster and simple tests involving HTTP requests. It records all the HTTP interactions in plain text files (by default in a YAML file). This helps to write deterministic tests, and also to run them in offline.

It works well with the following Python modules.

  • requests
  • aiohttp
  • urllib3
  • tornado
  • urllib2
  • boto3

Usage example

Let us take a very simple test case.

import unittest
import requests

class TestExample(unittest.TestCase):

    def test_httpget(self):
        r = requests.get("https://httpbin.org/get?name=vcrpy&lang=Python")
        self.assertEqual(r.status_code, 200)
        data = r.json()
        self.assertEqual(data["args"]["name"], "vcrpy")
        self.assertEqual(data["args"]["lang"], "Python")


if __name__ == "__main__":
    unittest.main()

In the above code, we are making a HTTP GET request to the https://httpbin.org site and examining the returned JSON data. Running the test takes around 1.75 seconds in my computer.

$ python test_all.py
.
------------------------------------------------------------------
Ran 1 test in 1.752s

OK

Now, we can add vcrpy to this project.

import unittest
import vcr
import requests

class TestExample(unittest.TestCase):

    @vcr.use_cassette("test-httpget.yml")
    def test_httpget(self):
        r = requests.get("https://httpbin.org/get?name=vcrpy&lang=Python")
        self.assertEqual(r.status_code, 200)
        data = r.json()
        self.assertEqual(data["args"]["name"], "vcrpy")
        self.assertEqual(data["args"]["lang"], "Python")

if __name__ == "__main__":
    unittest.main()

We imported vcr module, and added a decorator vcr.use_cassette to our test function. Now, when we will execute the test again, vcrpy will record the HTTP call details in the mentioned YAML file, and use the same for the future test runs.

$ python test_all.py
.
------------------------------------------------------------------
Ran 1 test in 0.016s

OK

You all can also notice the time taken to run the test, around 0.2 second.

Read the project documentation for all the available options.

Job alert: Associate Site Reliability Engineer at FPF

We (at Freedom of the Press Foundation) are looking for an Associate Site Reliability Engineer.

This position is open to junior and entry-level applicants, and we recognize the need to provide on-the-job mentoring and support to help you familiarize yourself with the technology stack we use. In addition to the possibility of working in our New York or San Francisco offices, this position is open to remote work within American time zones.

Skills and Experience

  • Familiarity with remote systems administration of bare-metal or virtualized Linux servers.
  • Comfortable with shell and programming languages commonly used in an SRE context (e.g., Python, Go, Bash, Ruby).
  • Strong interest in honing skills required to empower a distributed software development and operations team through automation and systems maintenance.

For more details, please visit the job posting.

Are you thinking if you should apply or not?

YES, APPLY!. You are ready to apply for this position. You don’t have to ask anyone to confirm if you are ready or not. Unless you apply, you don’t have a chance to get the job.

So, the first step is to apply for the position, and then you can think about Impostor syndrome. We all have it. Some people will admit that in public, some people will not.

Using podman for containers

Podman is one of the newer tool in the container world, it can help you to run OCI containers in pods. It uses Buildah to build containers, and runc or any other OCI compliant runtime. Podman is being actively developed.

I have moved the two major bots we use for dgplug summer training (named batul and tenida) under podman and they are running well for the last few days.

Installation

I am using a Fedora 28 system, installation of podman is as simple as any other standard Fedora package.

$ sudo dnf install podman

While I was trying out podman, I found it was working perfectly in my DigitalOcean instance, but, not so much on the production vm. I was not being able to attach to the stdout.

When I tried to get help in #podman IRC channel, many responded, but none of the suggestions helped. Later, I gave access to the box to Matthew Heon, one of the developer of the tool. He identified the Indian timezone (+5:30) was too large for the timestamp buffer and thus causing this trouble.

The fix was pushed fast, and a Fedora build was also pushed to the testing repo.

Usage

To learn about different available commands, visit this page.

First step was to build the container images, it was as simple as:

$ sudo podman build -t kdas/imagename .

I reused my old Dockerfiles for the same. After this, it was just simple run commands to start the containers.

Tor Browser and Selenium

Many of us use Python Selenium to do functional testing of our websites or web applications. We generally test against Firefox and Google Chrome browser on the desktop. But, there is also a lot of people who uses Tor Browser (from Tor Project) to browse the internet and access the web applications.

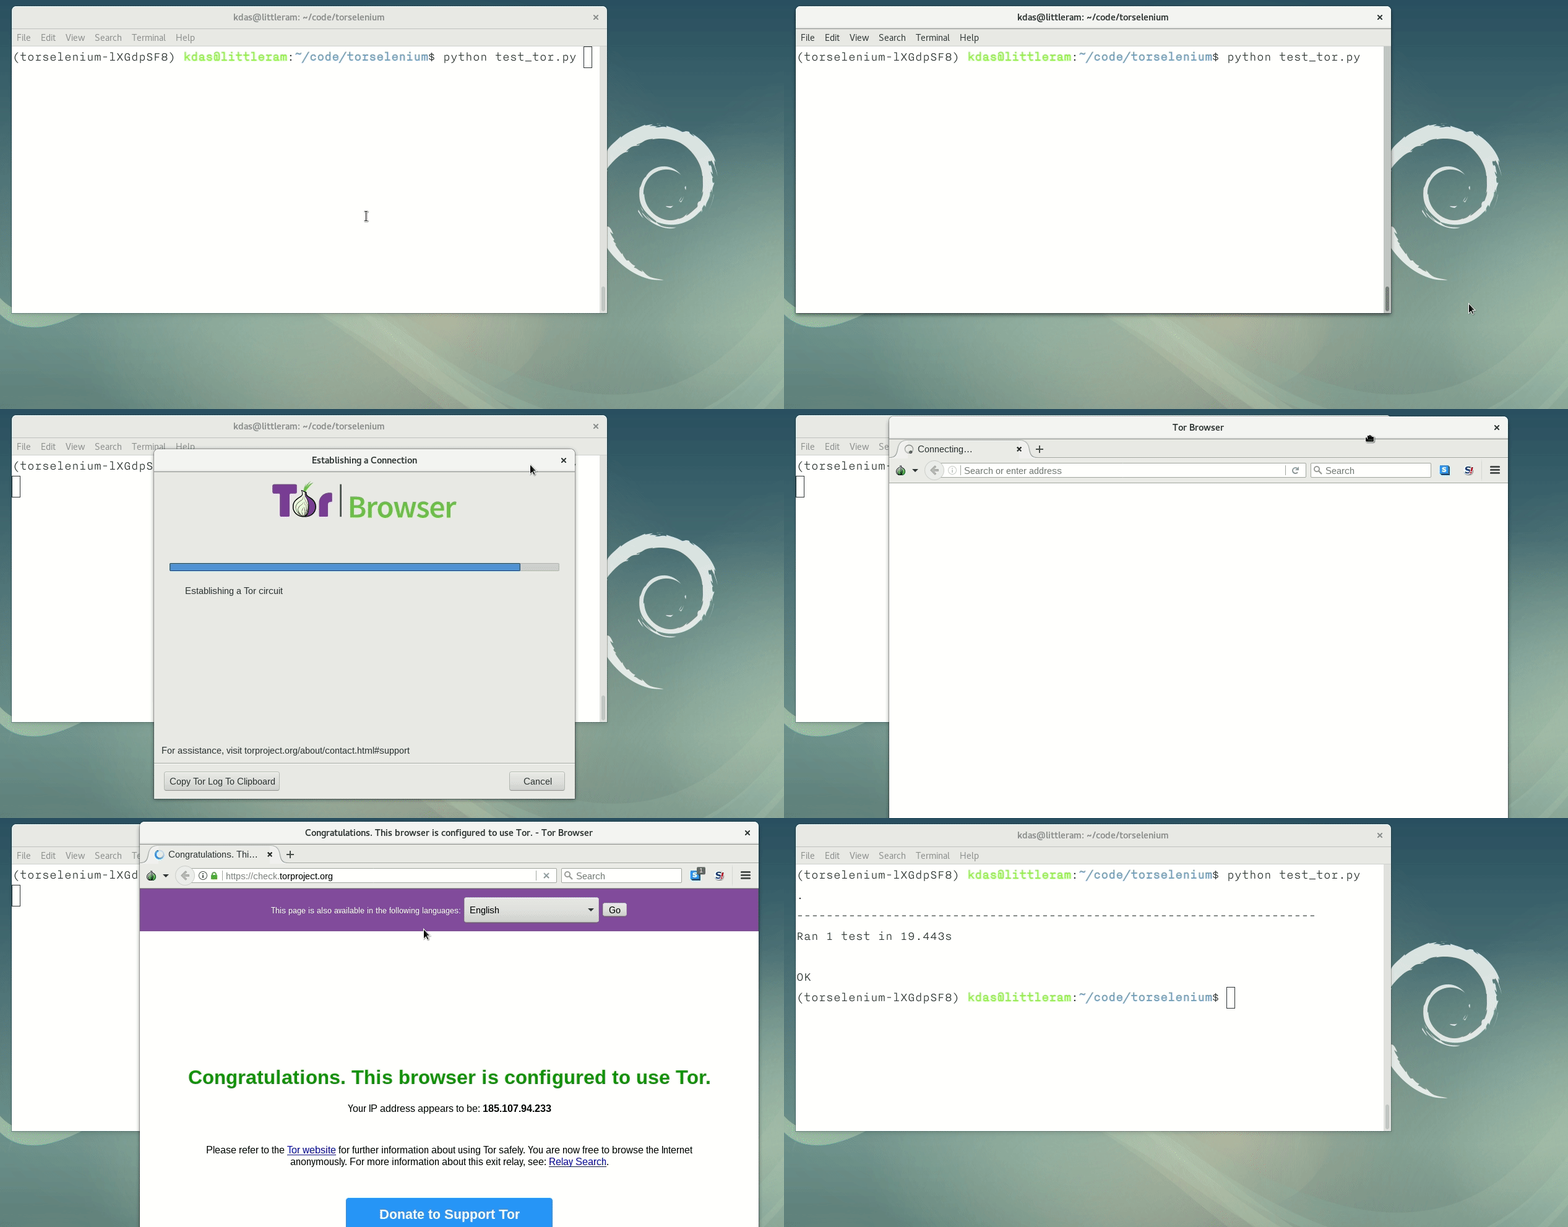
In this post we will see how can we use the Tor Browser along with Selenium for our testing.

Setting up the environment

First step is to download and verify, and then extract the Tor Browser somewhere in your system. Next, download and extract geckodriver 0.17.0 somewhere in the path. For the current series of Tor Browsers, you will need this particular version of the geckodriver.

We will use pipenv to create the Python virtualenv and also to install the dependencies.

$ mkdir tortests
$ cd tortests
$ pipenv install selenium tbselenium
$ pipenv shell

The tor-browser-selenium is Python library required for Tor Browser Selenium tests.

Example code

import unittest
from time import sleep
from tbselenium.tbdriver import TorBrowserDriver


class TestSite(unittest.TestCase):
    def setUp(self):
        # Point the path to the tor-browser_en-US directory in your system
        tbpath = '/home/kdas/.local/tbb/tor-browser_en-US/'
        self.driver = TorBrowserDriver(tbpath, tbb_logfile_path='test.log')
        self.url = "https://check.torproject.org"

    def tearDown(self):
        # We want the browser to close at the end of each test.
        self.driver.close()

    def test_available(self):
        self.driver.load_url(self.url)
        # Find the element for success
        element = self.driver.find_element_by_class_name('on')
        self.assertEqual(str.strip(element.text),
                         "Congratulations. This browser is configured to use Tor.")
        sleep(2)  # So that we can see the page


if __name__ == '__main__':
    unittest.main()

In the above example, we are connecting to the https://check.torproject.org and making sure that it informs we are connected over Tor. The tbpath variable in the setUp method contains the path to the Tor Browser in my system.

You can find many other examples in the source repository.

Please make sure that you test web application against Tor Browser, having more applications which can run smoothly on top of the Tor Browser will be a great help for the community.

PyQt5 thread example

PyQt is the Python binding for Qt library. To write Qt5 code, we use PyQt5 module. Like many others, my first introduction to GUI application development was using PyQt. Back in foss.in 2005 a talk from Sirtaj introduced me to PyQt, and later fall in love with it.

I tried to help in a GUI application after 8 years (I think), a lot of things have changed in between. But, Qt/PyQt still seems to be super helpful when it comes to ease of development. Qt has one of the best documentation out there for any Open Source project.

Many students start developing GUI tools by replacing one of the command line tool they use. Generally the idea is very simple, take some input in the GUI, and then process it (using a subprocess call) on a button click, and then show the output. The subprocess call happens over a simple method, means the whole GUI gets stuck till the function call finishes. We can fix this issue by using a QThread. In the below example, we will just write a frontend for git clone command and then will do the same using QThread.

Setting up project directory

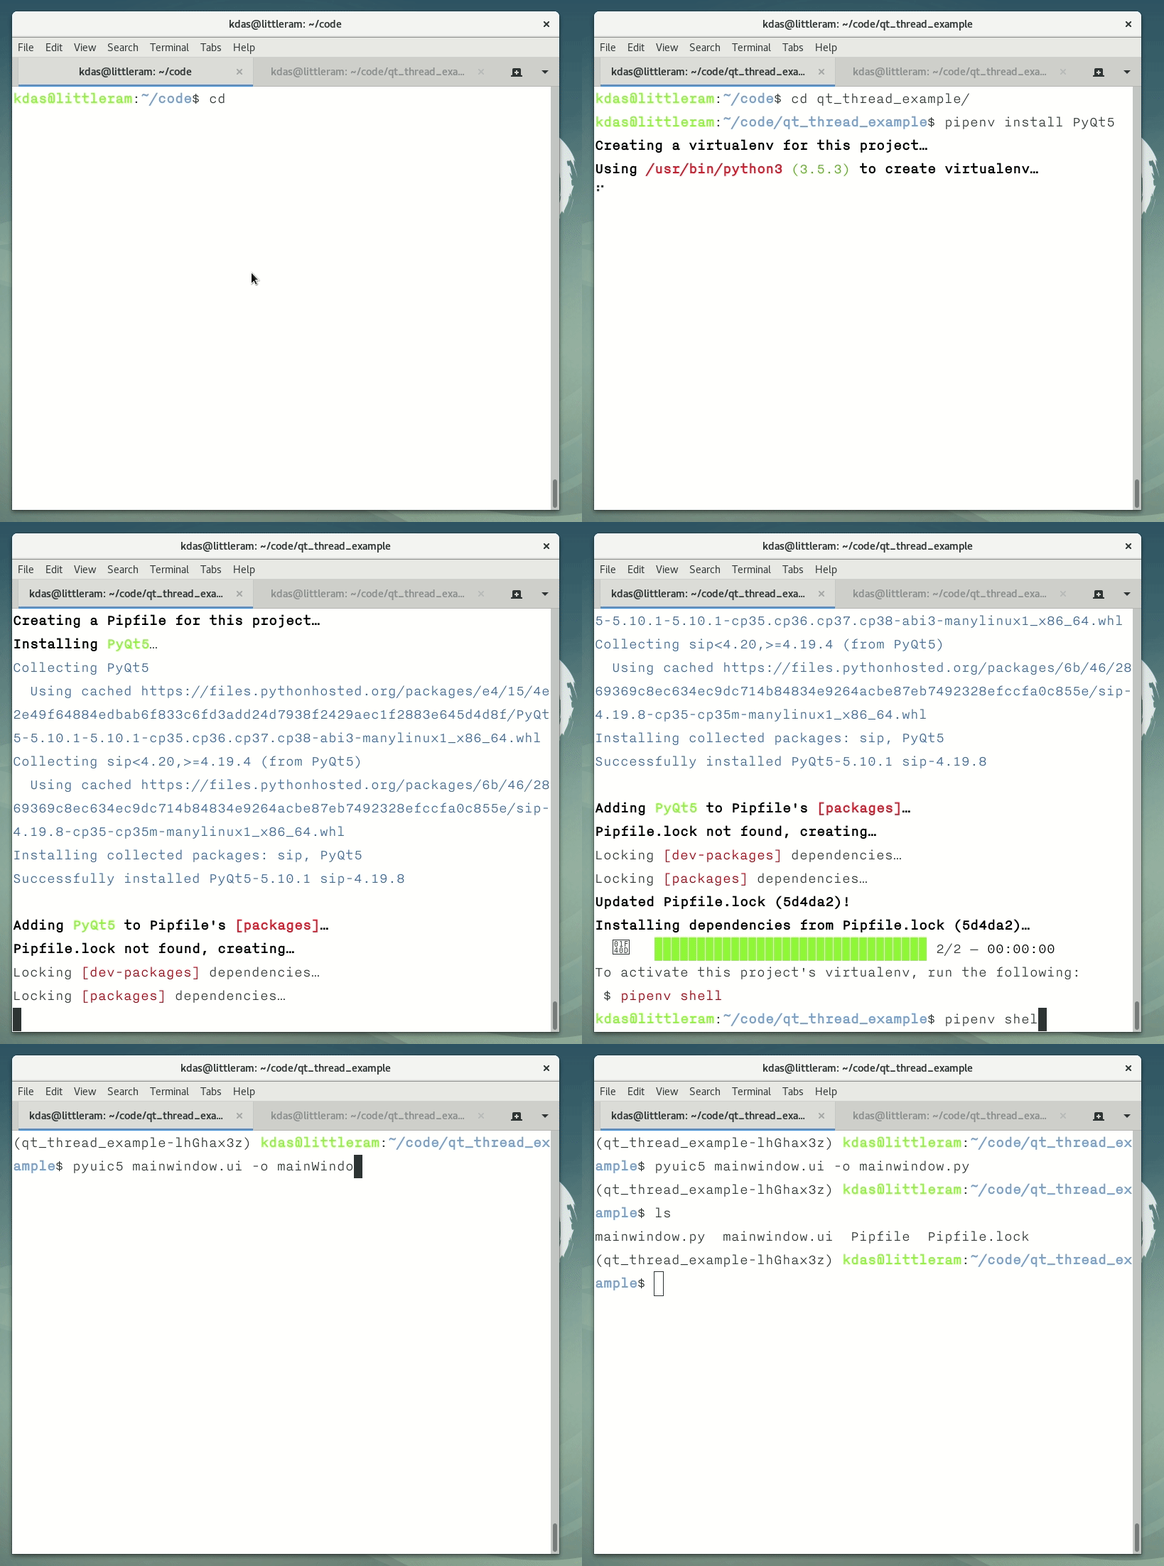
I have used qt creator to create a simple MainWindow form and saved it as mainwindow.ui in the project directory. Then, used pipenv to create a virtualenv and also installed the pyqt5 module. Next, used the pyuic5 command to create a Python file from UI file.

The code does not have error checks, the subprocess documentation should give you enough details about how to add them.

Doing git clone without any thread

The following code creates a temporary directory, and then git clones any given git repository into that.

#!/usr/bin/python3

import sys
import tempfile
import subprocess
from PyQt5 import QtWidgets

from mainwindow import Ui_MainWindow


class ExampleApp(QtWidgets.QMainWindow, Ui_MainWindow):

    def __init__(self, parent=None):
        super(ExampleApp, self).__init__(parent)
        self.setupUi(self)
        # Here we are telling to call git_clone method when
        # someone clicks on the pushButton.
        self.pushButton.clicked.connect(self.git_clone)

    # Here is the actual method which does git clone
    def git_clone(self):
        git_url = self.lineEdit.text()  # Get the git URL
        tmpdir = tempfile.mkdtemp()  # Creates a temporary directory
        cmd = "git clone {0} {1}".format(git_url, tmpdir)
        subprocess.check_output(cmd.split())  # Execute the command
        self.textEdit.setText(tmpdir)  # Show the output to the user


def main():
    app = QtWidgets.QApplication(sys.argv)
    form = ExampleApp()
    form.show()
    app.exec_()


if __name__ == '__main__':
    main()

Doing git clone with a thread

In the below example we added a new CloneThread class, it has a run method, which gets called when the thread starts. At the end of the run, we are emitting a signal to inform the main thread that the git clone operation has finished.

#!/usr/bin/python3

import sys
import tempfile
import subprocess
from PyQt5 import QtWidgets
from PyQt5.QtCore import QThread, pyqtSignal

from mainwindow import Ui_MainWindow


class CloneThread(QThread):
    signal = pyqtSignal('PyQt_PyObject')

    def __init__(self):
        QThread.__init__(self)
        self.git_url = ""

    # run method gets called when we start the thread
    def run(self):
        tmpdir = tempfile.mkdtemp()
        cmd = "git clone {0} {1}".format(self.git_url, tmpdir)
        subprocess.check_output(cmd.split())
        # git clone done, now inform the main thread with the output
        self.signal.emit(tmpdir)


class ExampleApp(QtWidgets.QMainWindow, Ui_MainWindow):

    def __init__(self, parent=None):
        super(ExampleApp, self).__init__(parent)
        self.setupUi(self)
        self.pushButton.setText("Git clone with Thread")
        # Here we are telling to call git_clone method when
        # someone clicks on the pushButton.
        self.pushButton.clicked.connect(self.git_clone)
        self.git_thread = CloneThread()  # This is the thread object
        # Connect the signal from the thread to the finished method
        self.git_thread.signal.connect(self.finished)

    def git_clone(self):
        self.git_thread.git_url = self.lineEdit.text()  # Get the git URL
        self.pushButton.setEnabled(False)  # Disables the pushButton
        self.textEdit.setText("Started git clone operation.")  # Updates the UI
        self.git_thread.start()  # Finally starts the thread

    def finished(self, result):
        self.textEdit.setText("Cloned at {0}".format(result))  # Show the output to the user
        self.pushButton.setEnabled(True)  # Enable the pushButton


def main():
    app = QtWidgets.QApplication(sys.argv)
    form = ExampleApp()
    form.show()
    app.exec_()


if __name__ == '__main__':
    main()

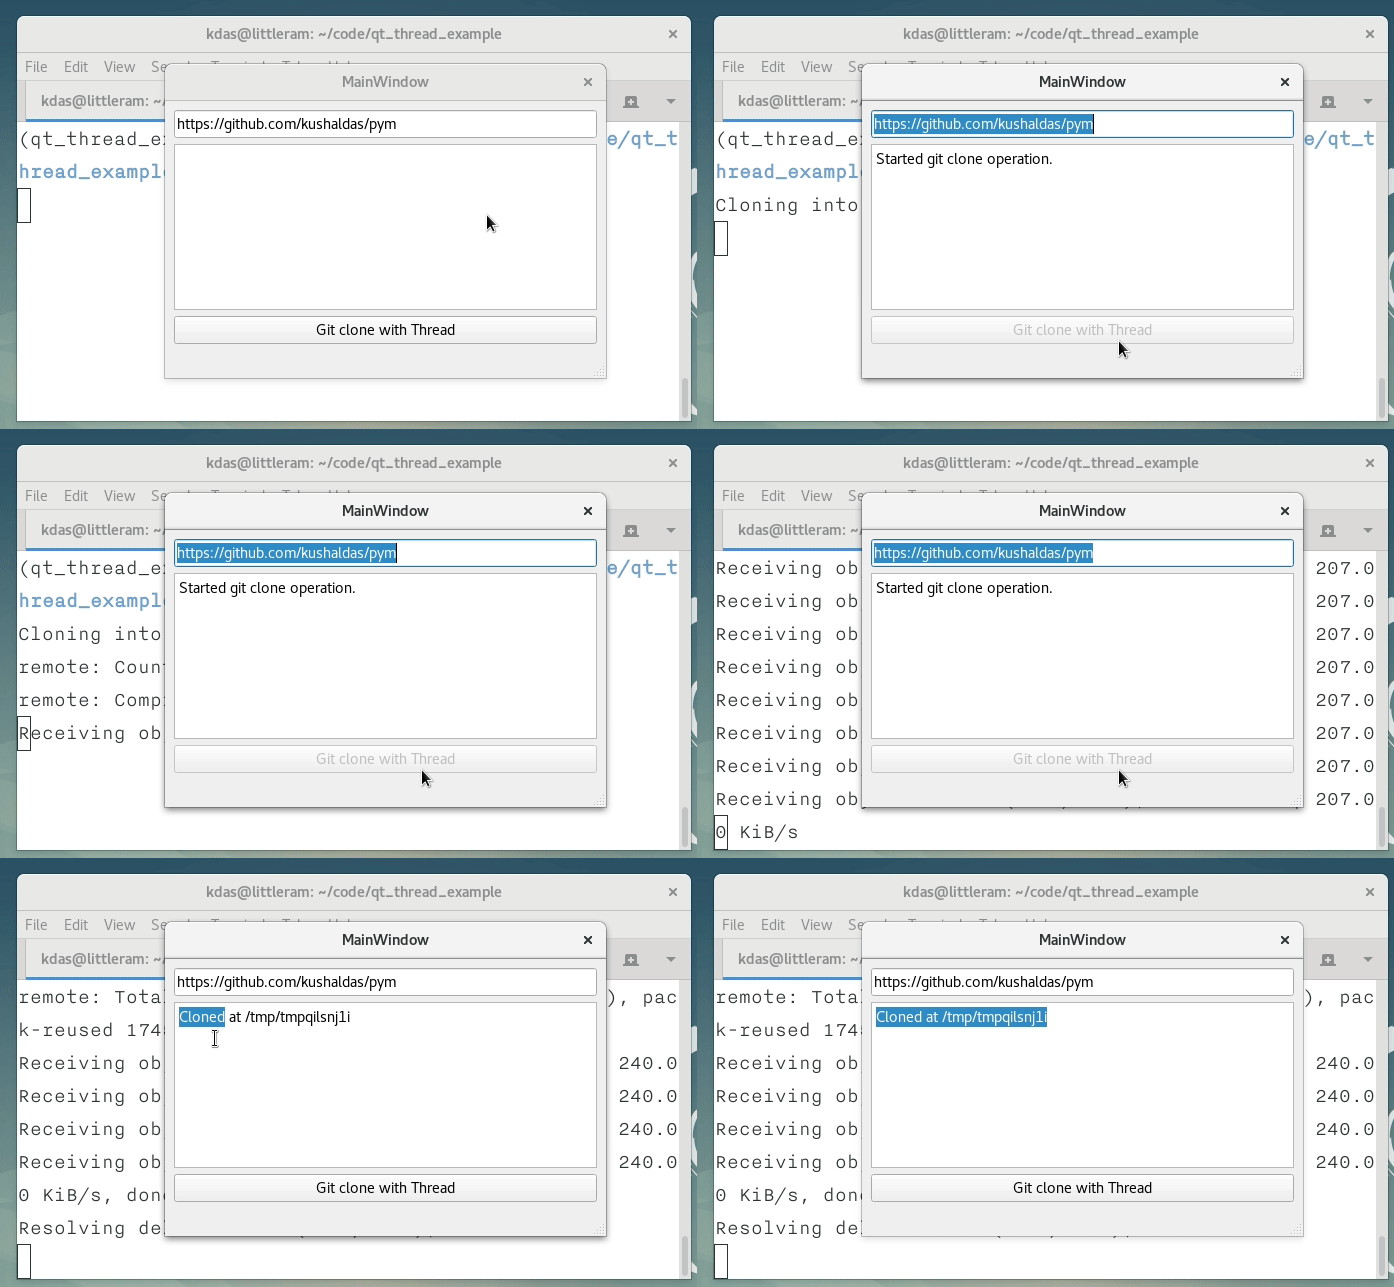
The example looks like the above GIF. You can find the source code here. You can find a bigger example in the journalist_gui of the SecureDrop project.

Fedora 28 template is available on QubesOS

In case you missed the news, Fedora 28 is now available as a template in Qubes OS 4.0. Fedora 26 will end of life on 2018-06-01, means this is a good time for everyone to upgrade. Use the following command in your dom0 to install the template. The template is more than 1GB in size, means it will take some time to download.

$ sudo qubes-dom0-update qubes-template-fedora-28

After installation, remember to start the template, and update, and also install all the required applications there. Next step would be to use this template everywhere.

Btw, we do have the latest Python 3.6.5 in Fedora 28 :)

$ python3
Python 3.6.5 (default, Mar 29 2018, 18:20:46)
[GCC 8.0.1 20180317 (Red Hat 8.0.1-0.19)] on linux
Type "help", "copyright", "credits" or "license" for more information.
>>>

SecureDrop development sprint in PyCon 2018

SecureDrop will take part in PyCon US development sprints (from 14th to 17th May). This will be first time for the SecureDrop project to present in the sprints.

If you never heard of the project before, SecureDrop is an open source whistleblower submission system that media organizations can install to securely accept documents from anonymous sources. Currently, dozens of news organizations including The Washington Post, The New York Times, The Associated Press, USA Today, and more, use SecureDrop to preserve the anonymous tipline in an era of mass surveillance. SecureDrop is installed on-premises in the news organizations, and journalists and source both use a web application to interact with the system. It was originally coded by the late Aaron Swartz and is now managed by Freedom of the Press Foundation.

How to prepare for the sprints

The source code of the project is hosted on Github.

The web applications, administration CLI tool, and a small Qt-based GUI are all written in Python. We use Ansible heavily for the orchestration. You can setup the development environment using Docker. This section of the documentation is a good place to start.

A good idea would be to create the initial Docker images for the development before the sprints. We have marked many issues for PyCon Sprints and also there are many documentation issues.

Another good place to look is the tests directorty. We use pytest for most of our test cases. We also have Selenium based functional tests.

Where to find the team?

Gitter is our primary communication platform. During the sprint days, we will in the same room of the CPython development (as I will be working on both).

So, if you are in PyCon sprints, please visit us to know more and maybe, start contributing to the project while in sprints.