Next week we have the 0.5 release of SecureDrop.
SecureDrop is an open-source whistleblower submission system that media
organizations can use to securely accept documents from and communicate with
anonymous sources. It was originally created by the late Aaron Swartz and is
currently managed by Freedom of the Press Foundation.
In this blog post I am going to tell you how can you set up a production
instance of SecureDrop in VM(s) in your computer, and help us to test the
system for the new release.
Required software
We provision our VM(s) using Vagrant. You will also need access to a GPG key
(along with the private key) to test the whole workflow. The set up is done
using Ansible playbooks.
Another important piece is a Tails VM for the
administrator/journalist workstation. Download the latest (Tails 3.3) ISO from
their website.
You will need at least 8GB RAM in your system so that you can have the 3 VM(s)
required to test the full system.
Get the source code
For our test, we will first set up a SecureDrop 0.4.4 production system, and
then we will update that to the 0.5rc release.
Clone the SecureDrop repository in a
directory in your local computer. And then use the following commands to set up
two VM(s). One of the VM is for the application server, and the other VM is the
monitor server.
$ vagrant up /prod/ --no-provision
In case you don’t have the right image file for KVM, you can convert the
Virtualbox image following this blog post.
Create a Tails VM
Follow this
guide
to create a virtualized Tails environment.
After the boot, remember to create a Persistence storage, and also setup a
administrator password (you will have to provide the administrator password
everytime you boot the Tails VM).

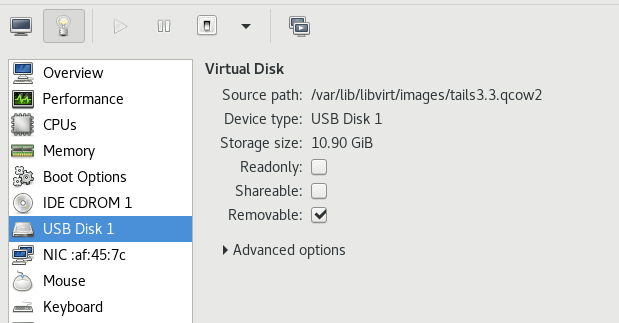
For KVM, remember to mark the drive as a removable USB storage and also mark it
in the Booting Options section after the installation.
Then, you can mount the SecureDrop git repository inside the Tails VM, I used
this
guide
for the same.
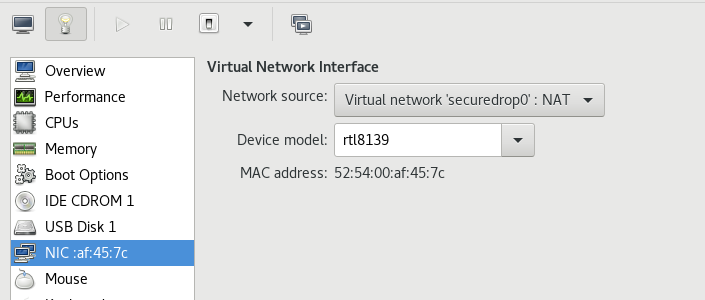
Also remember to change the Virtual Network Interface in the virt-manager to
Virtual network ‘securedrop0’: NAT for the Tails VM.

Install SecureDrop 0.4.4 release in the production VM(s).
For the next part of the tutorial, I am assuming that the source code is at the
~/Persistent/securedrop directory.
Move to 0.4.4 tag
$ git checkout 0.4.4
We will also have remove a validation role from the 0.4.4 Ansible playbook,
otherwise it will fail on a Tails 3.3 system.
diff --git a/install_files/ansible-base/securedrop-prod.yml b/install_files/ansible-base/securedrop-prod.yml
index 877782ff..37b27c14 100755
--- a/install_files/ansible-base/securedrop-prod.yml
+++ b/install_files/ansible-base/securedrop-prod.yml
@@ -11,8 +11,6 @@
# Don't clobber new vars file with old, just create it.
args:
creates: "{{ playbook_dir }}/group_vars/all/site-specific"
- roles:
- - { role: validate, tags: validate }
- name: Add FPF apt repository and install base packages.
hosts: securedrop
Create the configuration
In the host system make sure that you export your GPG public key to a file in
the SecureDrop source directory, for my example I stored it in
install_files/ansible-base/kushal.pub. I also have the exported insecure key
from Vagrant. You can find that key at ~/.vagrant.d/insecure_private_key in
your host system. Make sure to copy that file too in the SecureDrop source
directory so that we can later access it from the Tails VM.
Inside of the Tails VM, give the following command to setup the dependencies.
$ ./securedrop-admin setup
Next, we will use the sdconfig command to create the configuration file.
$ ./securedrop-admin sdconfig
The above command will ask you many details, you can use the defaults in most
cases. I am pasting my configuration file below, so that you can look at the
example values I am using. The IP addresses are the default address for the
production Vagrant VM(s). You should keep them the same as mine.
---
### Used by the common role ###
ssh_users: vagrant
dns_server: 8.8.8.8
daily_reboot_time: 4 # An integer between 0 and 23

# TODO Should use ansible to gather this info
monitor_ip: 10.0.1.5
monitor_hostname: mon
app_hostname: app
app_ip: 10.0.1.4

### Used by the app role ###
# The securedrop_header_image has to be in the install_files/ansible-base/ or
# the install_files/ansible-base/roles/app/files/ directory
# Leave set to empty to use the SecureDrop logo.
securedrop_header_image: ""
# The app GPG public key has to be in the install_files/ansible-base/ or
# install_files/ansible-base/roles/app/files/ directory
#
# The format of the app GPG public key can be binary or ASCII-armored,
# the extension also doesn't matter
#
# The format of the app gpg fingerprint needs to be all capital letters
# and zero spaces, e.g. "B89A29DB2128160B8E4B1B4CBADDE0C7FC9F6818"
securedrop_app_gpg_public_key: kushal.pub
securedrop_app_gpg_fingerprint: A85FF376759C994A8A1168D8D8219C8C43F6C5E1

### Used by the mon role ###
# The OSSEC alert GPG public key has to be in the install_files/ansible-base/ or
# install_files/ansible-base/roles/app/files/ directory
#
# The format of the OSSEC alert GPG public key can be binary or
# ASCII-armored, the extension also doesn't matter
#
# The format of the OSSEC alert GPG fingerprint needs to be all capital letters
# and zero spaces, e.g. "B89A29DB2128160B8E4B1B4CBADDE0C7FC9F6818"
ossec_alert_gpg_public_key: kushal.pub
ossec_gpg_fpr: A85FF376759C994A8A1168D8D8219C8C43F6C5E1
ossec_alert_email: kushaldas@gmail.com
smtp_relay: smtp.gmail.com
smtp_relay_port: 587
sasl_username: fakeuser
sasl_domain: gmail.com
sasl_password: fakepassword

### Use for backup restores ###
# If the `restore_file` variable is defined, Ansible will overwrite the state of
# the app server with the state from the restore file, which should have been
# created by a previous invocation of the "backup" role.
# To use uncomment the following line and enter the filename between the quotes.
# e.g. restore_file: "sd-backup-2015-01-15--21-03-32.tar.gz"
#restore_file: ""
securedrop_app_https_on_source_interface: False
securedrop_supported_locales: []
Starting the actual installation
Use the following two commands to start the installation.
$ ssh-add insecure_private_key
$ ./securedrop-admin install
Then wait for a while for the installation to finish.
Configure the Tails VM as a admin workstation
$ ./securedrop-admin tailsconfig
The above command expects that the previous installation step finished without
any issue. The addresses for the source and journalist interfaces can be found
in the install_files/ansible-base/*ths files at this moment.
After this command, you should see two desktop shortcuts on your Tails desktop,
one pointing to the source interface, and one for journalist interface. Double
click on the source interface and make sure that you can view the source
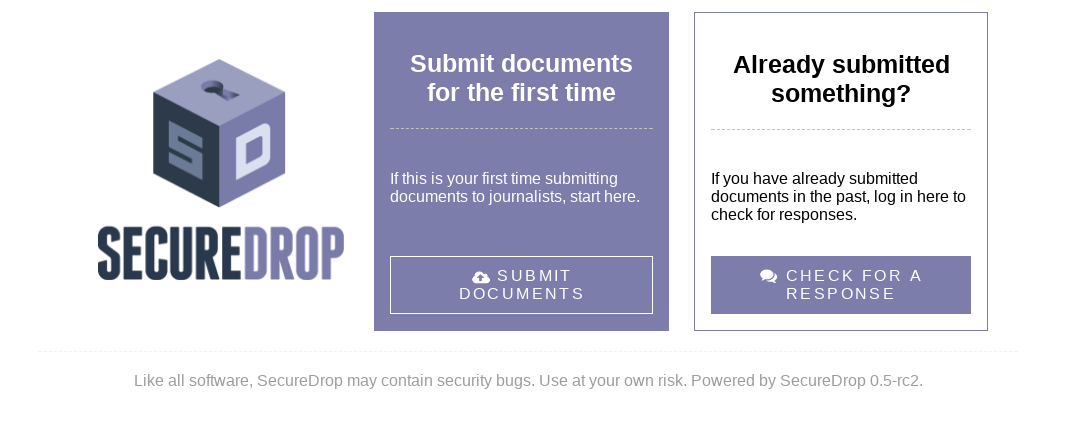
interface and the SecureDrop version mentioned in the page is 0.4.4.
Now update the systems to the latest SecureDrop rc release
The following commands in the Tails VM will help you to update to the latest RC release.
$ source .venv/bin/activate
$ cd install_files/ansible-base
$ torify wget https://gist.githubusercontent.com/conorsch/e7556624df59b2a0f8b81f7c0c4f9b7d/raw/86535a6a254e4bd72022865612d753042711e260/securedrop-qa.yml`
$ ansible-playbook -vv --diff securedrop-qa.yml
Then we will SSH into both app and mon VM(s), and give the following the
command to update to the latest RC.
$ sudo cron-apt -i -s
Note: You can use ssh app and ssh mon to connect to the systems. You can
also checkout the release/0.5 branch and rerun the tailsconfig command. That
will make sure the desktop shortcuts are trusted by default.
After you update both the systems, if you reopen the source interface in
the Tails VM again, you should see version mentioned as a RC release.
Now, if you open up the source interface onion address in the Tor browser on
your computer, you should be able to submit documents/messages.

SecureDrop hackathon at EFF office next week
On December 7th from 6PM we are having a SecureDrop hackathon at the EFF
office. Please
RSVP
and come over to start contributing to SecureDrop.


