Kushal Das

FOSS and life. Kushal Das talks here.

kushal76uaid62oup5774umh654scnu5dwzh4u2534qxhcbi4wbab3ad.onion

Securedrop Worktstation and how can you help

Snowden tweet

A few weeks ago on August 12 Freedom of the Press had one event where we talked with Paul Lewis from The Gurdian about their use of SecureDrop project, and how it helps in doing the investigative journalism work. My dear friend Harlo was the host for the evening. You can watch the event on Youtube.

The second half of the event was a live demo of the new SecureDrop Workstation project.

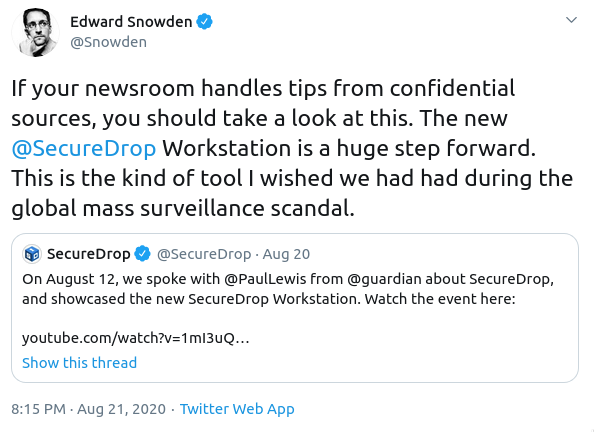
SecureDrop is an open source whistleblower submission system that media organizations and NGOs can install to securely accept documents from anonymous sources. It was originally created by the late Aaron Swartz and is now managed by Freedom of the Press Foundation. SecureDrop is available in 20 languages.

The current SecureDrop is dependent heavily on air-gapped Tails systems. This means increased security but also means a lot of time in accessing the submissions by the journalists. SecureDrop Workstation is the next generation system coming up to help in reducing this and also provide much smoother user experience without giving up the security.

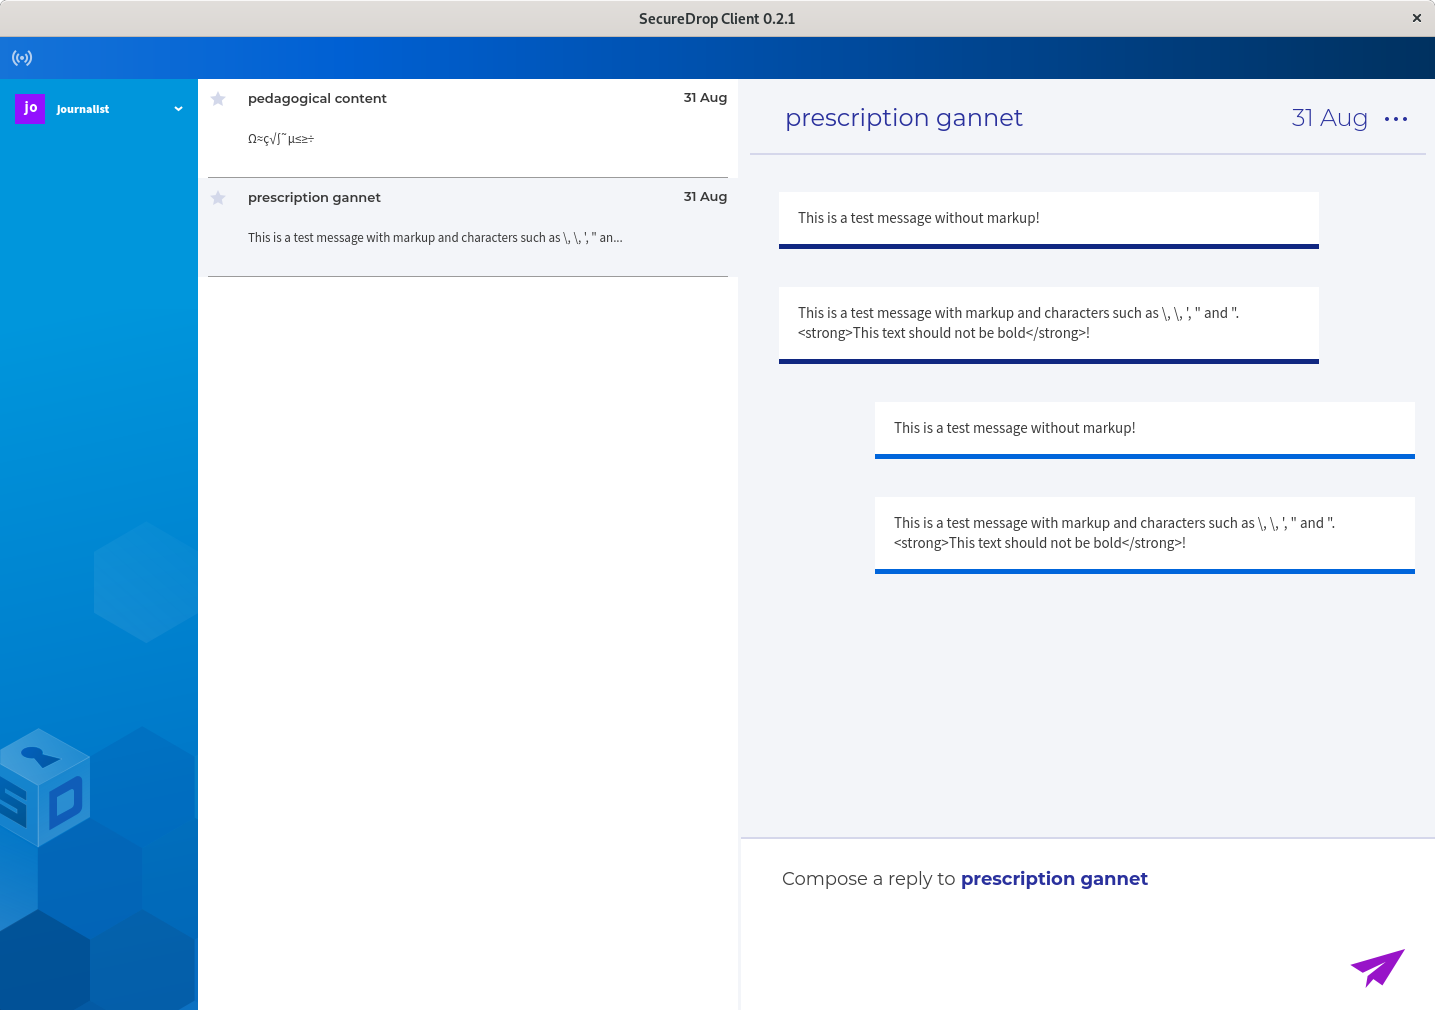
In simple words, it is a system built on top of the QubesOS, where journalists can access the submissions via a desktop application and can communicate with sources with much ease.

Login window

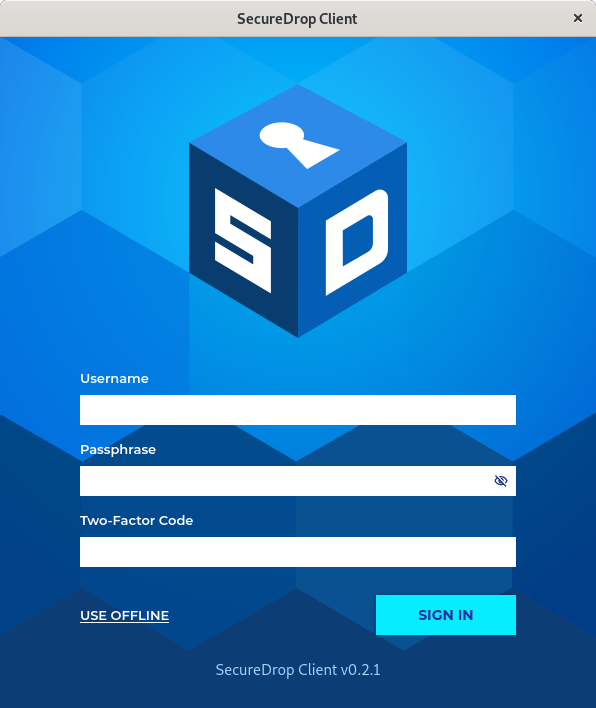
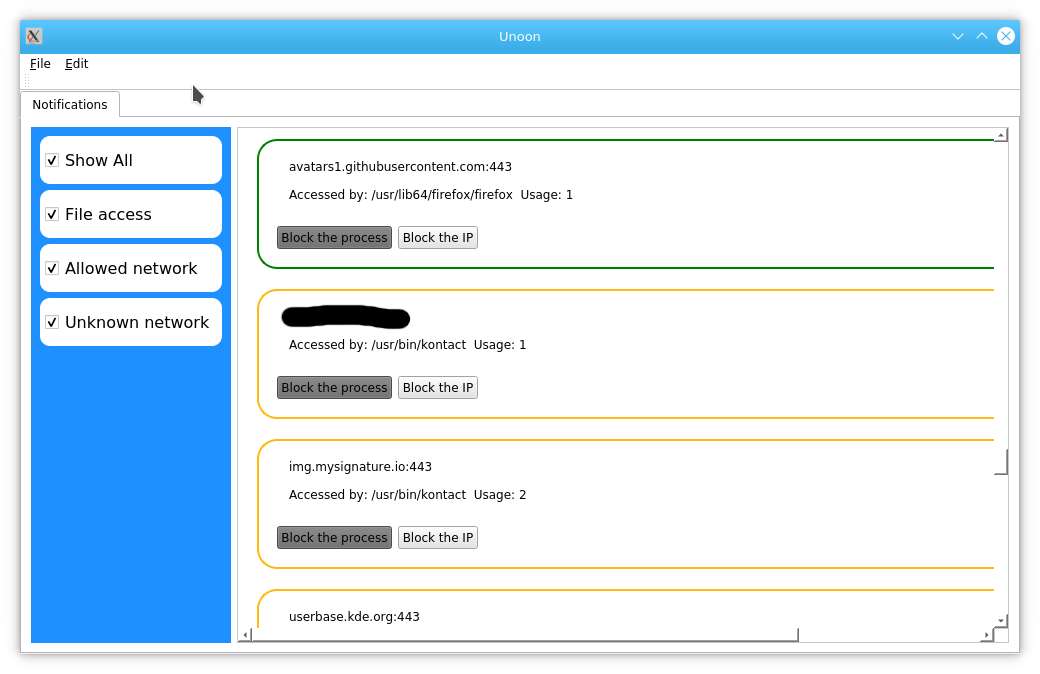
And the view for the journalists.

journalist view

You can read in detail about the idea and reasoning behind this project in this whitepaper.

At the beginning of this year, we also published the news on the first (for alpha release) security audit. You can directly jump into the full audit report too.

If you follow DEF CON, you may remember the last panel in 2019 where the usage of SecureDrop and the security audit was discussed.

You can also watch the talk at USENIX Enigma 2020 by Jennifer Helsby.

Technologies used, and how can you help?

SecureDrop is a Free Software project built with similar technologies that you all see and use every day. The main server side is written in Python, with a lot of Ansible, and molecule to test. The web application is written in Flask and contains tests written in Pytest. The documentation is written in Sphinx and maintained via ReadTheDocs. Development setup can be created using Docker, and full-scale production vms (for testing) can be created using the Vagrant.

The translations are maintained in the Weblate by the amazing community at Localization Lab.

The SecureDrop Workstation client is written in PyQt. There are many related Python modules in our Github. The packages are reproducible builds, except the RPMS.

The sources and journalists access SecureDrop via Tor Project. In Qubes OS we use both Fedora and Debian VMs.

There are many issues opened in all of these project’s repositories, and by using/testing them, you most probably will be able to find more things to be fixed. There are problems which can be solved with people from different experiences.

We do daily standup at 16:00UTC in this meeting link. Please feel free to join in and say hi.

Use DoH over Tor for your Qubes system

I was using my dns-tor-proxy tool in the AppVMs in my QubesOS system. But, at the same time I was trying to figure out how to make it the default DNS system for the whole Qubes.

ahf provided me a shell script showing how he is forwarding the DNS requests to a VPN interface. I modified the same so that all of standard DNS queries become DoH queries over the Tor network.

Setting up sys-firewall

In the following example, I am setting up the sys-firewall service VM. All other AppVMs connected to this VM as netvm will be use dns-tor-proxy without any modification.

Make sure that the template for sys-firewall has the latest Tor installed. You can get it from the official Tor repository.

Download (or build) the latest dns-tor-proxy 0.3.0 release, and put the file (as executable) in /rw/config/ directory.

Next, modify the /rw/config/rc.local file & add the following lines.

systemctl start tor
sh /rw/config/dns.sh
/rw/config/dns-tor-proxy --doh &

As you can see, we are executing another script at /rw/config/dns.sh, which has the following content. Remember to modify the DNS value to the right IP for your sys-firewall vm.


#!/bin/sh

QUBES_DNS_SERVERS="10.139.1.1 10.139.1.2"
DNS=10.137.0.x

# accept DNS requests from the other vms

iptables -I INPUT -i vif+ -p udp --dport 53 -j ACCEPT
iptables -I INPUT -i vif+ -p tcp --dport 53 -j ACCEPT

# Clean up our NAT firewall rules.
iptables --flush PR-QBS --table nat

# We take incoming traffic on TCP and UDP port 53 and forward to
# our DNS server.
for QUBES_DNS_SERVER in ${QUBES_DNS_SERVERS} ; do
    iptables --append PR-QBS --table nat --in-interface vif+ --protocol tcp --destination "${QUBES_DNS_SERVER}" --dport 53 --jump DNAT --to-destination "${DNS}":53
    iptables --append PR-QBS --table nat --in-interface vif+ --protocol udp --destination "${QUBES_DNS_SERVER}" --dport 53 --jump DNAT --to-destination "${DNS}":53
done

# Log *other* DNS service connections. This part is optional, but ensures that
# you can monitor if one of your VM's is making any traffic on port 53 with
# either TCP or UDP. If you want to log *every* DNS "connection", including the
# ones to QUBES_DNS_SERVERS, you can either move these commands up before the
# for-loop in this file or change the --apend option to be an --insert instead.
iptables --append PR-QBS --table nat --in-interface vif+ --protocol tcp --dport 53 --jump LOG --log-level 1 --log-prefix 'DNS Query: '
iptables --append PR-QBS --table nat --in-interface vif+ --protocol udp --dport 53 --jump LOG --log-level 1 --log-prefix 'DNS Query: '

Now, restart your sys-firewall vm. And you are all set for your DNS queries.

Introducing pyage-rust, a Python module for age encryption

age is a simple, modern and secure file encryption tool, it was designed by @Benjojo12 and @FiloSottile.

An alternative interoperable Rust implementation is available at github.com/str4d/rage

pyage-rust is a Python module for age, this is built on top of the Rust crate. I am not a cryptographer, and I prefer to keep this important thing to the specialists :)

pyage-rust demo

Installation

I have prebuilt wheels for both Linux and Mac, Python 3.7 and Python 3.8.

python3 -m pip install pyage-rust==0.1.0

Please have a look at the API documentation to learn how to use the API.

Building pyage-rust

You will need the nightly rust toolchain (via https://rustup.rs).

python3 -m venv .venv
source .venv/bin/activate
python3 -m pip install requirements-dev.txt
maturin develop && maturin build

Missing items in the current implementation

I am yet to add ways to use ssh keys or alias features, but those will come slowly in the future releases.

Another try at a new Python module for OpenPGP aka johnnycanencrypt

Using OpenPGP from Python is a pain. There are various documentation/notes on the Internet explaining why, including the famous one from isis agora lovecraft where they explained why they changed the module name to pretty_bad_protocol.

sequoia-pgp is a Rust project to do OpenPGP from scratch in Rust, and as library first approach. You can see the status page to see how much work is already done.

Using this and Pyo3 project I started writing an experimental Python module for OpenPGP called Johnny Can Encrypt.

I just did an release of 0.1.0. Here is some example code.

>>> import johnnycanencrypt as jce
>>> j = jce.Johnny("secret.asc")
>>> data = j.encrypt_bytes("kushal 🐍".encode("utf-8"))
>>> print(data)
-----BEGIN PGP MESSAGE-----

wcFMAwhsWpR1vDokAQ//UQGjrmmPLP0Td8pELf8XZEPh6fY9Xad6XHH6vQjGwvjG
36kK8ejRqyLbZpwVOO1FUfiZt6AyaeIEeEagoolMxmFl67mWBHsw5Z2NUPhydAwJ
EX+VdFn6CtRzQ0xG3T7rOCrsR50COO13gc4fIAn7Rxj1DyjqlFvur10FNnxRm0iJ
jnOwPnWVWKwoROzevfQd1Oef0n4nbkDUuyrS9oHSRFhFF/9I9bGtJhho0VIIcmFG
YVkhR0+QROTZ4edKotUg0R3UUfHmfwT0XcybGWMG/8Nh3W8pYuxwDdtbSMNDZzxu
o9TdpLrgoRIkhyGmuYWrURrRN1hmce5B6XOagWu7aKL7pFhP7Vd6LLoliDwY4G6x
1yKHbSo/1FEof7WBDujCksuVedUO8Gs9giitR/p/U9PBadeyiW0CKTYiTURkkNiF
g79lVfbmM54eZ9zmU+PraVNpekYXvH3o+lvXd5T39mo4Y/dv2fDCjo2aiZ/bE56Q
yn/0Hhmj2ikrsUk3NcuhO4zxt+VLctJt+lfk+R2hal+6NTaRkREdprPp4ltAt/bm
8xwBmqp+FDdxGgY+ItJkG69vsIf4WpPsvBI37fVbeYqrPsaz9NGlz2QKdfQvaH7j
R7rgxf24H2FjbbyNuHF3tJJa4Kfpnhq4nkxA/EdRP9JcVm/X568jLayTLyJGmrbS
PAHlVMLSBXQDApkY+5Veu3teRR5M2BLPr7X/gfeNnTlbZ4kF5S+E+0bjTjrz+6oo
dcsnTYxmcAm9hdPjng==
=1IYb
-----END PGP MESSAGE-----

>>> result = j.decrypt_bytes(data.encode("utf-8"), "mysecretpassword")
>>> print(result.decode("utf-8"))
kushal 🐍

The readme of the project page has build instruction, and more details about available API calls. We can create new keypair (RSA4096). We can encrypt/decrypt bytes and files. We can also sign/verify bytes/files. The code does not have much checks for error handling, this is super early stage.

You will need nettle (on Fedora) and libnettle on Debian (and related development packages) to build it successfully.

I published wheels for Debian Buster (Python3.7), and Fedora 32 (Python3.8).

Issues in providing better wheels for pip install

The wheels are linked against system provided nettle library. And every distribution has a different version. Means even if I am building a python3.7 wheel on Debian, it will not work on Fedora. I wish to find a better solution to this in the coming days.

As I said earlier in this post, this is just starting of this project. It will take time to mature for production use. And because of Sequoia, we will have better defaults of cipher/hash options.

dns-tor-proxy 0.2.0 aka DoH release

I just now released 0.2.0 of the dns-tor-proxy tool. The main feature of this release is DNS over HTTPS support. At first I started writing it from scratch, and then decided to use modified code from the amazing dns-over-https project instead.

Demo

demo of the DoH support in the tool

✦ ❯ ./dns-tor-proxy -h
Usage of ./dns-tor-proxy:
      --doh                 Use DoH servers as upstream.
      --dohaddress string   The DoH server address. (default "https://mozilla.cloudflare-dns.com/dns-query")
  -h, --help                Prints the help message and exists.
      --port int            Port on which the tool will listen. (default 53)
      --proxy string        The Tor SOCKS5 proxy to connect locally, IP:PORT format. (default "127.0.0.1:9050")
      --server string       The DNS server to connect IP:PORT format. (default "1.1.1.1:53")
  -v, --version             Prints the version and exists.
Make sure that your Tor process is running and has a SOCKS proxy enabled.

Now you can pass --doh flag to enable DoH server usage, by default it will use https://mozilla.cloudflare-dns.com/dns-query. But you can pass any server using --dohaddress flag. I found the following servers are working well over Tor.

  • https://doh.libredns.gr/dns-query
  • https://doh.powerdns.org
  • https://dns4torpnlfs2ifuz2s2yf3fc7rdmsbhm6rw75euj35pac6ap25zgqad.onion/dns-query
  • https://dnsforge.de/dns-query

The release also has a binary executable for Linux x86_64. You can verify the executable using the signature file available in the release page.

Introducing dns-tor-proxy, a new way to do all of your DNS calls over Tor

dns-tor-proxy is a small DNS server which you can run in your local system along with the Tor process. It will use the SOCKS5 proxy provided from Tor, and route all of your DNS queries over encrypted connections via Tor.

By default the tool will use 1.1.1.1 (from Cloudflare) as the upstream server, but as the network calls will happen over Tor, this will provide you better privacy than using directly.

In this first release I am only providing source packages, maybe in future I will add binaries so that people can download and use them directly.

Demo

In the following demo I am building the tool, running it at port 5300, and then using dig to find the IP addresses for mirrors.fedoraproject.org and python.org.

demo of dns tor proxy

The -h flag will show you all the available configurable options.

./dns-tor-proxy -h

Usage of ./dns-tor-proxy:
  -h, --help            Prints the help message and exists.
      --port int        Port on which the tool will listen. (default 53)
      --proxy string    The Tor SOCKS5 proxy to connect locally,  IP:PORT format. (default "127.0.0.1:9050")
      --server string   The DNS server to connect IP:PORT format. (default "1.1.1.1:53")
  -v, --version         Prints the version and exists.
Make sure that your Tor process is running and has a SOCKS proxy enabled.

Onion service v2 deprecation timeline

On Monday June 15, the developers of the Tor Project announced the initial plan for the deprecation of Onion services v2. You can identify v2 addresses easily as they are only 16 character long, where as the v3 addresses are 56 character long.

Why?

The v2 services used RSA1024, where as v3 uses ed25519, means better cryptography. We can also have offline keys for the onion service. You can read all other benefits in the v3 spec.

Timeline

According to the email to the list, the following the current timeline:

  • On 2020-09-15 with 0.4.4.x release Tor will start informing v2 onion service operators that v2 is deprecated.
  • On 2021-07-15 with 0.4.6.x release Tor will stop supporting v2 onion addresses, and all related source code will be removed.
  • On 2021-10-15 there will be a new stable version release which will disable using v2 onion services on the Tor network.

How can you prepare as an Onion service provider?

If you are using/providing any v2 onion service, you should enable v3 service for the same service. This will help you to test your v3 configuration while keeping the v2 on, and then you can retire your v2 address. If you need help in setting authenticated v3 service, you can follow this blog post. I wrote another post which explains how can you generate the keys using Python cryptography module.

Read the full announcement in the list archive.

Curious case of image based email signatures and Kmail

We already talk about why HTML emails are bad, but that is the default in most of the email service providers. HTML emails means some code is getting executed and rendered on your system. Maybe on a browser, or on a desktop email client.

Many people do not use any HTML tag in their emails, but then they have fancy email signatures. A lot of time they have fancy image generated on a website and they use the generated image URL as signature. This means every time someone opened the email (with HTML rendering on) the third party company will be able to track those usages. We don't know what happens next to all of these tracking information.

Last week I was trying out various desktop email clients available on Fedora 32, and noticed a strange thing on Kmail/Kontact, the email client of KDE. I run my Unoon tool to monitor all processes for any network connection on system. And, suddenly it popped a notification about Kmail connecting to mysignatures.io. I was surprised for a second, as Kmail also disables loading of any remote resource (say images) and does not render HTML email by default.

Screenshot of Unoon

Then I figured that if I click on reply button (the compose window), it fetches the image from the signature (or any <img> tag). This means the HTML is getting rendered somehow, even if it is not showing to the user. After I filed a bug upstream, I also pinged my friend ADE. He helped to reproduce it and also find more details on the same. Now, we are waiting for a fix. I hope this does not involve JS execution during that internal rendering.

I also checked for same behavior in Thunderbid, and it does not render in similar way.

Onion location and Onion names in Tor Browser 9.5

Yesterday the Tor Browser 9.5 was released. I am excited about this release for some user-focused updates.

Onion-Location header

If your webserver provides this one extra header Onion-Location, the Tor Browser will ask the user if they want to visit the onion site itself. The user can even mark to visit every such onion site by default. See it in action here.

To enable this, in Apache, you need a configuration line like below for your website’s configuration.

Onion location demo

Header set Onion-Location "http://your-onion-address.onion%{REQUEST_URI}s"

Remember to enable rewrite module.

For nginx, add the following in your server configuration.

add_header Onion-Location http://<your-onion-address>.onion$request_uri;

URL which we can remember aka onion names

This is the first proof of concept built along with Freedom of the Press Foundation (yes, my team) and HTTPS Everywhere to help people to use simple names for onion addresses. For example, below, you can see that I typed theintercept.securedrop.tor.onion on the browser, and that took us to The Intercept’s SecureDrop address.

Onion name

Using Rust to access Internet over Tor via SOCKS proxy 🦀

Tor provides a SOCKS proxy so that you can have any application using the same to connect the Onion network. The default port is 9050. The Tor Browser also provides the same service on port 9150. In this post, we will see how can we use the same SOCKS proxy to access the Internet using Rust.

You can read my previous post to do the same using Python.

Using reqwest and tokio-socks crates

I am using reqwest and tokio-socks crates in this example.

The Cargo.toml file.

[package]
name = "usetor"
version = "0.1.0"
authors = ["Kushal Das <mail@kushaldas.in>"]
edition = "2018"

# See more keys and their definitions at https://doc.rust-lang.org/cargo/reference/manifest.html

[dependencies]
tokio = { version = "0.2", features = ["macros"] }
reqwest = { version = "0.10.4", features = ["socks", "json"] }
serde_json = "1.0.53"

The source code:

use reqwest;
use tokio;
use serde_json;

#[tokio::main]
async fn main() -> Result<(), reqwest::Error> {
    let proxy = reqwest::Proxy::all("socks5://127.0.0.1:9050").unwrap();
    let client = reqwest::Client::builder()
        .proxy(proxy)
        .build().unwrap();

    let res = client.get("https://httpbin.org/get").send().await?;
    println!("Status: {}", res.status());

    let text: serde_json::Value = res.json().await?;
    println!("{:#?}", text);

    Ok(())
}

Here we are converting the response data into JSON using serde_json. The output looks like this.

✦ ❯ cargo run
    Finished dev [unoptimized + debuginfo] target(s) in 0.06s
     Running `target/debug/usetor`
Status: 200 OK
Object({
    "args": Object({}),
    "headers": Object({
        "Accept": String(
            "*/*",
        ),
        "Host": String(
            "httpbin.org",
        ),
        "X-Amzn-Trace-Id": String(
            "Root=1-5ecc9e03-09dc572e6db5357f28eecf47",
        ),
    }),
    "origin": String(
        "51.255.45.144",
    ),
    "url": String(
        "https://httpbin.org/get",
    ),
})

Instead of any normal domain, you can also connect to any .onion domain via the same proxy.