Kushal Das

FOSS and life. Kushal Das talks here.

kushal76uaid62oup5774umh654scnu5dwzh4u2534qxhcbi4wbab3ad.onion

Fedora 29 on Qubes OS

I spent most of my life using Fedora as my primary operating system on my desktop/laptops. I use CentOS on my servers, sometimes even Fedora, and a few special cases, I use *BSD systems.

But, for the last one year I am running Qubes OS as my primary operating system on my laptop. That enables me to still keep using Fedora in the AppVMs as I want, and I can also have different work VMs in Debian/Ubuntu or even Windows as required. Moving to a newer version of Fedora is just about installing the new template and rebooting any AppVM with the newest template.

Fedora 29 will release on 30th October, and Qubes team already built a template for the same and pushed to the testing repository. You can install it by the following command.

$ sudo qubes-dom0-update qubes-template-fedora-29 --enablerepo=qubes-templates-itl-testing

After this, I just installed all the required packages and setup the template as I want using my Qubes Ansible project. It took only a few minutes to move all of my development related VMs into Fedora 29 and this still keeps the option open to go back to Fedora 28 the moment I want. This is one of the beauty of Qubes OS and of course there are the regular security aspects too.

If you are a software developer using Linux, and also care about security practices, give Qubes OS a try. It has also a very active and helpful user community. I am sure it will not disappoint you.

Using Ansible to maintain your Qubes system

From the time I have started using Qubes OS, How to create and setup new AppVMs in an efficient way? remained an open question for me. I was mostly using the command line tool to create any new AppVMs and then manually setting all the properties after creation. I also did the package installations and other setup inside of the VMs manually.

If you never heard of Qubes before, you should check it out. Qubes takes a different approach to security, security by compartmentalization, different applications are separated by Qubes (VMs) . The base is running Fedora and then all other VMs are on top of Xen. It also provides a very tight integration of the tools to give a pleasant experience.

When I asked about how people maintain different VMs or templateVMs (from which the normal VMs spawn off), the answer was mostly bash scripts. The tools provided by the Qubes team are friendly to scripting. Though the official way to managing VMs is done by Salt project.

As we (at Freedom of the Press Founation) are working towards a Qubes based desktop client for SecureDrop, we also started using Salt to maintain the states of the VMs. I personally found Salt to be very confusing and a bit difficult to learn.

From the mailing list I also found out about https://github.com/Rudd-O/ansible-qubes, but, as I started reading the README, I figured that Salt is being used here too in the background. That made me rethink about the Ansible as a choice to maintain my Qubes.

Last weekend I pinged Trishna for some pointers on writing new plugins for Ansible, and later at night I also talked with Toshio about the Ansible plugins + modules.

Introducing Qubes Ansible

The result of those chats is Qubes Ansible. It has a qubesos module and a qubes connection plugin for Ansible.

I already have a PR opened to add the connection plugin into Ansible.

The actual module will still require a lot of work to become feature complete with the existing command line tools and also with the Salt. This project is under active development.

Good thing is that I am getting feedback+patches from the #qubes IRC channel (on Freenode). From the Qubes development team, marmarek provided some real valuable input to make the plugin easier to use.

Example playbook

---
- hosts: localhost
  connection: local

  tasks:
    - name: Make sure the development VM is present
      qubesos:
        guest: development2
        state: present
        properties:
          memory: 1200
          maxmem: 1400
          netvm: 'sys-firewall'
          template: 'debian-9'
          label: "blue"

    - name: Run the VM
      qubesos:
        guest: development2
        state: running

You can use the above playbook to create a development2 AppVM with the exact properties you want. The examples page has all the available options documented.

If you are using Qubes, please give it a try, and tell us how can we improve your experience of maintaining the system with Ansible. You can provide feedback in a Github issue or talk directly in the #qubes IRC channel.

Fedora 28 template is available on QubesOS

In case you missed the news, Fedora 28 is now available as a template in Qubes OS 4.0. Fedora 26 will end of life on 2018-06-01, means this is a good time for everyone to upgrade. Use the following command in your dom0 to install the template. The template is more than 1GB in size, means it will take some time to download.

$ sudo qubes-dom0-update qubes-template-fedora-28

After installation, remember to start the template, and update, and also install all the required applications there. Next step would be to use this template everywhere.

Btw, we do have the latest Python 3.6.5 in Fedora 28 :)

$ python3
Python 3.6.5 (default, Mar 29 2018, 18:20:46)
[GCC 8.0.1 20180317 (Red Hat 8.0.1-0.19)] on linux
Type "help", "copyright", "credits" or "license" for more information.
>>>

Using split ssh in QubesOS 4.0

The idea behind Qubes OS is known as security by compartmentalization. You create different Qubes (VMs or domains) to compartmentalize your digital data. So that even if one of the VMs is compromised, the attacker will not be able to access data stored in other VMs.

If we look into a typical GNU/Linux user’s daily routine, ssh is a regular tool everyday. We do login to various systems, or access files over ssh. But, if you keep the ssh keys in the place where you are also running the browser, there is a chance that someone will try to access the files by attacking through the browser. Yesterday we all read many things which can be done by attacking through the browsers (Yay! SECURITY!!!).

In this tutorial, we will learn about split-ssh and how we can keep the actual ssh keys safe in QubesOS. At the time of writing this article (2018-01-05), the commit in the master branch is 1b1786f5bac9d06af704b5fb3dd2c59f988767cb.

Modify the template VM

Because we will be adding things to /etc directory of our VMs, we will have to do this in the template VM. Because in the normal VMs the /etc directory will be a fresh copy every time we restart the VM. I modified fedora-26 as that is my default template.

First, add the following code in the /etc/qubes-rpc/qubes.SshAgent file in the template VM and then shut it down.

#!/bin/sh
notify-send "[`qubesdb-read /name`] SSH agent access from: $QREXEC_REMOTE_DOMAIN"
ncat -U $SSH_AUTH_SOCK

Creating the actual ssh-vault VM

Next task is to create a new VM, I named it ssh-vault. The name is important to remember as the code/configuration will access the ssh keys based on the vault VM name. You can have as many ssh vaults as you want. Remember to open the configuration after creation and set the networking to None.
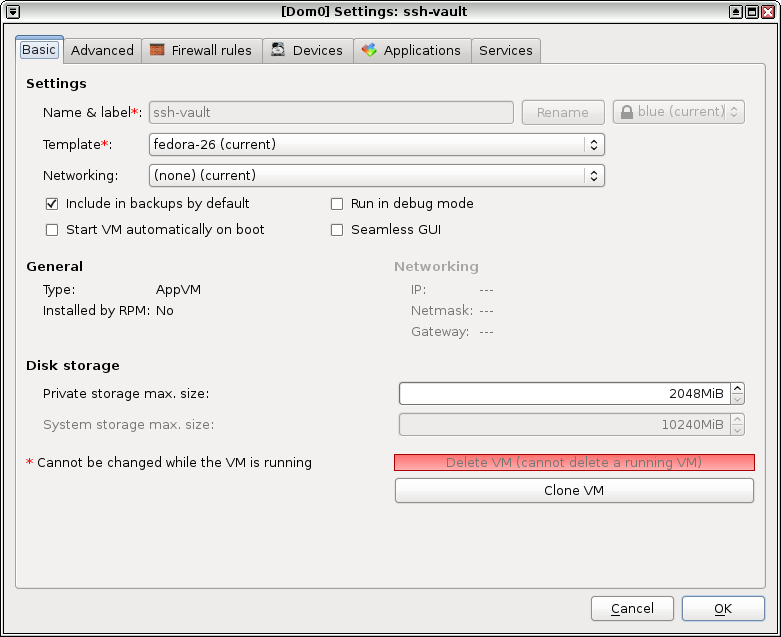
Start the vault VM, either create a new pair of ssh key, or copy your existing key in there. Remember to use qvm-copy command to copy the files, no network is available.

[Desktop Entry]
Name=ssh-add
Exec=ssh-add
Type=Application

Then add the above content to the ~/.config/autostart/ssh-add.desktop file. You may have to create the autostart directory.

$ mkdir -p .config/autostart
# vim ~/.config/autostart/ssh-add.desktop

Configuring the client VM

Client VM is the VM in which you use the ssh key. Add the following to the /rw/config/rc.local file, and then make the file executable. Remember to use sudo for the same.

SSH_VAULT_VM="ssh-vault"

if [ "$SSH_VAULT_VM" != "" ]; then
	export SSH_SOCK=/home/user/.SSH_AGENT_$SSH_VAULT_VM
	rm -f "$SSH_SOCK"
	sudo -u user /bin/sh -c "umask 177 && ncat -k -l -U '$SSH_SOCK' -c 'qrexec-client-vm $SSH_VAULT_VM qubes.SshAgent' &"
fi

If you look carefully at the shell scrip above, you will find we are setting the vault VM name using a variable called SSH_VAULT_VM. Change this name to whatever VM you want to use as the vault.

$ sudo vim /rw/config/rc.local
$ sudo chmod +x /rw/config/rc.local

Next, we will add the following to the ~/.bashrc file, so that ssh can find the right socket file.

# Set next line to the ssh key vault you want to use
SSH_VAULT_VM="ssh-vault"

if [ "$SSH_VAULT_VM" != "" ]; then
	export SSH_AUTH_SOCK=~user/.SSH_AGENT_$SSH_VAULT_VM
fi

Then I restarted the vault and client VMs. Because my ssh key also has a passphrase, I entered that using ssh-add command in the ssh-vault VM.

Configuring the policy in dom0

In QubesOS you will have to define a policy in the dom0, based on that the VMs can talk to each other (using QubeOS’ internal). In my case I want only the emails VM should be able to ask to get access to the ssh keys. So, I added the following in /etc/qubes-rpc/policy/qubes.SshAgent file.

emails ssh-vault ask

The above policy rule says that when the emails VM tries to contact ssh-vault VM, it has to ask for permission to do so from the user.

Using ssh (finally!)
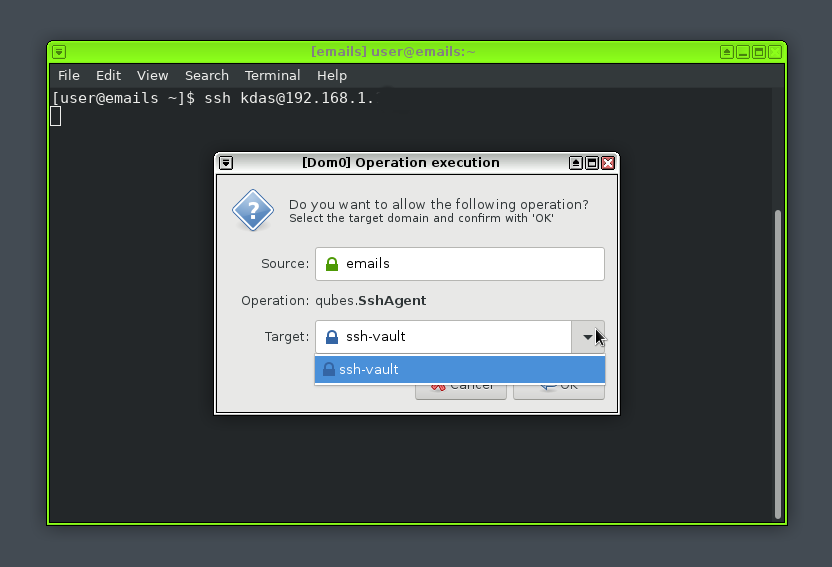
At this moment you can safely start the client VM, and try to ssh into anywhere. It will open up an authentication dialog, you will have to select and click on Okay button to give access to the ssh keys. You will also see a notification in the top notification area.

There is an active IRC channel #qubesin the Freenode server. Join there and ask any doubts you have.

Duplicate MAC address error in Qubes VMs

Just after I did the fresh install of Qubes 4.0rc3, I saw one error about sys-net (and sometimes same for other VMs) having a duplicate mac address for NIC. I rebooted the system for a few times, which solved the issue.

Start failed: invalid argument: network device with mac 00:16:3e:5e:6c:00 already exists

But, from the last week I started getting the same error again and again. Even if I use the qvm-prefs command to change the mac address, it is still trying to boot using the old address, I could not find the reason behind it. Rebooted the laptop way too many times with a hope of the error vanishing away, but of no use.

At first I checked the file /var/lib/qubes/qubes.xml for the duplicate record of the MAC address, but I found the right value there (the new one I set using the qvm-prefs command).

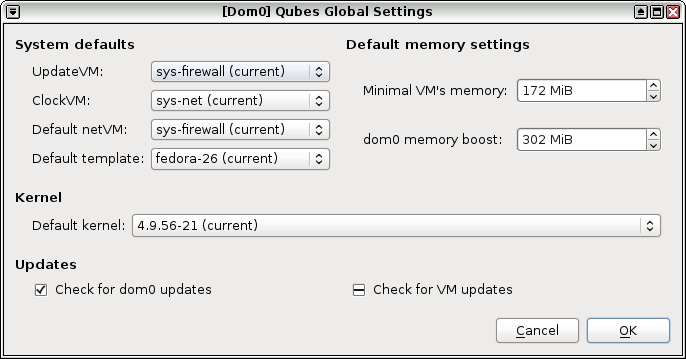
So, the next step was to remove the whole sys-net. As I forgot that I can not remove it till I remove all the dependency, my qvm-remove sys-net command will fail. I had to remove all dependencies using the Qubes Global Settings. Next, I removed and recreated the vm/domain and created a new one.

$ qvm-remove sys-net
$ sudo su -
# cd /srv/formulas/base/virtual-machines-formula/
# qubesctl top.enable qvm.sys-net
# qubesctl --targets sys-net state.highstate

I am yet to learn about Salt, I found a nice starting guide in the official Qubes documentation.

Qubes OS 4.0rc3 and latest UEFI systems

Last week I received a new laptop, I am going to use it as my primary work station. The first step was to install Qubes OS 4.0rc3 on the system. It is a Thinkpad T470 with 32GB RAM and a SSD drive.

How to install Qubes on the latest UEFI systems?

A few weeks back, a patch was merged to the official Qubes documentation, which explains in clear steps how to create a bootable USB drive on a Fedora system using livecd-tools. Please follow the guide and create a USB drive which will work on these latest machines. Just simply using dd will not help.

First step after installing Qubes

I upgraded the dom0 to the current testing packages using the following command.

$ sudo qubes-dom0-update --enablerepo=qubes-dom0-current-testing
$ sudo qubes-dom0-update qubes-template-fedora-26

I also installed the Fedora 26 template on my system using the next command. One of the important point to remember that Fedora 25 is going to be end of life today. So, better to use updated version of the distribution :)

There was another important thing happened in the last two weeks. I was in the Freedom of the Press Foundation office in San Fransisco. Means not only I managed to meet my amazing team, I also met many of my personal heroes in this trip. I may write a separate blog post about that later. But for now I can say that I managed to sit near to Micah Lee for 2 weeks and learn a ton about various things, including his Qubes workflow. The following two things were the first change I did to my installation (with his guidance) to make things working properly.

How to modify the copy-paste between domains shortcuts?

Generally Ctrl+Shift+c and Ctrl+Shift+v are used to copy-paste securely between different domains. But, those are the shortcuts to copy-paste from the terminal in all the systems. So, modifying them to a different key combination is very helpful for the muscle memory :)

Modify the following lines in the /etc/qubes/guid.conf file in dom0, I did a reboot after that to make sure that I am using this new key combination.

secure_copy_sequence = “Mod4-c”;
secure_paste_sequence = “Mod4-v”;

The above configuration will modify the copy paste shortcuts to Windows+c and Windows+v in my keyboard layout.

Fixing the wireless driver issue in suspend/resume

I also found that if I suspend the system, after starting it on again, the wireless device was missing from the sys-net domain. Adding the following two module in the /rw/config/suspend-module-blacklist file on the sys-net domain helped me to fix that.

iwlmvm
iwlwifi

The official documentation has a section on the same.

You can follow my posts on Qubes OS here.

Network isolation using NetVMs and VPN in Qubes

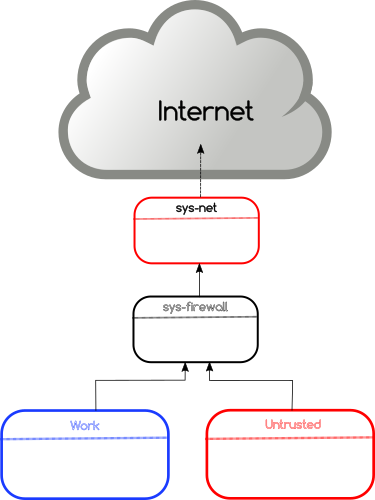
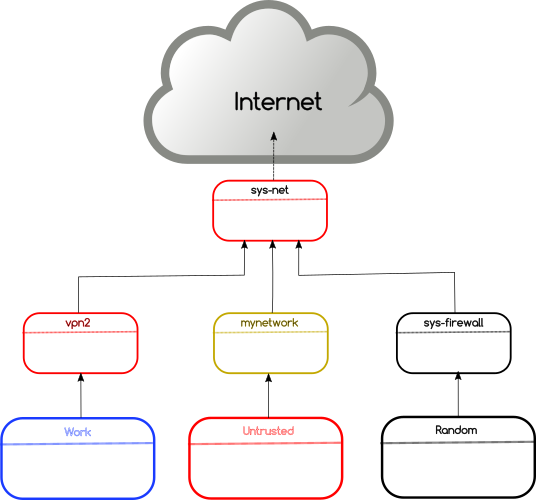
In this post, I am going to talk about the isolation of network for different domains using VPN on Qubes. The following shows the default network configuration in Qubes.

The network hardware is attached to a special domain called sys-net. This is the only domain which directly talks to the outside network. Then a domain named sys-firewall connects to sys-net and all other VMs use sys-firewall to access the outside network. These kinds of special domains are also known as NetVM as they can provide network access to other VMs.

Creating new NetVMs for VPN

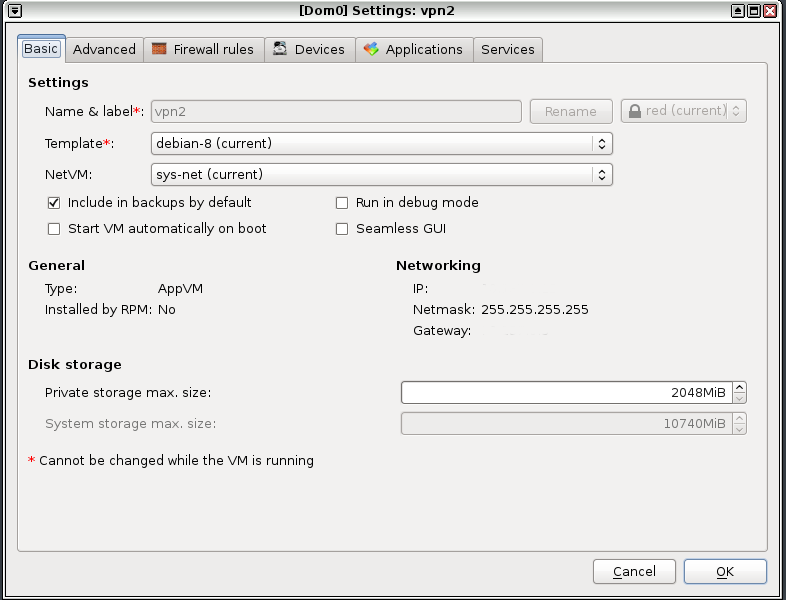
The easiest way is to clone the existing sys-net domain to a new domain. In my case, I have created two different domains, mynetwork and vpn2 as new NetVMs in dom0.

$ qvm-clone sys-net mynetwork
$ qvm-clone sys-net vpn2

As the next step, I have opened the settings for these VMs and marked sys-net as the NetVM for these. I have also install openvpn package in the templateVM so that both the new NetVM can find that package.

Setting up openvpn

I am not running openvpn as proper service as I want to switch to different VPN services I have access to. That also means a bit of manual work to setup the right /etc/resolv.conf file in the NetVMs and any corresponding VMs which access the network through these.

$ sudo /usr/sbin/openvpn --config connection_service_name.ovpn

So, the final network right now looks like the following diagram. The domains (where I am doing actual work) are connected into different VPN services.

Updating Qubes OS

Using updated software is a normal thing, also a few of us get more excited and use latest (not so stable) packages from the testing branch. This helps to detect bugs in the software before they go out the general availability.

As I was already using the RC1 release of Qubes, I thought of upgrading to the latest testing packages.

$ sudo qubes-dom0-update --enablerepo=qubes-dom0-current-testing

As we already know that dom0 does not connect to the network, it actually uses an UpdateVM to download the packages first, and then the packages are sent to dom0. DNF takes care of the actual install/update of the package.

I rebooted the box after the update was done. One of the major change I can see is with copy/pasting text. It is not asking to confirm the extra dialog box while pasting. I can simply copy text, press Ctrl+shift+c and then go to another domain and press Ctrl+shift+v, and then right click and paste (or press Ctrl+v).

I have also updated the Fedora25 templateVM to the latest from my local Fedora mirror. While trying to attach a local image file using loop device (in dom0) to a VM I got into this issue.

I could not find any Fedora 26 repo for Qubes yet, Fedora 25 is the latest there. Fedora 27 release date is in less than 2 months. And then in another month Fedora 25 will be EOL. I hope developers will release packages to upgrade to F26 at least by then.

Qubes OS part 2

In this post, I am going to talk about sharing data between domains. You can read part one here.

Update: Read part 3 about network isolation.

One of the most common operation while working on many domains is copy/pasting text or files. Though it is something very much necessary, at the same time this can be a security risk. Randomly copy pasting data or file into a trusted domain, can be dangerous. We also have to make sure that random scripts can not copy paste without proper authorization. Qubes uses Xen shared memory for copying files instead of any block device.

Copy pasting text

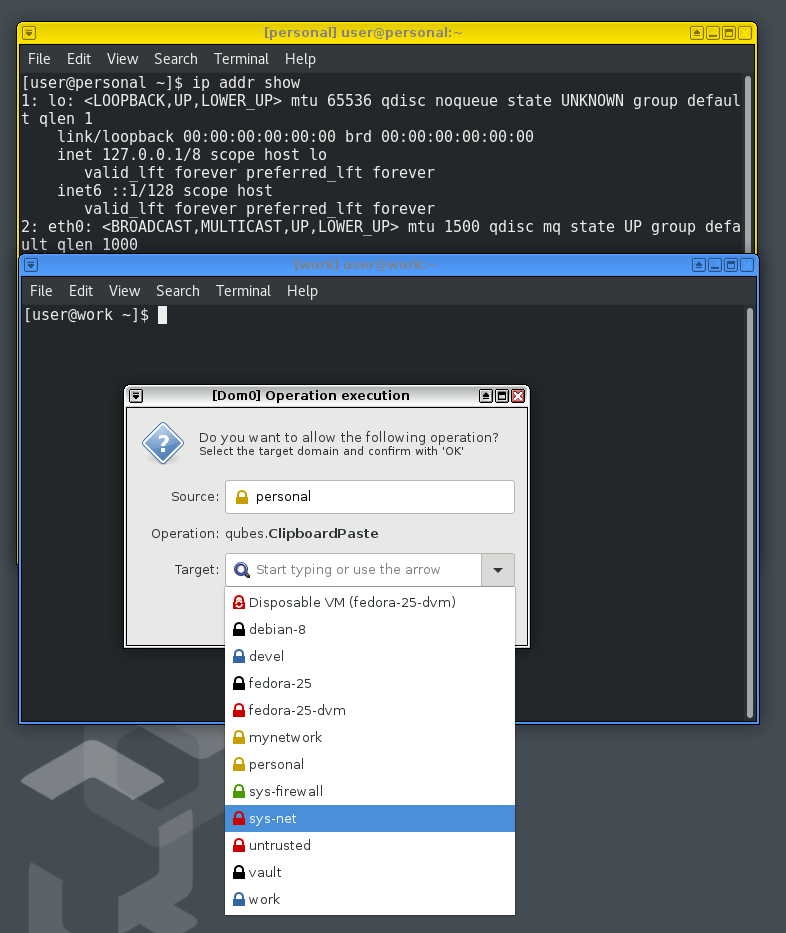
One can copy text to the clipboard of the VM as usual, and then one can press Ctrl+Shift+c, then if one press Ctrl+Shift+v in any VM, it will ask for a menu like below screenshot to confirm if you want to paste to that VM's clipboard. After that, you can normally paste with Ctrl+v or from the GUI.

Copying file to another VM

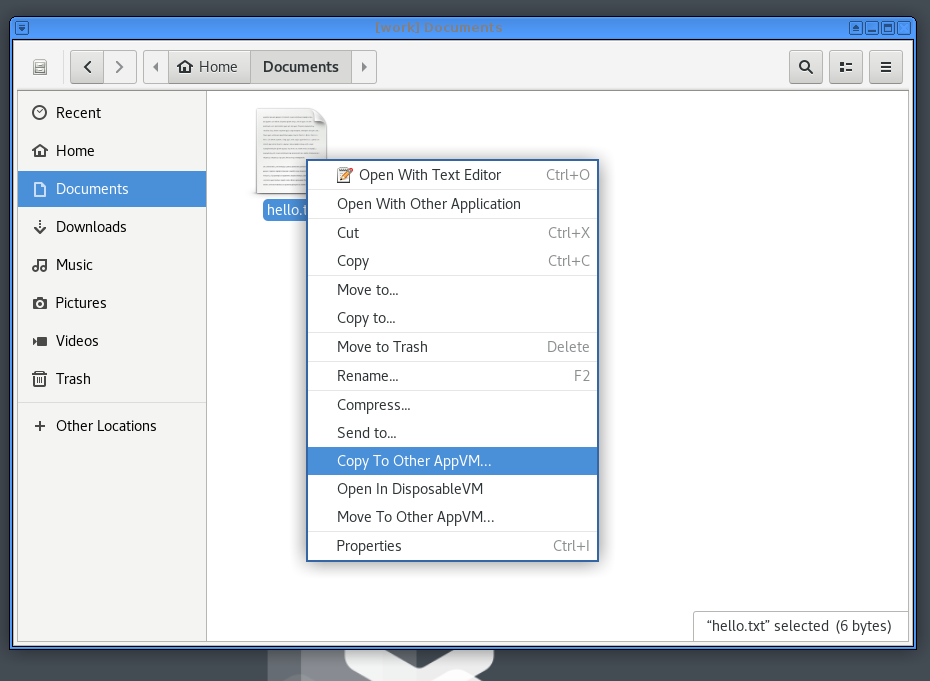
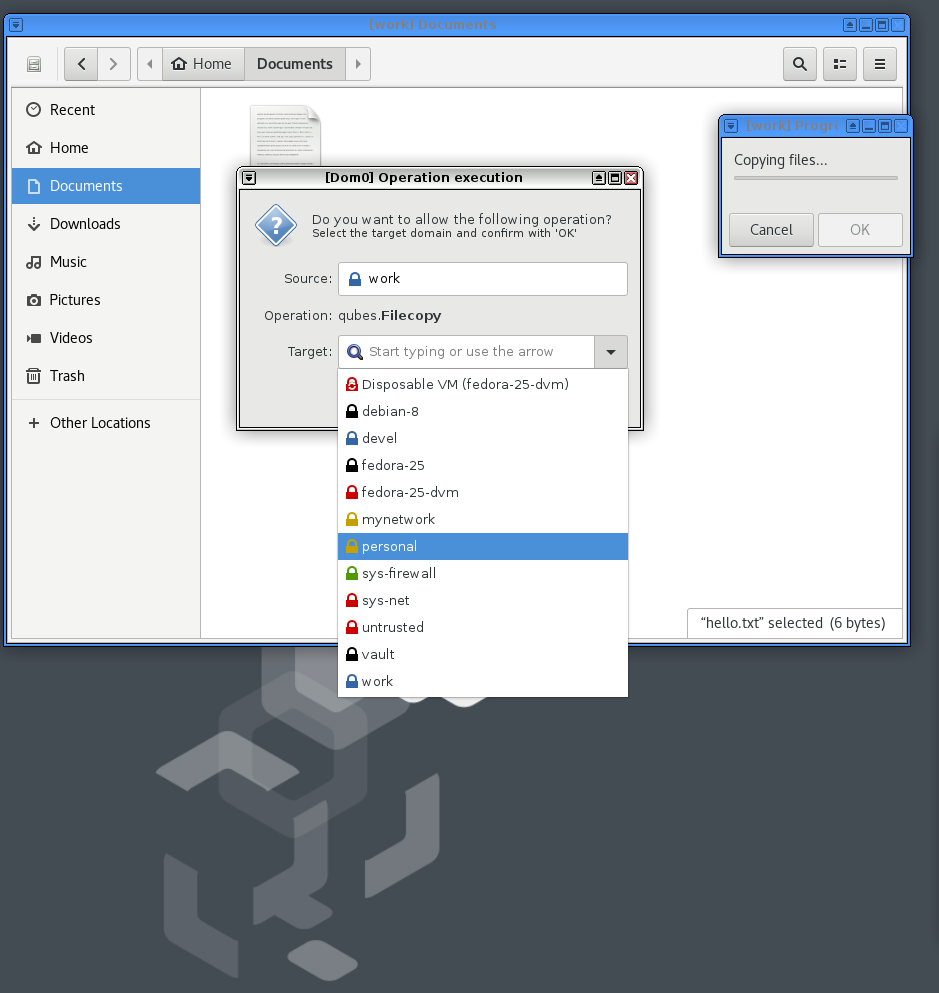
We can copy a file to another VM using the file browser. Just right click on any file, and click copy to the right VM. The following screenshots shows this way.

The other way to copy paste is using the command line. For example, the following command copies hello.txt file to the personal VM.

$ qvm-copy-to-vm personal hello.txt
sent 0/1 KB

Executing any command on a given VM

dom0 is the privileged domain in the system. From that, you can actually execute any command to another domain. In the following example, I am running the date command in the personal domain. With the --pass-io command line flag, we are saying to pass across the STDOUT and STDIN from the remote VM to dom0.

$ qvm-run --pass-io personal date
Tue Sep  5 17:42:11 IST 2017

Introduction to Qubes

I heard the name Qubes OS as an Operating System which was built while keeping security in mind, and also they used Fedora as the base Operating System. A reasonably secure operating system is the tagline and they also have a few testimonials in the site, I guess the most famous one is the following tweet.

The name again came up this week. This time I thought of trying it out, but, this is something I had to do on a bare-metal box, than on a VM. Luckily I bought extra drives in the last PyCon trip. I downloaded the stable 3.2 release, but the installer was failing into a Dracut shell saying /dev/mapper/live-rw is write protected. So, I moved on to the 4.0RC1 image. The installer is a modified Anaconda, means something very familiar to any Fedora/CentOS/Red Hat user. 4.0RC1 is based on Fedora 25, means more known points there.

Qubes uses Xen to manage VMs (for the rest of the post, I will keep using both VM, and domain interchangeably). The dom0 is the initial domain which comes up on boot. It is a short form of Domain 0. This is a privileged domain which manages all the other domains (domU). The default desktop for 4.0rc1 is XFCE. The dom0 does not have standard networking enabled. Actually, to have a working network to connect to outside world, the OS creates two special VMs.

sys-firewall

This special VM is the firewall for every other application VMs. You can actually create more than one firewall VMs and have a different set of rules.

sys-net

This VM has access to the network hardware and can create a connection with your local Wi-Fi or LAN/cable network. In my case, Fedora was failing to create internal interfaces which are being used by sys-firewall, so I rebooted the VM with a Debian-8 template. It solved my networking issue.

Regular Application VMs

When you first install the system, the installer will create a few domains for you, personal, work, untrusted, vault. It will create proper application shortcuts in the menu. This means when you click on the application menu for the Terminal for personal domain, it will first start the domain, and then open up the gnome-terminal for you. Each domain also gets a /rw partition which gets mounted as home. For every reboot, they start from a clean template, with only home consistent between boots.

This also means there is no easy way for applications/malware to talk between different VMs. If you open up a wrong website (with malware) on the untrusted domain, it will not have access to the filesystem under your work domain. There are special ways to copy/paste text between domains.

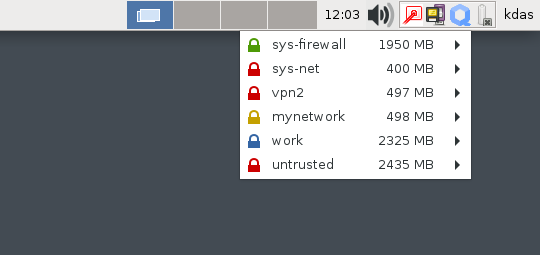
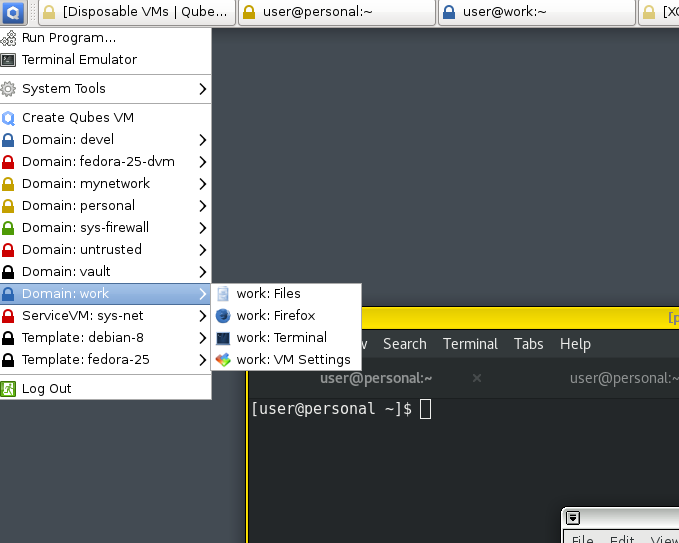
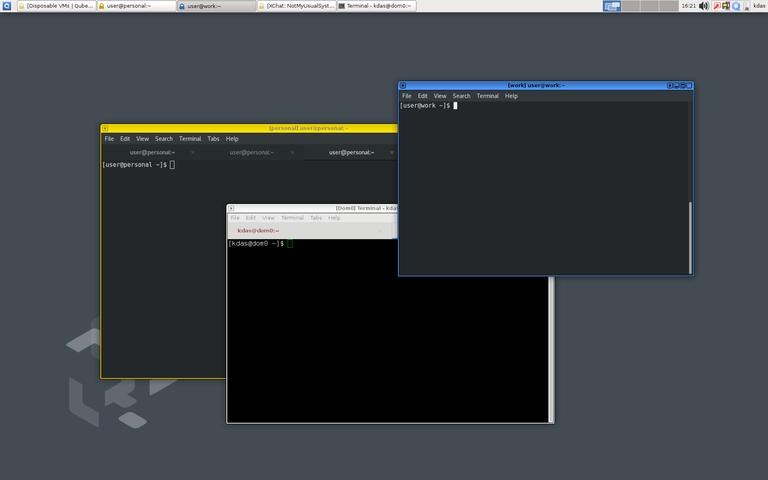
You can see in the above screenshot, the applications from each domain have different colors, that helps for quick recognition of each application for different domains. You can also see details about the running VMs by clicking on the Qubes icon on the tray in the menubar.

Disposable domains

There are times when you want to open a downloaded file (say PDF or a spreadsheet) on a VM which is only for single use. As soon as you close the application, the VM gets destroyed. For more details, read this document.

VMs without network access

The Vault is a special domain which does not connect to any network. You can also create new VMs in the same way, which does not connect to any firewall VM. The isolation from the network means nothing will go out in case of a malware in the file.

The following screenshot is showing the output of the qvm-ls command in dom0.

I will write more posts in future as I figure out things. Running F26 on the VMs is one them, because Python3.6 :) #qubes channel on Freenode is not that very active, but you will be able to find help in the channel if you wait.